>K 0 x d |
|
| (82 intermediate revisions by 19 users not shown) |
| Line 1: |
Line 1: |
| {{UnderConstruction}}
| | [[File:GearPageMagic.jpg|150px|link=https://redemptionps.com/wiki/Magic_Gear]] |
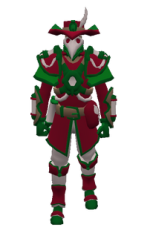
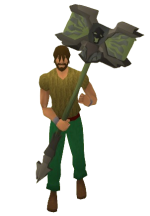
| [[File:GearPageMelee.png|center]]
| | [[File:GearPageRange.jpg|150px|link=https://redemptionps.com/wiki/Ranged_Gear]] |
| | | [[File:GearPageTribrid.jpg|150px|link=https://redemptionps.com/wiki/Tribrid_Gear]] |
| <tabber>
| |
| | |
| |-|Armour=
| |
| | |
| <p style="text-align:Center;">This will showcase the worst to best armour and give a brief description of them and where to obtain it. They will also have prices attached to them under the '''About''' section. You can use this guide to help you advance to next strongest weapon, and also see which is best for your price range.</p>
| |
| {|
| |
| |-
| |
| ! scope="col" style="background-color:#1c5bc3;"|<center>Armour</center>
| |
| ! scope="col" style="background-color:#1c5bc3;"|<center>Name</center>
| |
| ! scope="col" style="background-color:#1c5bc3;"|<center>About</center>
| |
| ! scope="col" style="background-color:#1c5bc3;"|<center>Bonuses</center>
| |
| |-
| |
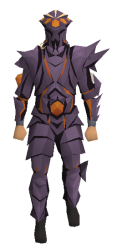
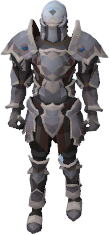
| | style="text-align:center;"|[[File:Torva5.png|center|44px]]
| |
| | style="text-align:center;"|[[Torva Set|Torva]]
| |
| | style="text-align:center;"|The Torva armour is one of the beginner armour sets that one may use for a melee setup. This armour is not recommended for Bosses.
| |
| | style="text-align:center;"|{{ItemStats
| |
| |image =
| |
| |class =Melee
| |
| |slot =set
| |
| |Stabatk =+0
| |
| |Stabdef =+336
| |
| |Slashatk =+0
| |
| |Slashdef =+313
| |
| |Crushatk =+0
| |
| |Crushdef =+280
| |
| |Magicatk =-59
| |
| |Magicdef =-17
| |
| |Rangeatk =-22
| |
| |Rangedef =+359
| |
| |Strboost =+9
| |
| |Prayboost =+3
| |
| |Aspeed = }}
| |
| |-
| |
| | style="text-align:center;"|[[File:Wolverine_Torva_Set.png|center|44px]]
| |
| | style="text-align:center;"|[[Wolverine Torva Set|Wolverine Torva]]
| |
| | style="text-align:center;"|The Wolverine Torva is a set you get from Torquat or Magegray and its a really good starter set.
| |
| | style="text-align:center;"|{{ItemStats
| |
| |image =
| |
| |class = Melee
| |
| |slot = Set
| |
| |Stabatk = +90
| |
| |Slashatk = +180
| |
| |Crushatk = +0
| |
| |Magicatk = +0
| |
| |Rangeatk = -120
| |
| |Stabdef = +450
| |
| |Slashdef = +1200
| |
| |Crushdef = +1200
| |
| |Magicdef = -150
| |
| |Rangedef = +1200
| |
| |Strboost = +90
| |
| |Rangedboost = +0
| |
| |Magicboost = +0.0%
| |
| |Prayboost = +150
| |
| |Aspeed = }}
| |
| |-
| |
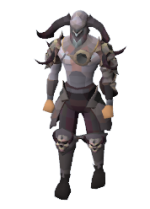
| | style="text-align:center;"|[[File:Flame_Torva_Set.png|center|44px]]
| |
| | style="text-align:center;"|[[Flame Torva Set|Flame Torva]]
| |
| | style="text-align:center;"|The Flame Torva Set is a where you can get from Flame King, Clue Scrolls, and other ways that's a strong starter set.
| |
| | style="text-align:center;"|{{ItemStats
| |
| |image =
| |
| |class =Melee
| |
| |slot =set
| |
| |Stabatk =+130
| |
| |Stabdef =+450
| |
| |Slashatk =+240
| |
| |Slashdef =+1200
| |
| |Crushatk =+0
| |
| |Crushdef =+1200
| |
| |Magicatk =+0
| |
| |Magicdef =-150
| |
| |Rangeatk =-120
| |
| |Rangedef =+1200
| |
| |Strboost =+90
| |
| |Prayboost =+150
| |
| |Aspeed = }}
| |
| |-
| |
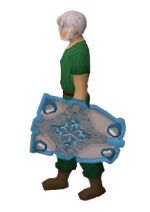
| | style="text-align:center;"|[[File:Malevolent_Set.png|center|44px]]
| |
| | style="text-align:center;"|[[Malevolent Set|Malevolent]]
| |
| | style="text-align:center;"|'''Malevolent Set''' is a great melee set to start off, because it gives a lot of strength bonus which will allow you to kill bosses like [[Olaf]]. It has the same stats as American Torva just with no Drop Rate Bonus.
| |
| | style="text-align:center;"|
| |
| {{ItemStats
| |
| |image =
| |
| |class =Melee
| |
| |slot =set
| |
| |Stabatk =+90
| |
| |Stabdef =+450
| |
| |Slashatk =+180
| |
| |Slashdef =+600
| |
| |Crushatk =+0
| |
| |Crushdef =+600
| |
| |Magicatk =+0
| |
| |Magicdef =-150
| |
| |Rangeatk =-120
| |
| |Rangedef =+600
| |
| |Strboost =+190
| |
| |Prayboost =+150
| |
| |Rangedboost =+0
| |
| |Magicboost =+0
| |
| |Aspeed = }}
| |
| |-
| |
| | style="text-align:center;"|[[File:American_Torva_Set_Equiped.png|center|44px]]
| |
| | style="text-align:center;"|[[American Torva Set|American Torva]]
| |
| | style="text-align:center;"|American Torva is apart of the American set collection and gives a 5% Drop Rate bonus with strong strength bonus.
| |
| | style="text-align:center;"|{{ItemStats
| |
| |image =
| |
| |class =Melee
| |
| |slot =set
| |
| |Stabatk =+90
| |
| |Stabdef =+450
| |
| |Slashatk =+180
| |
| |Slashdef =+600
| |
| |Crushatk =+0
| |
| |Crushdef =+600
| |
| |Magicatk =+0
| |
| |Magicdef =-150
| |
| |Rangeatk =-120
| |
| |Rangedef =+600
| |
| |Strboost =+190
| |
| |Prayboost =+150
| |
| |Rangedboost =+0
| |
| |Magicboost =+0
| |
| |Aspeed = }}
| |
| |-
| |
| | style="text-align:center;"|[[File:American_Torva_Set_(u)_Equiped.png|center|44px]]
| |
| | style="text-align:center;"|[[American Torva Set (u)|American Torva (u)]]
| |
| | style="text-align:center;"|American Torva (u) is the upgraded version of American Torva and gives a 7% drop rate bonus with even stronger strength bonus.
| |
| | style="text-align:center;"|{{ItemStats
| |
| |image =
| |
| |class =Melee
| |
| |slot =set
| |
| |Stabatk =+135
| |
| |Stabdef =+495
| |
| |Slashatk =+225
| |
| |Slashdef =+645
| |
| |Crushatk =+0
| |
| |Crushdef =+645
| |
| |Magicatk =+0
| |
| |Magicdef =-105
| |
| |Rangeatk =-75
| |
| |Rangedef =+645
| |
| |Strboost =+235
| |
| |Prayboost =+195
| |
| |Aspeed = }}
| |
| |-
| |
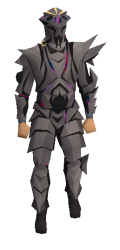
| | style="text-align:center;"|[[File:Shadow_Torva_(u)_Set.png|center|44px]]
| |
| | style="text-align:center;"|[[Shadow Torva (u) Set|Shadow Torva (u)]]
| |
| | style="text-align:center;"|Shadow Torva (u) is the upgraded set of shadow torva and its usually used for fashionscape but it also gives strong.
| |
| | style="text-align:center;"|{{ItemStats
| |
| |image =
| |
| |class =Melee
| |
| |slot =set
| |
| |Stabatk =+210
| |
| |Stabdef =+570
| |
| |Slashatk =+300
| |
| |Slashdef =+720
| |
| |Crushatk =+30
| |
| |Crushdef =+720
| |
| |Magicatk =+0
| |
| |Magicdef =+-30
| |
| |Rangeatk =-60
| |
| |Rangedef =+700
| |
| |Strboost =+290
| |
| |Prayboost =+270
| |
| |Aspeed = }}
| |
| |-
| |
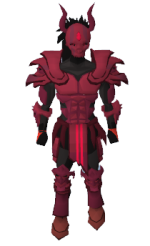
| | style="text-align:center;"|[[File:Shadow_Torva.png|center|44px]]
| |
| | style="text-align:center;"|[[Shadow Set|Shadow Torva]]
| |
| | style="text-align:center;"|Shadow torva is a strong melee set which can be obtained from killing [[Shadow King]]
| |
| | style="text-align:center;"|{{ItemStats
| |
| |image =
| |
| |class =Melee
| |
| |slot =set
| |
| |Stabatk =+280
| |
| |Stabdef =+890
| |
| |Slashatk =+390
| |
| |Slashdef =+1290
| |
| |Crushatk =+60
| |
| |Crushdef =+1120
| |
| |Magicatk =+25
| |
| |Magicdef =+85
| |
| |Rangeatk =-75
| |
| |Rangedef =+1100
| |
| |Strboost =+380
| |
| |Prayboost =+440
| |
| |Aspeed = }}
| |
| |-
| |
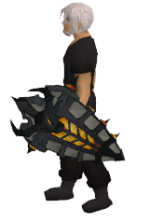
| | style="text-align:center;"|[[File:Olaf_Set.png|center|center|120px]]
| |
| | style="text-align:center;"|[https://dreamscape317.wikia.com/wiki/Olaf_Set Olaf Set] | |
| | style="text-align:center;"|Olaf Set is dropped from Olaf's and can be obtained from soulroom, and it gives a 10% damage bonus when the full 4 set is equiped.
| |
| | style="text-align:center;"|{{ItemStats
| |
| |image =
| |
| |class =Melee
| |
| |slot =set
| |
| |Stabatk =+650
| |
| |Slashatk =+1050
| |
| |Crushatk =+650
| |
| |Magicatk =+20
| |
| |Rangeatk =++20
| |
| |Stabdef =+1020
| |
| |Slashdef =+1020
| |
| |Crushdef =+1020
| |
| |Magicdef =+1400
| |
| |Rangedef =+0
| |
| |Strboost =+2530
| |
| |Rangedboost =0
| |
| |Magicboost =+0
| |
| |Prayboost =+420
| |
| |Aspeed =}}
| |
| |
| |
| |-
| |
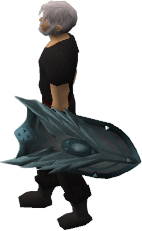
| | style="text-align:center;"|[[File:Link_Set_.png|center|center|120px]]
| |
| | style="text-align:center;"|[https://dreamscape317.wikia.com/wiki/Link_Set Link Set] | |
| | style="text-align:center;"|Link Set is one of the best in game sets which also give a 50% double drop rate bonus.
| |
| | style="text-align:center;"|{{ItemStats
| |
| |image =
| |
| |class =Melee
| |
| |slot =set
| |
| |Stabatk =+450
| |
| |Stabdef =+999
| |
| |Slashatk =+450
| |
| |Slashdef =+999
| |
| |Crushatk =+450
| |
| |Crushdef =+999
| |
| |Magicatk =+0
| |
| |Magicdef =+1398
| |
| |Rangeatk =+0
| |
| |Rangedef =+198
| |
| |Strboost =+528
| |
| |Prayboost =+399
| |
| |Aspeed = }}
| |
| |-
| |
| | style="text-align:center;"|[[File:Justiciar_armour_equipped.png|center|center|44px]]
| |
| | style="text-align:center;"|[https://dreamscape317.wikia.com/wiki/Justiciar_Set Justiciar Set]
| |
| | style="text-align:center;"|Justiciar is a brand new set that gives 50% double drop bonus. That is dropped from ToB.
| |
| | style="text-align:center;"|{{ItemStats
| |
| |image =
| |
| |class = Melee
| |
| |slot = set
| |
| |Stabatk = +450
| |
| |Slashatk = +658
| |
| |Crushatk = +450
| |
| |Magicatk = +0
| |
| |Rangeatk = +0
| |
| |Stabdef = +999
| |
| |Slashdef = +999
| |
| |Crushdef = +999
| |
| |Magicdef = +1398
| |
| |Rangedef = +198
| |
| |Strboost = +528
| |
| |Rangedboost = +0
| |
| |Magicboost = +0.0%
| |
| |Prayboost = +399
| |
| |Aspeed = }}
| |
| |-
| |
| | style="text-align:center;"|[[File:Dream_Armor.png|center|center|120px]]
| |
| | style="text-align:center;"|[[Dream Set]]
| |
| | style="text-align:center;"|The Dream Set also known as the OG set is an overpowered melee set with overpowered stats.
| |
| | style="text-align:center;"|{{ItemStats
| |
| |image =
| |
| |class =Melee
| |
| |slot =set
| |
| |Stabatk =+675
| |
| |Stabdef =+1135
| |
| |Slashatk =+1320
| |
| |Slashdef =+1270
| |
| |Crushatk =+635
| |
| |Crushdef =+1270
| |
| |Magicatk =+725
| |
| |Magicdef =+825
| |
| |Rangeatk =+725
| |
| |Rangedef =+1245
| |
| |Strboost =+745
| |
| |Prayboost =+715
| |
| |Rangedboost =+0
| |
| |Magicboost =+0
| |
| |Aspeed = }}
| |
| |}
| |
|
| |
|
|
| |
|
| | <center> |
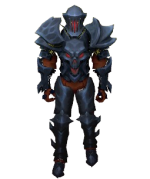
| | [[File:Gear Page Melee.jpg|center]] |
| | {{Pbr|This guide is organized from least effective to most effective, starting at the top and progressing downwards. This layout allows players to see their potential growth and strive towards achieving higher levels of effectiveness.}} |
|
| |
|
| | <tabber> |
|
| |
|
| <tabber>
| | |-|Sets= |
| | {{:Melee Sets}} |
|
| |
|
| |-|Weapons= | | |-|Weapons= |
| <p style="text-align:Center;">This will showcase the worst to best weapons and give a brief description of them. They will also have prices attached to them under the '''About''' section. You can use this guide to help you advance to next strongest weapon, and also see which is best for your price range.</p>
| | {{:Melee Weapons}} |
| {|
| |
| ! scope="col" style="background-color:#1c5bc3;"|<center>Weapon</center>
| |
| ! scope="col" style="background-color:#1c5bc3;"|<center>Name</center>
| |
| ! scope="col" style="background-color:#1c5bc3;"|<center>About</center>
| |
| ! scope="col" style="background-color:#1c5bc3;"|<center>Bonuses</center>
| |
| |-
| |
| | style="text-align:center;"|[[File:Royal_Sicle.png|center]]
| |
| | style="text-align:center;"|[[Royal Sicle]]
| |
| | style="text-align:center;"|The Royal sicle is your main go for starting out in dreamscape, it can be drop from boxes [[Mystery box]] and bosses like [[Torquat]] it might have low stats but its just for starting out!
| |
| | style="text-align:center;"|{{ItemStats
| |
| |image = royal_sicle.png
| |
| |class = Melee
| |
| |slot = Weapon|Stabatk = 0
| |
| |Stabdef = +0
| |
| |Slashatk = +0
| |
| |Slashdef = +0
| |
| |Crushatk = +0
| |
| |Crushdef = +0
| |
| |Magicatk = +0
| |
| |Magicdef = +0
| |
| |Rangeatk = +0
| |
| |Rangedef = +0
| |
| |Strboost = +70
| |
| |Prayboost = +0
| |
| |Aspeed = 9}}
| |
| |-
| |
| | style="text-align:center;"|[[File:Royal Sicle (u).png]]
| |
| | style="text-align:center;"|[[Royal Sicle (u)]]
| |
| | style="text-align:center;"|The Royal sicle U is the upgrade version of the "Royal sicle" To upgrade it ingame ::Upgrade, you have a "Easy" rate of receiving the upgrade. BE WARE IF FAIL YOU WILL LOOSE IT!
| |
| | style="text-align:center;"|{{ItemStats
| |
| |image =
| |
| |class = Melee
| |
| |slot = Weapon
| |
| |Stabatk = +50
| |
| |Slashatk = +50
| |
| |Crushatk = +50
| |
| |Magicatk = +0
| |
| |Rangeatk = +0
| |
| |Stabdef = +0
| |
| |Slashdef = +0
| |
| |Crushdef = +0
| |
| |Magicdef = +0
| |
| |Rangedef = +0
| |
| |Strboost = +75
| |
| |Rangedboost = +0
| |
| |Magicboost = +0.0%
| |
| |Prayboost = +0
| |
| |Aspeed = 9}}
| |
| |-
| |
| | style="text-align:center;"|[[File:Ice Katana..png]]
| |
| | style="text-align:center;"|[[Ice Katana]]
| |
| | style="text-align:center;"|The Ice katana is a fast hitting weapon that is right after the royal sicle u, it is going to be doing a lot more damage then you were with the bonus attack bonuses.
| |
| | style="text-align:center;"|{{ItemStats
| |
| |image =
| |
| |class =melee
| |
| |slot =main
| |
| |Stabatk =+100
| |
| |Slashatk =+100
| |
| |Crushatk =+100
| |
| |Magicatk =+100
| |
| |Rangeatk =+100
| |
| |Stabdef =+0
| |
| |Slashdef =+0
| |
| |Crushdef =+0
| |
| |Magicdef =+0
| |
| |Rangedef =+0
| |
| |Strboost =+60
| |
| |Prayboost =+0
| |
| |Aspeed =9}}
| |
| |-
| |
| | style="text-align:center;"|[[File:GoldenKatana.png|center]]
| |
| | style="text-align:center;"|[[Golden Katana]]
| |
| | style="text-align:center;"|The Golden Katana is the upgrade version of the "Ice Katana" To upgrade it ingame ::Upgrade, you have a "Hard" rate of receiving the upgrade. BE WARE IF FAIL YOU WILL LOOSE IT!
| |
| | style="text-align:center;"|{{ItemStats
| |
| |image =
| |
| |class = Melee
| |
| |slot = Weapon
| |
| |Stabatk = +120
| |
| |Slashatk = +120
| |
| |Crushatk = +120
| |
| |Magicatk = +120
| |
| |Rangeatk = +120
| |
| |Stabdef = +0
| |
| |Slashdef = +0
| |
| |Crushdef = +0
| |
| |Magicdef = +0
| |
| |Rangedef = +0
| |
| |Strboost = +72
| |
| |Rangedboost = +0
| |
| |Magicboost = +0.0%
| |
| |Prayboost = +0
| |
| |Aspeed = 9}}
| |
| |-
| |
| | style="text-align:center;"|[[File:Silver Space Sword.png]]
| |
| | style="text-align:center;"|[[Silver Space Sword]]
| |
| | style="text-align:center;"|The Silver space sword is a part of a 3 set weapon, it follows Silver space sword, Space Jam sword, Space jam (U) [[Treasure chest]] and [[Castle Wars]] are way's to obtain the Sword!
| |
| | style="text-align:center;"|{{ItemStats
| |
| |class = melee
| |
| |slot = main
| |
| |Stabatk = +100
| |
| |Stabdef = +0
| |
| |Slashatk = +100
| |
| |Slashdef = +0
| |
| |Crushatk = +100
| |
| |Crushdef = +0
| |
| |Magicatk = +100
| |
| |Magicdef = +0
| |
| |Rangeatk = +100
| |
| |Rangedef = +0
| |
| |Strboost = +120
| |
| |Prayboost = +0
| |
| |Aspeed = 9}}
| |
| |-
| |
| | style="text-align:center;"|[[File:Space Jam Sword.png]]
| |
| | style="text-align:center;"|[[Space Jam Sword]]
| |
| | style="text-align:center;"|The Space Jam sword is a part of a 3 set weapon, it follows Silver space sword, Space Jam sword, Space jam (U) [[Treasure chest]] and [[Castle Wars]] are way's to obtain the Sword!
| |
| | style="text-align:center;"|{{ItemStats
| |
| |class = melee
| |
| |slot = main
| |
| |Stabatk = +100
| |
| |Stabdef = +0
| |
| |Slashatk = +100
| |
| |Slashdef = +0
| |
| |Crushatk = +100
| |
| |Crushdef = +0
| |
| |Magicatk = +100
| |
| |Magicdef = +0
| |
| |Rangeatk = +100
| |
| |Rangedef = +0
| |
| |Strboost = +120
| |
| |Prayboost = +0
| |
| |Aspeed = 9}}
| |
| |-
| |
| | style="text-align:center;"|[[File:Space Jam U.png]]
| |
| | style="text-align:center;"|[[Spacejam Sword (u)]]
| |
| | style="text-align:center;"|The Space sword (U) is a part of a 3 set weapon, it follows Silver space sword, Space Jam sword, Space jam (U) the "SJU" is obtainable from using the command ::Upgrade, and risking your space jam sword for a insane upgrade! With a "Easy" chance of getting it without a doubt you will be able to easily obtain it! Careful IF FAILED YOU WILL LOOSE IT!
| |
| | style="text-align:center;"|{{ItemStats
| |
| |image =
| |
| |class = Melee
| |
| |slot = Weapon
| |
| |Stabatk = +120
| |
| |Slashatk = +120
| |
| |Crushatk = +120
| |
| |Magicatk = +120
| |
| |Rangeatk = +120
| |
| |Stabdef = +10
| |
| |Slashdef = +10
| |
| |Crushdef = +10
| |
| |Magicdef = +10
| |
| |Rangedef = +10
| |
| |Strboost = +135
| |
| |Rangedboost = +0
| |
| |Magicboost = +0.0%
| |
| |Prayboost = +5
| |
| |Aspeed = 9}}
| |
| |-
| |
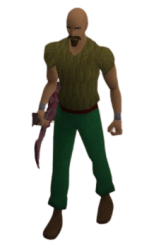
| | style="text-align:center;"|[[File:Castiel Katana.png]]
| |
| | style="text-align:center;"|[[Castiel Katana]]
| |
| | style="text-align:center;"|The Castiel Katana is a Strong Katana type weapon after the golden katana, dropped from [[Vendura]] it is a really strong and relatively cheap weapon!
| |
| | style="text-align:center;"|{{ItemStats
| |
| |image =
| |
| |class = Melee
| |
| |slot = Main
| |
| |Stabatk = +140
| |
| |Slashatk = +140
| |
| |Crushatk = +140
| |
| |Magicatk = +140
| |
| |Rangeatk = +140
| |
| |Stabdef = +0
| |
| |Slashdef = +0
| |
| |Crushdef = +0
| |
| |Magicdef = +0
| |
| |Rangedef = +0
| |
| |Strboost = +1000
| |
| |Rangedboost = 0
| |
| |Magicboost = 0
| |
| |Prayboost = +500
| |
| |Aspeed = 9}}
| |
| |-
| |
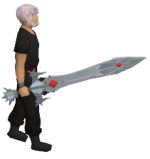
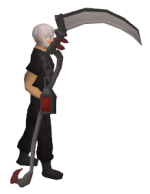
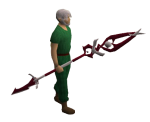
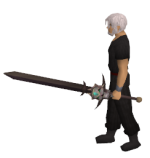
| | style="text-align:center;"|[[File:Olaf´s_Scythe_Equiped.png|center]]
| |
| | style="text-align:center;"|[[Olaf´s Scythe]]
| |
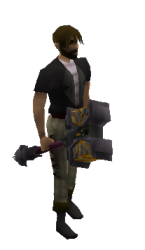
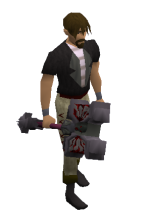
| | style="text-align:center;"|Ola's Death Scythe is a really strong weapon that hits twice per hit, having a slow attack speed but packs a PUNCH, dropped by [[Olaf]] the scythe comes out as the first scythe style weapon introduced into the game!
| |
| | style="text-align:center;"|{{ItemStats
| |
| |image =
| |
| |class =Melee
| |
| |slot =Main
| |
| |Stabatk =+200
| |
| |Slashatk =+400
| |
| |Crushatk =+200
| |
| |Magicatk =+20
| |
| |Rangeatk =+20
| |
| |Stabdef =+20
| |
| |Slashdef =+20
| |
| |Crushdef =+20
| |
| |Magicdef =
| |
| |Rangedef =
| |
| |Strboost =+2000
| |
| |Rangedboost =
| |
| |Magicboost =
| |
| |Prayboost =+20
| |
| |Aspeed =6}}
| |
| |-
| |
| | style="text-align:center;"|[[File:Electronic Katana.png]]
| |
| | style="text-align:center;"|[[Electronic Katana]]
| |
| | style="text-align:center;"|Dropped by the [[OG Dragon]] the electronic katana is a extremely OP weapon! With special particles when attacking and a fast hitting high damage weapon this is truely a great weapon!
| |
| | style="text-align:center;"|{{ItemStats
| |
| |image =
| |
| |class =Melee
| |
| |slot =Main
| |
| |Stabatk =+410
| |
| |Slashatk =+570
| |
| |Crushatk =-40
| |
| |Magicatk =+0
| |
| |Rangeatk =+0
| |
| |Stabdef =+130
| |
| |Slashdef =+260
| |
| |Crushdef =+70
| |
| |Magicdef =+0
| |
| |Rangedef =+0
| |
| |Strboost =+3000
| |
| |Rangedboost =
| |
| |Magicboost =
| |
| |Prayboost =+0
| |
| |Aspeed =9}}
| |
| |-
| |
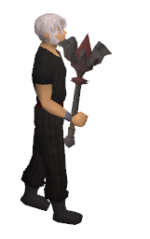
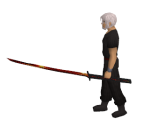
| | style="text-align:center;"|[[File:Ghrazi rapier.png]]
| |
| | style="text-align:center;"|[[Ghrazi rapier]]
| |
| | style="text-align:center;"|From the great newly introduce raid [[Theatre of Blood]] The Ghrazi Rapier is the strongest rapier in game with a insane high damage and strength and high attack speed you are ready to slay any bosses that walk in your way!!
| |
| | style="text-align:center;"|{{ItemStats
| |
| |image =
| |
| |class = Melee
| |
| |slot = Mainhand
| |
| |Stabatk = +570
| |
| |Slashatk = +410
| |
| |Crushatk = -10
| |
| |Magicatk = +0
| |
| |Rangeatk = +0
| |
| |Stabdef = +130
| |
| |Slashdef = +260
| |
| |Crushdef = +70
| |
| |Magicdef = +0
| |
| |Rangedef = +0
| |
| |Strboost = +3000
| |
| |Rangedboost = +0
| |
| |Magicboost = +0.0%
| |
| |Prayboost = +0
| |
| |Aspeed = 9}}
| |
| |-
| |
| | style="text-align:center;"|[[File:Longclaw.png]]
| |
| | style="text-align:center;"|[[Longclaw]]
| |
| | style="text-align:center;"|Introducing the best Spec weapon in the game! Not only does the longclaw smack you like how you should be smacking bosses with it, but it has a special attack that is able to hit upwards to 100,000 IN ONE HIT!!!!
| |
| | style="text-align:center;"|{{ItemStats
| |
| |image =
| |
| |class = Melee
| |
| |slot = Mainhand
| |
| |Stabatk = +500
| |
| |Slashatk = +500
| |
| |Crushatk = +250
| |
| |Magicatk = +0
| |
| |Rangeatk = +0
| |
| |Stabdef = +0
| |
| |Slashdef = +0
| |
| |Crushdef = +0
| |
| |Magicdef = +0
| |
| |Rangedef = +0
| |
| |Strboost = +3500
| |
| |Rangedboost = +500
| |
| |Magicboost = +0.0%
| |
| |Prayboost = +0
| |
| |Aspeed = 9}}
| |
| |-
| |
| | style="text-align:center;"|[[File:Dream_Katana1_(1).png|Dream_Katana1_(1).png]]
| |
| | style="text-align:center;"|[[Ultimate Dream Katana]]
| |
| | style="text-align:center;"|The best katana and weapon in game is the Ultimate Dream Katana only avaible from the newly revamped [[Dream Mystery Box]] it will slice you Tf up!
| |
| | style="text-align:center;"|{{ItemStats
| |
| |image =
| |
| |class = Melee
| |
| |slot = Mainhand
| |
| |Stabatk = +600
| |
| |Slashatk = +600
| |
| |Crushatk = +300
| |
| |Magicatk = +0
| |
| |Rangeatk = +0
| |
| |Stabdef = +0
| |
| |Slashdef = +0
| |
| |Crushdef = +0
| |
| |Magicdef = +0
| |
| |Rangedef = +0
| |
| |Strboost = +4200
| |
| |Rangedboost = +0
| |
| |Magicboost = +0.0%
| |
| |Prayboost = +0
| |
| |Aspeed = }}
| |
| |-
| |
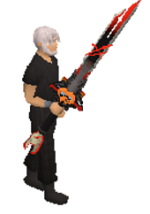
| | style="text-align:center;"|[[File:Scythe of vitur.png]]
| |
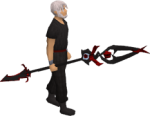
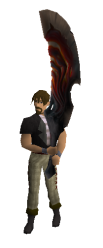
| | style="text-align:center;"|[[Scythe of vitur]]
| |
| | style="text-align:center;"|From the great newly introduce raid [[Theatre of Blood]] The Scythe of Virtur is a INSANE DPS WEAPON! With an amazing animation when swinging around your mighty scythe it not only looks amazing but hits like a TRUCK!
| |
| | style="text-align:center;"|{{ItemStats
| |
| |image =
| |
| |class = Melee
| |
| |slot = Two-handed
| |
| |Stabatk = +570
| |
| |Slashatk = +600
| |
| |Crushatk = -40
| |
| |Magicatk = +0
| |
| |Rangeatk = +0
| |
| |Stabdef = +130
| |
| |Slashdef = +260
| |
| |Crushdef = +70
| |
| |Magicdef = +0
| |
| |Rangedef = +0
| |
| |Strboost = +3000
| |
| |Rangedboost = +0
| |
| |Magicboost = +0.0%
| |
| |Prayboost = +0
| |
| |Aspeed = 10}}
| |
| |}
| |
| | |
|
| |
|
| <tabber>
| | |-|Offhands= |
| | | {{:Melee Offhands}} |
| |-|Capes=
| |
| <p style="text-align:Center;">This will showcase the worst to best capes and give a brief description of them and where to obtain it. They will also have prices attached to them under the '''About''' section. You can use this guide to help you advance to next strongest weapon, and also see which is best for your price range.</p>
| |
| {|
| |
| ! scope="col" style="background-color:#1c5bc3;"|<center>Armour</center>
| |
| ! scope="col" style="background-color:#1c5bc3;"|<center>Name</center>
| |
| ! scope="col" style="background-color:#1c5bc3;"|<center>About</center>
| |
| ! scope="col" style="background-color:#1c5bc3;"|<center>Bonuses</center>
| |
| |-
| |
| | style="text-align:center;"|[[File:Death_Cape1.png|center|70px]]
| |
| | style="text-align:center;"|[[Death Cape]]
| |
| | style="text-align:center;"|The Death Cape is a cape that could be bought from the [[Shops]] at home. It's really good if you're an Iron Man and you don't have good enough gear to start going to Torquat for the White Glass Wings.
| |
| | style="text-align:center;"|{{ItemStats
| |
| |image =
| |
| |class = Melee
| |
| |slot = cape
| |
| |Stabatk = +0
| |
| |Slashatk = +0
| |
| |Crushatk = +0
| |
| |Magicatk = +0
| |
| |Rangeatk = +0
| |
| |Stabdef = +0
| |
| |Slashdef = +0
| |
| |Crushdef = +0
| |
| |Magicdef = +0
| |
| |Rangedef = +0
| |
| |Strboost = +5
| |
| |Rangedboost = +0
| |
| |Magicboost = +0.0%
| |
| |Prayboost = +0
| |
| |Aspeed = }}
| |
| |-
| |
| | style="text-align:center;"|[[File:White_Glass_Wings_Equipped.png|center|80px]]
| |
| | style="text-align:center;"|[[White Glass Wings]]
| |
| | style="text-align:center;"|The White Glass Wings has the most prayer bonus and usually used with a lot of gear set ups since you barely lose any prayer with it. This can obtained from [[Torquat]].
| |
| | style="text-align:center;"|{{ItemStats
| |
| |image =
| |
| |class = melee
| |
| |slot = Cape
| |
| |Stabatk = +0
| |
| |Slashatk = +0
| |
| |Crushatk = +0
| |
| |Magicatk = +0
| |
| |Rangeatk = +0
| |
| |Stabdef = +0
| |
| |Slashdef = +0
| |
| |Crushdef = +0
| |
| |Magicdef = +0
| |
| |Rangedef = +0
| |
| |Strboost = +12
| |
| |Rangedboost = +0
| |
| |Magicboost = +0
| |
| |Prayboost = +1000
| |
| |Aspeed = random}}
| |
| |-
| |
| | style="text-align:center;"|[[File:Monkey_Lover_-_Imagee.png|center|80px]]
| |
| | style="text-align:center;"|[[Monkey Lover]]
| |
| | style="text-align:center;"|The Monkey Lover cape could be bought from the [[Shops]] at home, and is usually used for clue scrolls but it gives a +20 Strength bonus so it can be used for a small boost in your damage.
| |
| | style="text-align:center;"|{{ItemStats
| |
| |image =
| |
| |class = melee
| |
| |slot = Cape
| |
| |Stabatk = +0
| |
| |Slashatk = +0
| |
| |Crushatk = +0
| |
| |Magicatk = +0
| |
| |Rangeatk = +0
| |
| |Stabdef = +26
| |
| |Slashdef = +25
| |
| |Crushdef = +25
| |
| |Magicdef = +25
| |
| |Rangedef = +25
| |
| |Strboost = +20
| |
| |Rangedboost = +0
| |
| |Magicboost = +0
| |
| |Prayboost = +0
| |
| |Aspeed = random}}
| |
| |-
| |
| | style="text-align:center;"|[[File:Fallen_Deathcape.png|center|150px]]
| |
| | style="text-align:center;"|[[Fallen Deathcape]]
| |
| | style="text-align:center;"|Fallen Death Cape can be obtained from Dream Clue scrolls and can be upgraded into a Fallen Death Cape U.
| |
| | style="text-align:center;"|{{ItemStats
| |
| |class = melee
| |
| |slot = cape
| |
| |Stabatk = +30
| |
| |Stabdef = +150
| |
| |Slashatk = +60
| |
| |Slashdef = +400
| |
| |Crushatk = +0
| |
| |Crushdef = +400
| |
| |Magicatk = +0
| |
| |Magicdef = -50
| |
| |Rangeatk = -40
| |
| |Rangedef = +400
| |
| |Strboost = +30
| |
| |Prayboost = +50}}
| |
| |-
| |
| | style="text-align:center;"|[[File:Fallen_Death_Cape_(u).png|center|80px]]
| |
| | style="text-align:center;"|[[Fallen Deathcape (U)]]
| |
| | style="text-align:center;"|The Fallen Death Deathcape U is a strong cape with a really nice design to it, and gives the user really strong strength bonus. When you upgrade it at ::upgrade it's a '''hard''' chance. '''BE CAREFUL OF UPGRADING YOU CAN LOSE IF IT FAILS'''
| |
| | style="text-align:center;"|{{ItemStats
| |
| |class = melee
| |
| |slot = cape
| |
| |Stabatk = +90
| |
| |Stabdef = +400
| |
| |Slashatk = +90
| |
| |Slashdef = +400
| |
| |Crushatk = +0
| |
| |Crushdef = +400
| |
| |Magicatk = +0
| |
| |Magicdef = +400
| |
| |Rangeatk = +0
| |
| |Rangedef = +400
| |
| |Strboost = +45
| |
| |Prayboost = +90}}
| |
| |-
| |
| | style="text-align:center;"|[[File:Blue_Deathcape.png|center]]
| |
| | style="text-align:center;"|[[Blue Deathcape]]
| |
| | style="text-align:center;"|The Blue Deathcape is one of the most used melee capes for mid-tier capes and has a really strong defense bonus towards it. It can also be obtained in many different ways which makes it not as expensive/easily obtainable.
| |
| | style="text-align:center;"|{{ItemStats
| |
| |image =
| |
| |class =melee
| |
| |slot =cape
| |
| |Stabatk =+120
| |
| |Stabdef =+500
| |
| |Slashatk =+0
| |
| |Slashdef =+500
| |
| |Crushatk =+0
| |
| |Crushdef =+500
| |
| |Magicatk =+0
| |
| |Magicdef =+500
| |
| |Rangeatk =+0
| |
| |Rangedef =+500
| |
| |Strboost =+60
| |
| |Prayboost =+100
| |
| |Aspeed =}}
| |
| |-
| |
| | style="text-align:center;"|[[File:Berserker_cape.png|center]]
| |
| | style="text-align:center;"|[[Berserker Cape]]
| |
| | style="text-align:center;"|The Beserker Cape is a cape originally obtainable from getting 20,000 slayer points and is still. It's the best cape you can get if you can't do Arcade and anyone can get it if you grind out slayer.
| |
| | style="text-align:center;"|{{ItemStats
| |
| |image =
| |
| |class =melee
| |
| |slot =cape
| |
| |Stabatk =+200
| |
| |Stabdef =+500
| |
| |Slashatk =+200
| |
| |Slashdef =+500
| |
| |Crushatk =+200
| |
| |Crushdef =+500
| |
| |Magicatk =+0
| |
| |Magicdef =+500
| |
| |Rangeatk =+0
| |
| |Rangedef =+500
| |
| |Strboost =+250
| |
| |Prayboost =+1000
| |
| |Aspeed =}}
| |
| |-
| |
| | style="text-align:center;"|[[File:Infernal_Cape.gif|center]]
| |
| | style="text-align:center;"|[[Infernal Cape]]
| |
| | style="text-align:center;"|The Infernal Cape is second best in game, and can be obtained from completing all 50 stages of [[Arcade]]. The cape is also untradable so the only way to obtain this cape is from arcade itself.
| |
| | style="text-align:center;"|{{ItemStats
| |
| |image =
| |
| |class = melee
| |
| |slot = Cape
| |
| |Stabatk = +250
| |
| |Slashatk = +250
| |
| |Crushatk = +250
| |
| |Magicatk = +250
| |
| |Rangeatk = +250
| |
| |Stabdef = +500
| |
| |Slashdef = +500
| |
| |Crushdef = +500
| |
| |Magicdef = +500
| |
| |Rangedef = +500
| |
| |Strboost = +250
| |
| |Rangedboost = +250
| |
| |Magicboost = +5%
| |
| |Prayboost = +1000
| |
| |Aspeed = }}
| |
| |-
| |
| | style="text-align:center;"|[[File:Infernal_Melee_Char.png|center|120px]]
| |
| | style="text-align:center;"|[[Infernal Melee Cape]]
| |
| | style="text-align:center;"|The Infernal Melee Cape is best in slot for melee. It's a cape you receive for sacrificing your Infernal Cape and completing [[Arcade|Extreme Arcade]]. Since the cape is untradable, completing the challenge is the only way of receiving this cape.
| |
| | style="text-align:center;"|{{ItemStats
| |
| |image =
| |
| |class = melee
| |
| |slot = cape
| |
| |Stabatk = +200
| |
| |Slashatk = +200
| |
| |Crushatk = +200
| |
| |Magicatk = +200
| |
| |Rangeatk = +200
| |
| |Stabdef = +500
| |
| |Slashdef = +500
| |
| |Crushdef = +500
| |
| |Magicdef = +500
| |
| |Rangedef = +500
| |
| |Strboost = +350
| |
| |Rangedboost = +0
| |
| |Magicboost = +0.0%
| |
| |Prayboost = +1000
| |
| |Aspeed = }}
| |
| | |
| | |
| |}
| |
| | |
| | |
| | |
| | |
| <tabber>
| |
| | |
| |-|Amulets=
| |
| | |
| <p style="text-align:Center;">This will showcase the worst to best amulets and give a brief description of them and where to obtain it. They will also have prices attached to them under the '''About''' section. You can use this guide to help you advance to next strongest weapon, and also see which is best for your price range.</p>
| |
| {|
| |
| |-
| |
| ! scope="col" style="background-color:#1c5bc3;"|<center>Amulets</center>
| |
| ! scope="col" style="background-color:#1c5bc3;"|<center>Name</center>
| |
| ! scope="col" style="background-color:#1c5bc3;"|<center>About</center>
| |
| ! scope="col" style="background-color:#1c5bc3;"|<center>Bonuses</center>
| |
| |-
| |
| | style="text-align:center;"|[[File:Amulet_of_Fury_(o).png|center|40px]]
| |
| | style="text-align:center;"|[[Amulet of Fury (or)]]
| |
| | style="text-align:center;"|This is a very good starting necklace, because it's extremely easy to get whether or not you're a Ironman or not. This is a necklace to used to be only used as a starter and that's it.
| |
| | style="text-align:center;"|{{ItemStats
| |
| |image =
| |
| |class =melee
| |
| |slot =neck
| |
| |Stabatk =+20
| |
| |Slashatk =+20
| |
| |Crushatk =+20
| |
| |Magicatk =+20
| |
| |Rangeatk =+20
| |
| |Stabdef =+20
| |
| |Slashdef =+20
| |
| |Crushdef =+20
| |
| |Magicdef =+20
| |
| |Rangedef =+20
| |
| |Strboost =+15
| |
| |Rangedboost =+0
| |
| |Magicboost =+0
| |
| |Prayboost =+15
| |
| |Aspeed =}}
| |
| |-
| |
| | style="text-align:center;"|[[File:Exteme_Amulet.png|center|70px]]
| |
| | style="text-align:center;"|[[Extreme Amulet]]
| |
| | style="text-align:center;"|The extreme amulet is given to you when you become an extreme donor. The stats aren't that good on it but it is a nice amulet for a starter and could be bought at the extreme donor zone for '''0 points'''.
| |
| | style="text-align:center;"|{{ItemStats
| |
| |image =
| |
| |class =melee
| |
| |slot =neck
| |
| |Stabatk =+100
| |
| |Slashatk =+100
| |
| |Crushatk =+125
| |
| |Magicatk =+125
| |
| |Rangeatk =+20
| |
| |Stabdef =+0
| |
| |Slashdef =+0
| |
| |Crushdef =+0
| |
| |Magicdef =+0
| |
| |Rangedef =+0
| |
| |Strboost =+50
| |
| |Rangedboost =+0
| |
| |Magicboost =+0
| |
| |Prayboost =+25
| |
| |Aspeed =}}
| |
| |-
| |
| | style="text-align:center;"|[[File:Amulet_of_blood.png|center|70px]]
| |
| | style="text-align:center;"|[[Amulet of blood]]
| |
| | style="text-align:center;"|The Amulet of Blood is a really good amulet because of the fact that it picks up items but it also gives you a 10% Luck Bonus at the '''Soulroom'''. Since the Amulet of Blood is the upgraded version of the collectors necklace it does pose a risk of disappearing while you try to upgrade it. The upgrade rate is easy so chances are higher than most.
| |
| | style="text-align:center;"|{{ItemStats
| |
| |image =
| |
| |class =melee
| |
| |slot =neck
| |
| |Stabatk =+100
| |
| |Slashatk =+100
| |
| |Crushatk =+125
| |
| |Magicatk =+125
| |
| |Rangeatk =+20
| |
| |Stabdef =+0
| |
| |Slashdef =+0
| |
| |Crushdef =+0
| |
| |Magicdef =+0
| |
| |Rangedef =+0
| |
| |Strboost =+50
| |
| |Rangedboost =+0
| |
| |Magicboost =+0
| |
| |Prayboost =+25
| |
| |Aspeed =}}
| |
| |-
| |
| | style="text-align:center;"|[[File:Gold_Chain.png|center|150x]]
| |
| | style="text-align:center;"|[[Gold Chain]]
| |
| | style="text-align:center;"|The gold chain is a strong necklace that gives a lot of strength bonus and it could also be upgraded at a rate of '''hard''' to the '''Nocturnal Chain'''.
| |
| | style="text-align:center;"|
| |
| {{ItemStats
| |
| |class = Melee
| |
| |slot = neck
| |
| |Stabatk = 0
| |
| |Stabdef = 0
| |
| |Slashatk = +150
| |
| |Slashdef = 0
| |
| |Crushatk = 0
| |
| |Crushdef = 0
| |
| |Magicatk = 0
| |
| |Magicdef = 0
| |
| |Rangeatk = 0
| |
| |Rangedef = 0
| |
| |Strboost = +90
| |
| |Prayboost = 0
| |
| }}
| |
| |-
| |
| | style="text-align:center;"|[[File:Nocturnal_Chain.png|center|100px]]
| |
| | style="text-align:center;"|[[Nocturnal Chain]]
| |
| | style="text-align:center;"|The Nocturnal Chain is the gold chain which was upgraded, gives more stats than the Gold Chain.
| |
| | style="text-align:center;"|
| |
| {{ItemStats
| |
| |class = Melee
| |
| |slot = neck
| |
| |Stabatk = 0
| |
| |Stabdef = 0
| |
| |Slashatk = +180
| |
| |Slashdef = 0
| |
| |Crushatk = 0
| |
| |Crushdef = 0
| |
| |Magicatk = 0
| |
| |Magicdef = 0
| |
| |Rangeatk = 0
| |
| |Rangedef = 0
| |
| |Strboost = +108
| |
| |Prayboost = 0
| |
| }}
| |
| |-
| |
| | style="text-align:center;"|[[File:Weed_chain.png|center|70px]]
| |
| | style="text-align:center;"|[[Weed Chain]]
| |
| | style="text-align:center;"|is a custom chain in Dreamscape , look at that fashion it has along with the few added bonus makes it a amazing must have in Dreamscape.
| |
| | style="text-align:center;"|
| |
| {{ItemStats
| |
| |image =
| |
| |class = melee
| |
| |slot = neck
| |
| |Stabatk = +0
| |
| |Slashatk = +150
| |
| |Crushatk = +0
| |
| |Magicatk = +0
| |
| |Rangeatk = +0
| |
| |Stabdef = +0
| |
| |Slashdef = +0
| |
| |Crushdef = +0
| |
| |Magicdef = +0
| |
| |Rangedef = +0
| |
| |Strboost = +90
| |
| |Rangedboost = +0
| |
| |Magicboost = +0.0%
| |
| |Prayboost = +0
| |
| |Aspeed =}}
| |
| |-
| |
| | style="text-align:center;"|[[File:Silver_Chain.png|center|70px]]
| |
| | style="text-align:center;"|[[Silver Chain]]
| |
| | style="text-align:center;"|Silver Chain is a necklace which can be obtained from [[Roachey]] for 150 Donation Points. The silver chain can be upgraded into [[Black Chain]] with an upgrade rate of '''hard'''
| |
| | style="text-align:center;"|
| |
| {{ItemStats
| |
| |image =
| |
| |class =melee
| |
| |slot =neck
| |
| |Stabatk =+0
| |
| |Slashatk =+200
| |
| |Crushatk =+0
| |
| |Magicatk =+0
| |
| |Rangeatk =+0
| |
| |Stabdef =+0
| |
| |Slashdef =+0
| |
| |Crushdef =+0
| |
| |Magicdef =+0
| |
| |Rangedef =+0
| |
| |Strboost =+115
| |
| |Rangedboost =+0
| |
| |Magicboost =+0.0%
| |
| |Prayboost =0
| |
| |Aspeed =}}
| |
| |-
| |
| | style="text-align:center;"|[[File:Nax_amulet.png|center|70px]]
| |
| | style="text-align:center;"|[[Nax Amulet]]
| |
| | style="text-align:center;"|Is one of the best melee amulets in the game. This Amulet is one of three used to make the best necklace in the game for all combat stats The Trix Amulet
| |
| | style="text-align:center;"|
| |
| {{ItemStats
| |
| |image =
| |
| |class =Melee
| |
| |slot =Neck
| |
| |Stabatk =+150
| |
| |Slashatk =+150
| |
| |Crushatk =+150
| |
| |Magicatk =
| |
| |Rangeatk =
| |
| |Stabdef =
| |
| |Slashdef =
| |
| |Crushdef =
| |
| |Magicdef =
| |
| |Rangedef =
| |
| |Strboost =+150
| |
| |Rangedboost =
| |
| |Magicboost =
| |
| |Prayboost =
| |
| |Aspeed =}}
| |
| |-
| |
| | style="text-align:center;"|[[File:Trix_Amulet_(i).png|center|70px]]
| |
| | style="text-align:center;"|[[Trix Amulet]]/[[Trix Amulet (i)]]
| |
| | style="text-align:center;"|The Trix Amulet is the best amulet we have in ds for all 3 combat styles. To make this Amulet you Select upgrade on one of the amulets with all three amulets in your inventory, All three amulets being [[The Nax Amulet|Nax Amulet]], [[The Yix Amulet|Yix Amulet]] and [[The Tam Amulet|Tam Amulet]].
| |
| | style="text-align:center;"|
| |
| {{ItemStats
| |
| |image =
| |
| |class =melee
| |
| |slot =Neck
| |
| |Stabatk =+250
| |
| |Slashatk =+250
| |
| |Crushatk =+250
| |
| |Magicatk =+250
| |
| |Rangeatk =+250
| |
| |Stabdef =
| |
| |Slashdef =
| |
| |Crushdef =
| |
| |Magicdef =
| |
| |Rangedef =
| |
| |Strboost =+250
| |
| |Rangedboost =+250
| |
| |Magicboost =+25%
| |
| |Prayboost =
| |
| |Aspeed =}}
| |
| <tabber>
| |
| | |
| |-|Rings=
| |
| | |
| | |
| <p style="text-align:Center;">This will showcase the worst to best '''rings''' and give a brief description of them and where to obtain it. They will also have prices attached to them under the '''About''' section. You can use this guide to help you advance to next strongest weapon, and also see which is best for your price range.</p>
| |
| {|
| |
| |-
| |
| ! scope="col" style="background-color:#1c5bc3;"|<center>Rings</center>
| |
| ! scope="col" style="background-color:#1c5bc3;"|<center>Name</center>
| |
| ! scope="col" style="background-color:#1c5bc3;"|<center>About</center>
| |
| ! scope="col" style="background-color:#1c5bc3;"|<center>Bonuses</center>
| |
| |-
| |
| | style="text-align:center;"|[[File:Epic_Berserker_Ring.png|center]]
| |
| | style="text-align:center;"|[[Epic Berserker Ring]]
| |
| | style="text-align:center;"|The Epic Berserker Ring is dropped by the Ragannoth Rex and gives 5% Drop Rate. You can kill the Ragannoth Rex at ::kings.
| |
| | style="text-align:center;"|
| |
| {{ItemStats
| |
| |image =
| |
| |class =melee
| |
| |slot =ring
| |
| |Stabatk =+400
| |
| |Slashatk =+400
| |
| |Crushatk =+400
| |
| |Magicatk =+0
| |
| |Rangeatk =+0
| |
| |Stabdef =
| |
| |Slashdef =
| |
| |Crushdef =
| |
| |Magicdef =
| |
| |Rangedef =
| |
| |Strboost =+0
| |
| |Rangedboost =+0
| |
| |Magicboost =+0.0%
| |
| |Prayboost =
| |
| |Aspeed =}}
| |
| |-
| |
| | style="text-align:center;"|[[File:Avery_ring_i.png|center]]
| |
| | style="text-align:center;"|[[Avery's Ring]]
| |
| | style="text-align:center;"|The Epic Berserker Ring is dropped by the Ragannoth Rex and gives 5% Drop Rate. You can kill the Ragannoth Rex at ::kings.
| |
| | style="text-align:center;"|
| |
| {{ItemStats
| |
| |image =
| |
| |class = melee
| |
| |slot = ring
| |
| |Stabatk = 450
| |
| |Slashatk = 450
| |
| |Crushatk = 300
| |
| |Magicatk = 80
| |
| |Rangeatk = 100
| |
| |Stabdef = 0
| |
| |Slashdef = 0
| |
| |Crushdef = 0
| |
| |Magicdef = 0
| |
| |Rangedef = 0
| |
| |Strboost = 50
| |
| |Rangedboost = 0
| |
| |Magicboost = 0%
| |
| |Prayboost = 1000
| |
| |Aspeed = }}
| |
| | |
| <tabber>
| |
| | |
| |-|Off-Hand= | |
| | |
| | |
| <p style="text-align:Center;">This will showcase the worst to best '''off-hands''' and give a brief description of them and where to obtain it. They will also have prices attached to them under the '''About''' section. You can use this guide to help you advance to next strongest weapon, and also see which is best for your price range.</p>
| |
| {|
| |
| |-
| |
| ! scope="col" style="background-color:#1c5bc3;"|<center>Off-Hand</center>
| |
| ! scope="col" style="background-color:#1c5bc3;"|<center>Name</center>
| |
| ! scope="col" style="background-color:#1c5bc3;"|<center>About</center>
| |
| ! scope="col" style="background-color:#1c5bc3;"|<center>Bonuses</center>
| |
| |-
| |
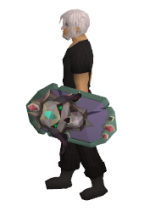
| | style="text-align:center;"|[[File:Drygore_Offhand.png|center|70px]]
| |
| | style="text-align:center;"|[[Drygore Offhand]]
| |
| | style="text-align:center;"|The Drygore Offhand is the best starter weapon because it can be purchased from the '''Armor Shop''' at home, but it's also dropped at ::starterboss by the [[Torquat]] and it can be upgraded into the [[Drygore Offhand (u)]]
| |
| | style="text-align:center;"|
| |
| {{ItemStats | |
| |image =
| |
| |class =melee
| |
| |slot =offhand
| |
| |Stabatk =
| |
| |Slashatk =
| |
| |Crushatk =
| |
| |Magicatk =
| |
| |Rangeatk =
| |
| |Stabdef =
| |
| |Slashdef =
| |
| |Crushdef =
| |
| |Magicdef =
| |
| |Rangedef =
| |
| |Strboost =+30
| |
| |Rangedboost =
| |
| |Magicboost =
| |
| |Prayboost =+10
| |
| |Aspeed =}}
| |
| |-
| |
| | style="text-align:center;"|[[File:Drygore_Offhand_(u).png|center|70px]]
| |
| | style="text-align:center;"|[[Drygore Offhand (u)]]
| |
| | style="text-align:center;"|Drygore Offhand (u) is the upgraded version of the [[Drygore Offhand]].
| |
| | style="text-align:center;"|
| |
| {{ItemStats
| |
| |image =
| |
| |class = Melee
| |
| |slot = Shield
| |
| |Stabatk = +0
| |
| |Slashatk = +0
| |
| |Crushatk = +0
| |
| |Magicatk = +0
| |
| |Rangeatk = +0
| |
| |Stabdef = +0
| |
| |Slashdef = +0
| |
| |Crushdef = +0
| |
| |Magicdef = +0
| |
| |Rangedef = +0
| |
| |Strboost = +60
| |
| |Rangedboost = +0
| |
| |Magicboost = +0.0%
| |
| |Prayboost = +20
| |
| |Aspeed =}}
| |
| |-
| |
| | style="text-align:center;"|[[File:Ice_Offhand.png|center|70px]]
| |
| | style="text-align:center;"|[[Ice Offhand]]
| |
| | style="text-align:center;"|Ice Katana is very good low/mid tier offhand which is easily obtainable and can be upgraded into the [[Golden Offhand]]
| |
| | style="text-align:center;"|
| |
| {{ItemStats
| |
| |class = melee
| |
| |slot = off
| |
| |Stabatk = +100
| |
| |Stabdef = +0
| |
| |Slashatk = +100
| |
| |Slashdef = +0
| |
| |Crushatk = +100
| |
| |Crushdef = +0
| |
| |Magicatk = +0
| |
| |Magicdef = +0
| |
| |Rangeatk = +0
| |
| |Rangedef = +0
| |
| |Strboost = +65
| |
| |Prayboost = +0
| |
| }}
| |
| |-
| |
| | style="text-align:center;"|[[File:Golden_Offhand.png|center|70px]]
| |
| | style="text-align:center;"|[[Golden Offhand]]
| |
| | style="text-align:center;"|The golden offhand is the best mid-tier offhand because of the price range between the high tier compared to mid/low tier offhands.::
| |
| | style="text-align:center;"|
| |
| {{ItemStats
| |
| |class = melee
| |
| |slot = shield
| |
| |Stabatk = +200
| |
| |Stabdef = +0
| |
| |Slashatk = +200
| |
| |Slashdef = +0
| |
| |Crushatk = +200
| |
| |Crushdef = +0
| |
| |Magicatk = +0
| |
| |Magicdef = +0
| |
| |Rangeatk = +0
| |
| |Rangedef = +0
| |
| |Strboost = +130
| |
| |Rangedboost = +0
| |
| |Prayboost = +0
| |
| }}
| |
| |-
| |
| | style="text-align:center;"|[[File:Avernic_defender_detail.png|center|70px]]
| |
| | style="text-align:center;"|[[Avernic Defender]]
| |
| | style="text-align:center;"|The Avernic defender is the best defender in-game as well as the best melee offhand in game that requiring 70 Attack and Defence to wield. This offhand can be obtained from the [[Theatre of Blood]] raid.
| |
| | style="text-align:center;"|
| |
| {{ItemStats
| |
| |image =
| |
| |class = melee
| |
| |slot = offhand
| |
| |Stabatk = +300
| |
| |Slashatk = +300
| |
| |Crushatk = +300
| |
| |Magicatk = +0
| |
| |Rangeatk = +0
| |
| |Stabdef = +500
| |
| |Slashdef = +500
| |
| |Crushdef = +500
| |
| |Magicdef = +0
| |
| |Rangedef = +600
| |
| |Strboost = +200
| |
| |Rangedboost = +0
| |
| |Magicboost = +0.0%
| |
| |Prayboost = +100
| |
| |Aspeed = }}
| |
| |-
| |
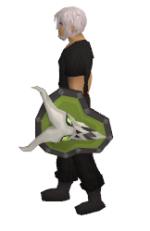
| | style="text-align:center;"|[[File:Inferno_Spirit_Shield.png|center|70px]]
| |
| | style="text-align:center;"|[[Inferno Spirit Shield]]
| |
| | style="text-align:center;"|The Inferno Spirit Shield is the best melee offhand in the game! Equippable in the offhand slot, providing incredible bonuses to melee. Can currently be obtained from Ultra Mystery Box and Corporeal Beast .
| |
| | style="text-align:center;"|
| |
| {{ItemStats
| |
| |image =
| |
| |class =melee
| |
| |slot =ring
| |
| |Stabatk =+0
| |
| |Slashatk =+0
| |
| |Crushatk =+0
| |
| |Magicatk =+0
| |
| |Rangeatk =+0
| |
| |Stabdef =+200
| |
| |Slashdef =+200
| |
| |Crushdef =+200
| |
| |Magicdef =+200
| |
| |Rangedef =+200
| |
| |Strboost =+300
| |
| |Rangedboost =+0
| |
| |Magicboost =+0.0%
| |
| |Prayboost =
| |
| |Aspeed =}}
| |
| | |
| <tabber>
| |
|
| |
|
| |-|Boots= | | |-|Miscellaneous= |
| | {{:Melee Misc}} |
|
| |
|
| | </tabber> |
|
| |
|
| <p style="text-align:Center;">This will showcase the worst to best '''boots''' and give a brief description of them and where to obtain it. They will also have prices attached to them under the '''About''' section. You can use this guide to help you advance to next strongest weapon, and also see which is best for your price range.</p>
| | </center> |
| {|
| |
| |-
| |
| ! scope="col" style="background-color:#1c5bc3;"|<center>Boots</center>
| |
| ! scope="col" style="background-color:#1c5bc3;"|<center>Name</center>
| |
| ! scope="col" style="background-color:#1c5bc3;"|<center>About</center>
| |
| ! scope="col" style="background-color:#1c5bc3;"|<center>Bonuses</center>
| |
| |-
| |
| | style="text-align:center;"|[[File:Vanguard_Boots.png|center|100px]]
| |
| | style="text-align:center;"|[[Vanguard Boots]]
| |
| | style="text-align:center;"|Vanguard boots are only supposed to be as a starter and you can get these boots from multi places. Such as shops at home, raids, and from killing penguins at ::mbox.
| |
| | style="text-align:center;"|
| |
| {{ItemStats
| |
| |image =
| |
| |class =Melee
| |
| |slot =boots
| |
| |Stabatk =+12
| |
| |Stabdef =+12
| |
| |Slashatk =+12
| |
| |Slashdef =+12
| |
| |Crushatk =+12
| |
| |Crushdef =+12
| |
| |Magicatk =+6
| |
| |Magicdef =+12
| |
| |Rangeatk =+12
| |
| |Rangedef =
| |
| |Strboost =+15
| |
| |Prayboost = +20}}
| |
| |-
| |
| | style="text-align:center;"|[[File:Icy_Boots.png|center|100px]]
| |
| | style="text-align:center;"|[[Icy Boots]]
| |
| | style="text-align:center;"|Icy Boots are a nice addition to your bank if you don't have much and can also be obtained pretty easily through votes and various other ways.
| |
| | style="text-align:center;"|
| |
| {{ItemStats
| |
| |image =
| |
| |class =melee
| |
| |slot =feet
| |
| |Stabatk =+30
| |
| |Slashatk =+30
| |
| |Crushatk =+0
| |
| |Magicatk =+0
| |
| |Rangeatk =+0
| |
| |Stabdef =+170
| |
| |Slashdef =+170
| |
| |Crushdef =+170
| |
| |Magicdef =+0
| |
| |Rangedef =+165
| |
| |Strboost =+40
| |
| |Prayboost =+100
| |
| |Aspeed =}}
| |
| |-
| |
| | style="text-align:center;"|[[File:Dream_Wing_Boots.png|center|100px]]
| |
| | style="text-align:center;"|[[Dream Wing Boots]]
| |
| | style="text-align:center;"|Dream Wing Boots are the best starting boots, and can be obtained multiple ways. These boots are good to help you get a little boost in damage at the start.
| |
| | style="text-align:center;"|
| |
| {{ItemStats
| |
| |image =
| |
| |class =melee
| |
| |slot =feet
| |
| |Stabatk =+30
| |
| |Slashatk =+30
| |
| |Crushatk =
| |
| |Magicatk =
| |
| |Rangeatk =
| |
| |Stabdef =+170
| |
| |Slashdef =+170
| |
| |Crushdef =+170
| |
| |Magicdef =
| |
| |Rangedef =+165
| |
| |Strboost =+40
| |
| |Rangedboost =
| |
| |Magicboost =
| |
| |Prayboost =+100
| |
| |Aspeed =}}
| |
| |-
| |
| | style="text-align:center;"|[[File:Shadow_Boots.png|center|100px]]
| |
| | style="text-align:center;"|[[Shadow Boots]]
| |
| | style="text-align:center;"|Shadow Boots comes from the Shadow Collection and it can be dropped by the [[Shadow King]]. They give a good bonus and allow the user to get a really strong strength boost.
| |
| | style="text-align:center;"|
| |
| {{ItemStats
| |
| |image =
| |
| |class = melee
| |
| |slot = main
| |
| |Stabatk = +40
| |
| |Slashatk = +30
| |
| |Crushatk = +30
| |
| |Magicatk = +25
| |
| |Rangeatk = +25
| |
| |Stabdef = +170
| |
| |Slashdef = +170
| |
| |Crushdef = +0
| |
| |Magicdef = +165
| |
| |Rangedef = +0
| |
| |Strboost = +60
| |
| |Rangedboost = +0
| |
| |Magicboost = +0.0%
| |
| |Prayboost = +120
| |
| |Aspeed = }}
| |
| |-
| |
| | style="text-align:center;"|[[File:Elemental_Boots.png|center|100px]]
| |
| | style="text-align:center;"|[[Elemental Boots]]
| |
| | style="text-align:center;"|Elemental Boots are dropped by the [[Chaos elemental]] and is the best mid-tier boots.
| |
| | style="text-align:center;"|
| |
| {{ItemStats
| |
| |slot = feet
| |
| |Stabatk = +44
| |
| |Stabdef = +187
| |
| |Slashatk = +33
| |
| |Slashdef = +187
| |
| |Crushatk = +33
| |
| |Crushdef = +0
| |
| |Magicatk = +28
| |
| |Magicdef = +181
| |
| |Rangeatk = +28
| |
| |Rangedef = +0
| |
| |Strboost = +66
| |
| |Prayboost = +132}}
| |
| |-
| |
| | style="text-align:center;"|[[File:Berserker_Boots.png|center|100px]]
| |
| | style="text-align:center;"|[[Berserker Boots]]
| |
| | style="text-align:center;"|'''''Berserker Boots; '''Berkserket boots are currently the best boots in-game. They can be obtained as a drop from the Olaf boss as well as the donation store.''
| |
| | style="text-align:center;"|
| |
| {{ItemStats
| |
| |image =
| |
| |class = Melee
| |
| |slot = feet
| |
| |Stabatk = +200
| |
| |Slashatk = +200
| |
| |Crushatk = +200
| |
| |Magicatk = +0
| |
| |Rangeatk = +0
| |
| |Stabdef = +500
| |
| |Slashdef = +500
| |
| |Crushdef = +500
| |
| |Magicdef = +500
| |
| |Rangedef = +500
| |
| |Strboost = +250
| |
| |Rangedboost = +0
| |
| |Magicboost = +0.0%
| |
| |Prayboost = +1000
| |
| |Aspeed = }}
| |
| [[Category:Armour]]
| |
| [[Category:Melee]]
| |
| [[Category:Miscellaneous]]
| |


