>Ownerscape |
|
| (127 intermediate revisions by 26 users not shown) |
| Line 1: |
Line 1: |
| {| class="article-table" style="width: auto;border: 1px solid black;"
| | [[File:GearPageMagic.jpg|150px|link=https://redemptionps.com/wiki/Magic_Gear]] |
| ! style="background-color:navy;color:white;"|Armor Name
| | [[File:GearPageRange.jpg|150px|link=https://redemptionps.com/wiki/Ranged_Gear]] |
| |-
| | [[File:GearPageTribrid.jpg|150px|link=https://redemptionps.com/wiki/Tribrid_Gear]] |
| | style="width: auto;border: 1px solid black;"|Armor Picture / Stats | | |
| |}
| | |
| {| class="article-table" style="width: auto;border: 1px solid black;"
| | <center> |
| ! style="background-color:navy;color:white;"|Armor Name
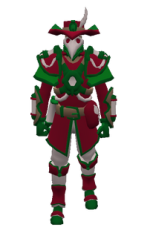
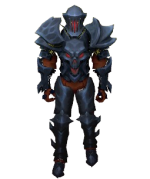
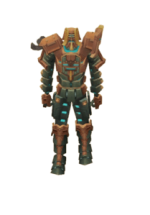
| | [[File:Gear Page Melee.jpg|center]] |
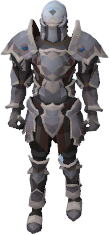
| |- | | {{Pbr|This guide is organized from least effective to most effective, starting at the top and progressing downwards. This layout allows players to see their potential growth and strive towards achieving higher levels of effectiveness.}} |
| | style="width: auto;border: 1px solid black;"|Armor Picture / Stats | | |
| |}
| | <tabber> |
| {| class="article-table" style="width: auto;border: 1px solid black;"
| | |
| ! style="background-color:navy;color:white;"|Armor Name
| | |-|Sets= |
| |- | | {{:Melee Sets}} |
| | style="width: auto;border: 1px solid black;"|Armor Picture / Stats
| | |
| |}
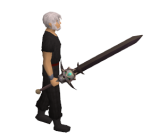
| | |-|Weapons= |
| {| class="article-table" style="width: auto;border: 1px solid black;"
| | {{:Melee Weapons}} |
| ! style="background-color:navy;color:white;"|Armor Name
| | |
| |-
| | |-|Offhands= |
| | style="width: auto;border: 1px solid black;"|Armor Picture / Stats
| | {{:Melee Offhands}} |
| |} | | |
| {| class="article-table" style="width: auto;border: 1px solid black;"
| | |-|Miscellaneous= |
| ! style="background-color:navy;color:white;"|Armor Name
| | {{:Melee Misc}} |
| |- | | |
| | style="width: auto;border: 1px solid black;"|Armor Picture / Stats | | </tabber> |
| |}
| | |
| {| class="article-table" style="width: auto;border: 1px solid black;" | | </center> |
| ! style="background-color:navy;color:white;"|Armor Name
| |
| |- | |
| | style="width: auto;border: 1px solid black;"|Armor Picture / Stats | |
| |}
| |
| {| class="article-table" style="width: auto;border: 1px solid black;" | |
| ! style="background-color:navy;color:white;"|Armor Name
| |
| |- | |
| | style="width: auto;border: 1px solid black;"|Armor Picture / Stats | |
| |}
| |
| {| class="article-table" style="width: auto;border: 1px solid black;" | |
| ! style="background-color:navy;color:white;"|Armor Name
| |
| |- | |
| | style="width: auto;border: 1px solid black;"|Armor Picture / Stats | |
| |}
| |
| {| class="article-table" style="width: auto;border: 1px solid black;" | |
| ! style="background-color:navy;color:white;"|Armor Name
| |
| |-
| |
| | style="width: auto;border: 1px solid black;"|Armor Picture / Stats
| |
| |}
| |
| {| class="article-table" style="width: auto;border: 1px solid black;"
| |
| ! style="background-color:navy;color:white;"|Armor Name
| |
| |-
| |
| | style="width: auto;border: 1px solid black;"|Armor Picture / Stats
| |
| |}
| |


