User:RegisLux/Sandbox: Difference between revisions

From Redemption Wiki
Jump to navigation Jump to search
>RegisLux
No edit summary
>RegisLux
No edit summary
Line 1: Line 1:
Clue Unique Tables:
<center>
<div style="margin-top: 10px; margin-bottom:10px; padding: 10px; font-size: 100%; ">
[[File:Page-title-minigames.jpg|center|800px]]
<tabber>


<tabber>
|-|The Arcade=
{{:Arcade}}
 
 
|-|Barrows=


|-|Normal=
'''The Big 6!!'''
{| class="wikitable" style="margin:auto" cellpadding="2" cellspacing="0" data-expandtext="show" data-collapsetext="hide"
{| border="0" cellpadding="1" cellspacing="1" class="article-table" style="width: auto;"
[[File:Mh kit barrows sets by atellum.gif|500px]]
|-
|-
! colspan="8" style="min-width:300px" | Uniques
! scope="col" style="background-color: navy;" style="background-color:navy;color:white;"|Tips
|-
|-
|
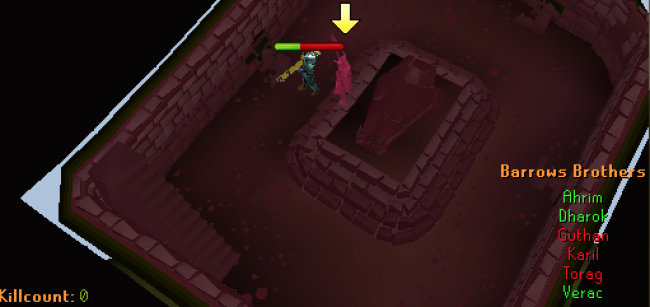
| style="width: auto;border: 1px solid black;" |Each brother has his own burial mound and possesses a combat level of 115, except Ahrim the Blighted and Karil the Tainted, who both have a combat level of 98. To enter a mound, the player must stand on top of it and dig using a spade. Inside the tomb the Tomb's of the brother appear, simply clicking the tomb will wake them up to begin fighting them.
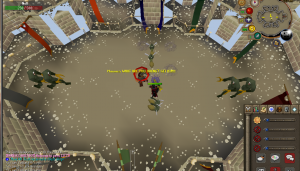
{| class="article-table" style="margin:auto" cellpadding="2" cellspacing="0" data-expandtext="show" data-collapsetext="hide"
[[File:BarrowsBrother.png|650px]]
!
!Name
!Drop Chance
|-
|-
|[[File:Space Virtus Helm.png|center|Thumb]]
! scope="col" style="background-color:navy;color:white;"|Information
|[[Space Virtus Helm]]
|1/600
|-
|-
|[[File:Space Virtus Body.png|center|Thumb]]
| style="width: auto;border: 1px solid black;" |The Barrows brothers are very strong, each with high Defence levels and strong armour. Each brother has a set effect, which is the same as the corresponding armour set. Because of this, consideration should be given to the methods with and order in which the brothers are killed.
|[[Space Virtus Body]]
[[File:Barrows Grave.png|center|350px]]
|1/600


|-
|-
|[[File:Space Virtus Legs.png|center|Thumb]]
! scope="col" style="background-color:navy;color:white;"|What you need
|[[Space Virtus Legs]]
|1/600
|-
|-
|[[File:Dream Helm.png|center|Thumb]]
| style="width: auto;border: 1px solid black;" |Range setup: [[Minigun]] / [[Golden Minigun]] with [[American Pernix Set|American&nbsp;pernix set]], [[Blue Deathcape]] and [[Ring of Wealth (i)]].
|[[Dream Helm]]
 
|1/600
Magic setup: [[Soulflare (u)|Soulflare u]] with [[Aqua Spirit Shield|aqua spirit shield]] with inga armor set or [[Infernal Set]]
|-
a Spade
|[[File:Dream Body.png|center|Thumb]]
(They only have 5000 health, any form of damage you can do, can be well affected but its noted that they pierce through armor and will hit you hard)
|[[Dream Body]]
|1/600
|-
|[[File:Dream Legs.png|center|Thumb]]
|[[Dream Legs]]
|1/600
|-
|-
|[[File:Dream Range Helmet.png|center|thumb]]
! scope="col" style="background-color:navy;color:white;"|Getting there
|[[Dream range helmet]]
|1/600
|-
|-
|[[File:Dream Range Body.png|center|thumb]]
| style="width: auto;border: 1px solid black;" |To get to barrows use the '''Minigames''' Teleport and selecting "Barrows" [[File:Minigames Teleport.png]]
|[[Dream range body]]
[[File:Minigames chat.png|650px]]
|1/600
|-
|-
|[[File:Dream Range Legs.png|center|thumb]]
'''Crypt'''
|[[Dream range legs]]
{| border="0" cellpadding="1" cellspacing="1" class="article-table" style="width: auto;"
|1/600
|-
|-
|[[File:Dream Mage Helmet.png|center|thumb]]
! scope="col" style="background-color: navy;" style="background-color:navy;color:white;"|Inside The Crypt
|[[Dream Mage Helmet]]
|1/600
|-
|-
|[[File:Dream Mage Body.png|center|thumb]]
| style="width: auto;border: 1px solid black;" |Inside the barrows crypt there are '''NO''' Monsters inside just some puzzle you must answer before entering the door as shown
|[[Dream Mage Body]]
[[File:Barrows Puzzles.png|650px]]
|1/600
|-
|-
|[[File:Dream Mage Legs.png|center|thumb]]
{| border="0" cellpadding="1" cellspacing="1" class="article-table" style="width: auto;"
|[[Dream Mage Legs]]
|1/600
|-
|-
|[[File:Blacksmith helmet.png|center|thumb]]
! scope="col" style="background-color: navy;" style="background-color:navy;color:white;"|Entering the chest room
|[[Blacksmith’s Helm|Blacksmith's Mask]]
|1/750
|-
|-
|[[File:Blue Checkered Shirt.png|center|thumb]]
| style="width: auto;border: 1px solid black;" |[[File:Barrows Crypt.png|thumb|300px|It's Barrows from the Crypt!]]
|[[Blue Checkered Shirt]]
Once the player locates the operational door that leads to the Barrows Chest, he or she will have to solve a simple puzzle in order to open the door. Due to not having any monsters in the room it's a fast and easy process once you've gon the hand of it
|1/1500
|-
|[[File:Green Checkered Shirt.png|center|thumb]]
|[[Green Checkered Shirt]]
|1/1500
|-
|[[File:Purple Checkered Shirt.png|center|Thumb]]
|[[Purple Checkered Shirt]]
|1/1500
|}
|}
|-|Hard=
 
{| class="wikitable" style="margin:auto" cellpadding="2" cellspacing="0" data-expandtext="show" data-collapsetext="hide"
{{UnderConstruction}}
{|class="wikitable dropstable mw-collapsible mw-collapsed rdtable" style="text-align:center" cellpadding="2" cellspacing="0" data-expandtext="show" data-collapsetext="hide"
|-
|-
! colspan="8" style="min-width:300px" | Uniques
! style="min-width:250px" colspan="7"|View Table of Barrows pet rewards
|-
|-
|
! scope="col" style="background-color:#9b1717;"|<center>A list of Barrows pets</center>
{| class="article-table" style="margin:auto" cellpadding="2" cellspacing="0" data-expandtext="show" data-collapsetext="hide"
! scope="col" style="background-color:#9b1717;"|<center>Name</center>
!
! scope="col" style="background-color:#9b1717;"|<center>About</center>
!Name
!Drop Chance
|-
|-
|[[File:Space Virtus Helm.png|center|Thumb]]
| style="text-align:center;"|Image Missing
|[[Space Virtus Helm]]
| style="text-align:center;"|[[Ahrim jr]]
|1/300
| style="text-align:center;"|Has a 1 in 10 chance of hitting twice when using mage.
|-
|-
|[[File:Space Virtus Body.png|center|Thumb]]
| style="text-align:center;"|Image Missing
|[[Space Virtus Body]]
| style="text-align:center;"|[[Dharok jr]]
|1/300
| style="text-align:center;"|Causes the players average damage dealt to be increased as they lose life points.
|-
|-
|[[File:Space Virtus Legs.png|center|Thumb]]
| style="text-align:center;"|Image Missing
|[[Space Virtus Legs]]
| style="text-align:center;"|[[Guthan jr]]
|1/300
| style="text-align:center;"|Has the chance to heal the player.
|-
|-
|[[File:Dream Helm.png|center|Thumb]]
| style="text-align:center;"|Image Missing
|[[Dream Helm]]
| style="text-align:center;"|[[Karil jr]]
|1/300
| style="text-align:center;"|Your hits reduce the bosses magic level.
|-
|-
|[[File:Dream Body.png|center|Thumb]]
| style="text-align:center;"|Image Missing
|[[Dream Body]]
| style="text-align:center;"|[[Torag jr]]
|1/300
| style="text-align:center;"|3x the special attack recovery time.
|-
|-
|[[File:Dream Legs.png|center|Thumb]]
| style="text-align:center;"|Image missing
|[[Dream Legs]]
| style="text-align:center;"|[[Verac jr]]
|1/300
| style="text-align:center;"|Allows the player to have a chance to ignore the bosses armour.
|}
 
|-|Castle Wars=
 
{| border="0" cellpadding="1" cellspacing="1" class="article-table" style="width: auto;"
|-
|-
|[[File:Dream Range Helmet.png|center|thumb]]
! scope="col" style="background-color: navy;" style="background-color:navy;color:white;"|Castle Wars:
|[[Dream range helmet]]
|1/300
|-
|-
|[[File:Dream Range Body.png|center|thumb]]
| style="width: auto;border: 1px solid black;" |Castle wars is an minigame released on 26th of May 2015.
|[[Dream range body]]
|1/300
|-
|-
|[[File:Dream Range Legs.png|center|thumb]]
{| border="0" cellpadding="1" cellspacing="1" class="article-table" style="width: auto;"
|[[Dream range legs]]
|1/300
|-
|-
|[[File:Dream Mage Helmet.png|center|thumb]]
! scope="col" style="background-color: navy;" style="background-color:navy;color:white;"|How does Castle Wars work:
|[[Dream Mage Helmet]]
|1/300
|-
|-
|[[File:Dream Mage Body.png|center|thumb]]
| style="width: auto;border: 1px solid black;" |In the minigame there are two teams who have to battle against each other. You need at least four (4) players on each team to play the mini game.
|[[Dream Mage Body]]
The two teams are.
|1/300
* Saradomin Team (Blue Flag)
* Zamorak Team (Red Flag)
In the minigame, there are three portals
* Blue Portal = Saradomin team.
* Red Portal  = Zamorak team.
* Green Portal = Guthix team | Team with fewer players.
 
In each castle, there are four (4) floors.
* On the 1st floor of the castle are some tables. Each table contains items such as; Rocks, Pickaxe, Rope, Toolkit, Barricade, Poison of explosion and a bucket of water. These items can be used in the minigame through-out your game.
* On the 2nd floor, the players will spawn when the minigame starts, and you spawn there when you die in the game.
* On the 3rd floor there is a ladder to get into the opponents 2nd floor.
* On the 4th floor is where the flag is located.
[[File:Castlewars.png|thumb|304px|Playground Castle wars]]
|-
|-
|[[File:Dream Mage Legs.png|center|thumb]]
{| border="0" cellpadding="1" cellspacing="1" class="article-table" style="width: auto;"
|[[Dream Mage Legs]]
|1/300
|-
|-
|[[File:Dream Mage Set.png|center|thumb]]
! scope="col" style="background-color: navy;" style="background-color:navy;color:white;"|How to gain points:
|[[Dream Mage Set]]
|1/575
|-
|-
|[[File:Dream Range Set.png|center|thumb]]
| style="width: auto;border: 1px solid black;" |Example how to gain points:
|[[Dream Range Set]]
If one of the players from team Saradomin gets the Zamorak flag and return the flag to the Saradomin castle, team Saradomin gets one point. Also of course if the team Zamorak takes the Saradomin flag and returns it to Zamorak castle, then team Zamorak gets one point.
|1/575
In castle wars minigame can you also choose to kill the other team and force them back so they don't get your team flag
|-
|-
|[[File:Dream Melee Set.png|center|thumb]]
{| border="0" cellpadding="1" cellspacing="1" class="article-table" style="width: auto;"
|[[Dream Set|Dream Melee Set]]
|1/575
|-
|-
|[[File:Space Virtus Set.png|center|thumb::]]
! scope="col" style="background-color: navy;" style="background-color:navy;color:white;"|Rules:
|[[Space Virtus Set]]
|1/575
|-
|-
|[[File:Obsidian Virtus Mask.png|center|thumb]]
| style="width: auto;border: 1px solid black;" |There is some rules cause it have to be a fair minigame.
|[[Obsidian Virtus Mask]]
* You cant wear '''[http://Redemptionrsps.wikia.com/wiki/OP_Items overpowered items]''' (such as '''Glock''', '''Assault Rifle''' and '''Ice Katana''').
|1/1000
* You cant wear a helmet or a hat, because you already get a castle-wars team hood.
* You cant wear a cape, because you already get a castle-wars team cape.
* You must wear gear while in the game. If you do not, you will be punished.
|-
|-
|[[File:Obsidian Virtus Top.png|center|thumb]]
{| border="0" cellpadding="1" cellspacing="1" class="article-table" style="width: auto;"
|[[Obsidian Virtus Top]]
|1/1000
|-
|-
|[[File:Obsidian Virtus Bottom.png|center|thumb]]
! scope="col" style="background-color: navy;" style="background-color:navy;color:white;"|Castle Wars Shop:
|[[Obsidian Virtus Bottom]]
|1/1000
|-
|-
|[[File:Rain_Bow.png|center|thumb]]
| style="width: auto;border: 1px solid black;" |[[File:Castle_Wars.PNG|thumb|center]]
|[[Rain Bow]]
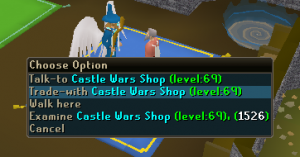
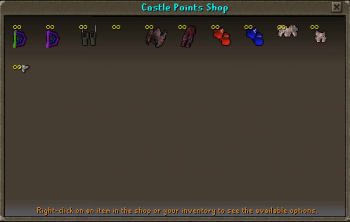
Once you have enough points, you can go to the Castle Wars Shop and get some exclusive items! The store can be found just next to the portals.
|1/1750
[[File:Castle_Wars2.PNG|thumb|350px|center]]
* [[Space Jam Sword]] 100 point.
* [[Silver Space Sword]] 75 point.
* [[Dream Wing Boots]] 100 point.
* [[Prime Torva Helm]] 50 point.
* [[Prime Torva Platelegs]] 50 point.
* [[Prime Torva Platebody]] 50 point.
* [[Red Boxing Gloves]] 150 point.
* [[Blue Boxing Gloves]] 150 point.
* [[Malevolent Platebody]] 50 point.
* [[Malevolent Platelegs]] 50 point.
* [[Malevolent Helm]] 50 point.
 
|-|Tzhaar Caves=
{| border="0" cellpadding="1" cellspacing="1" class="article-table" style="width: auto;"
|-
|-
|[[File:Cape_of_Skulls.png|center|thumb]]
! scope="col" style="background-color: navy;" style="background-color:navy;color:white;"|Jad (firecape):
|[[Cape of Skulls]]
|1/2500
|-
|-
|[[File:Ankou_Mask.png|center|thumb]]
| style="width: auto;border: 1px solid black;" |To get an firecape you need to kill Jad.
|[[Ankou Mask]]
[[File:Jad.png|thumb|center]]
|1/1500
TzTok-Jad is combat lvl 702.
|-
|-
|[[File:Ankou_Top.png|center|thumb]]
{| border="0" cellpadding="1" cellspacing="1" class="article-table" style="width: auto;"
|[[Ankou Top]]
|1/1500
|-
|-
|[[File:Ankou_Leggings.png|center|thumb]]
! scope="col" style="background-color: navy;" style="background-color:navy;color:white;"|How to get there.
|[[Ankou Leggings]]
|1/1500
|-
|-
|[[File:Ankou_Socks.png|center|thumb]]
| style="width: auto;border: 1px solid black;" |You use the teleport book and choose minigames and then use Tzhaar cave, when you get there just go north and enter,
|[[Ankou Socks]]
[[File:Indgang.png|thumb|center]]
|1/1500
when you click enter you get to choose 1 normal fightcaves (Firecape)
|-
|-
|[[File:Ankou_Gloves.png|center|thumb]]
{| border="0" cellpadding="1" cellspacing="1" class="article-table" style="width: auto;"
|[[Ankou Gloves]]
|1/1500
|-
|-
|[[File:Mummy's_Head.png|center|thumb]]
! scope="col" style="background-color: navy;" style="background-color:navy;color:white;"|TookHar Kal Cape.
|[[Mummy's Head]]
|1/1500
|-
|-
|[[File:Mummy's_Body.png|center|thumb]]
| style="width: auto;border: 1px solid black;" |You use the teleport book and choose minigames and then use Tzhaar cave, when you get there just go north and enter.
|[[Mummy's Body]]
[[File:Indgang.png|thumb|center]]
|1/1500
when you click enter you get to choose 2 Tookhar kal caves (New cape)
|-
|-
|[[File:Mummy's_Legs.png|center|thumb]]
{| border="0" cellpadding="1" cellspacing="1" class="article-table" style="width: auto;"
|[[Mummy's Legs]]
|1/1500
|-
|-
|[[File:Mummy's_Hands.png|center|thumb]]
! scope="col" style="background-color: navy;" style="background-color:navy;color:white;"|TookHar Kal Cape.
|[[Mummy's Hands]]
|1/1500
|-
|-
|[[File:Mummy's_Feet.png|center|thumb]]
| style="width: auto;border: 1px solid black;" |This minigame you need to complete 5 waves.
|[[Mummy's Feet]]
* Wave 1 Nomad
|1/1500
* Wave 2 Angry Goblin
* Wave 3 General Graador
* Wave 4 Chaos Elemental
* Wave 5 Corporeal Beast
|-
|-
|[[File:Obsidian_Cape_(r).png|center|thumb]]
 
|[[Obsidian Cape (r)]]
|-|Warriors Guild=
|1/1500
{| border="0" cellpadding="1" cellspacing="1" class="article-table" style="width: auto;"
|-
|-
|[[File:Pufferfish Balloon.png|center|thumb]]
! scope="col" style="background-color: navy;" style="background-color:navy;color:white;"|Warriors Guild:
|[[Pufferfish Balloon]]
|1/2500
|-
|-
|}
| style="width: auto;border: 1px solid black;" |Warriors Guild is a minigame where you can get different defenders from iron to flameburst.
|-|Elite=
{| class="wikitable" style="margin:auto" cellpadding="2" cellspacing="0" data-expandtext="show" data-collapsetext="hide"
|-
|-
! colspan="8" style="min-width:300px" | Uniques
{| border="0" cellpadding="1" cellspacing="1" class="article-table" style="width: auto;"
|-
|-
|
! scope="col" style="background-color: navy;" style="background-color:navy;color:white;"|How does Warriors Guild work:
{| class="article-table" style="margin:auto" cellpadding="2" cellspacing="0" data-expandtext="show" data-collapsetext="hide"
!
!Name
!Drop Chance
|-
|-
|[[File:Backstab_Cape.png|center|thumb]]
| style="width: auto;border: 1px solid black;" |You start buying an armour set (helm, plate, legs) from Shanomi then you use it on the magical animator.
|[[Backstab Cape]]
[[File:Shanomi.png|thumb|center]]
|1/4000
[[File:Shop.png|thumb|358px|center]]
And an animated warrior spawn and you kill him, he drops Warrior Guild Token.
[[File:Animated_Rune_Armour.png|thumb|center]]
|-
|-
|[[File:Sack of Effigies.png|center|thumb]]
{| border="0" cellpadding="1" cellspacing="1" class="article-table" style="width: auto;"
|[[Sack of Effigies]]
|1/3000
|-
|-
|[[File:Explosive_Barrel.png|center|thumb]]
! scope="col" style="background-color: navy;" style="background-color:navy;color:white;"|Drops:
|[[Explosive Barrel]]
|1/4000
|-
|-
|[[File:Orlando_Smith's_Hat.png|center|thumb]]
| style="width: auto;border: 1px solid black;" |When you get the tokens you go to the south-west corner and climb up the staircase, and enter the room inside the room you need to kill the cyclops lvl 56.
|[[Orlando Smith's Hat]]
[[File:Cyclops.png|thumb|center]]
|1/3000
keep killing those and they drop the defenders, first they will drop the iron defender, pick it up and kill more, the order they drop the defender is.
* Iron
* Steel
* Black
* Mithril
* Adamant
* Rune
* Dragon
* Flameburst
Keep repeat this until you have the defender you want.
[[File:Defenders.png|thumb|center]]
|-
|-
|[[File:Briefcase.png|center|thumb]]
 
|[[Briefcase]]
|-|Assault & Dominion=
|1/1500
{| border="0" cellpadding="1" cellspacing="1" class="article-table" style="width: auto;"
|-
|-
|[[File:Offhand Briefcase.png|center|thumb]]
! scope="col" style="background-color: navy;" style="background-color:navy;color:white;"|How to get to assault minigame:
|[[Briefcase|Off-Hand Briefcase]]
|1/1500
|-
|-
|[[File:Pyjama_Top.png|center|thumb]]
| style="width: auto;border: 1px solid black;" |You open the teleport book and use the minigame teleport and choose the option Assault & Dominion, when you get there you enter the trapdoor and the fight begins, make sure to bring the best gear and weapon you have.
|[[Pyjama Top]]
[[File:Assault_Start.png|thumb|center]]
|1/1500
|-
|-
|[[File:Pyjama_Bottoms.png|center|thumb]]
{| border="0" cellpadding="1" cellspacing="1" class="article-table" style="width: auto;"
|[[Pyjama Bottoms]]
|1/1500
|-
|-
|[[File:Pyjama_Slippers.png|center|thumb]]
! scope="col" style="background-color: navy;" style="background-color:navy;color:white;"|How does Assault minigame work:
|[[Pyjama Slippers]]
|1/1500
|-
|-
|[[File:Elite Robin Hood Hat.png|center|thumb]]
| style="width: auto;border: 1px solid black;" |Is a minigame where you need to kill some Penance fighter, penance ranger, beserk barbarian spirit and corporeal beast.
|[[Elite Robin Hood Set|Elite Robin Hood Hat]]
You have to complete 26 waves, and each wave got some monster you have to defeat to complete the wave.
|1/5000
* wave 1, - 2 penance fighter 2 penance ranger
* wave 2, - 4 penance fighter 4 penance ranger
* wave 3, - 4 penance fighter 4 penance ranger
* wave 4, - 4 penance fighter 4 penance ranger
* wave 5, - 4 penance fighter 4 penance ranger
* wave 6, - 4 penance fighter 4 penance ranger
* wave 7, - 4 penance fighter 4 penance ranger
* wave 8, - 4 penance fighter 4 penance ranger
* wave 9, - 4 penance fighter 4 penance ranger
* wave 10 - 4 penance fighter 4 penance ranger
* wave 11 - 4 penance fighter 4 penance ranger
* wave 12 - 4 penance fighter 4 penance ranger
* wave 13 - 4 penance fighter 4 penance ranger
* wave 14 - 4 penance fighter 4 penance ranger
* wave 15 - 4 penance fighter 4 penance ranger
* wave 16 - 4 penance fighter 4 penance ranger
* wave 17 - 6 penance fighter 6 penance ranger
* wave 18 - 6 penance fighter 6 penance ranger
* wave 22 - 6 penance fighter 6 penance ranger
* Wave 23 - 6 penance fighter 6 penance ranger
* wave 24 - 6 penance fighter 6 penance ranger
* wave 25 - 6 penance fighter 6 penance ranger
* wave 26 - 12 beserk barbarian spirit 1 corporeal beast
Wave 26 is the last one and when you get to that one kill corporeal beast and the minigame is done.
[[File:Assault_Arena.png|thumb|center]]
|-
|-
|[[File:Elite Robin Hood Tunic.png|center|thumb]]
{| border="0" cellpadding="1" cellspacing="1" class="article-table" style="width: auto;"
|[[Elite Robin Hood Set|Elite Robin Hood Tunic]]
|1/5000
|-
|-
|[[File:Elite Robin Hood Tights.png|center|thumb]]
! scope="col" style="background-color: navy;" style="background-color:navy;color:white;"|How to gain points:
|[[Elite Robin Hood Set|Elite Robin Hood Tights]]
|1/5000
|-
|-
|}
| style="width: auto;border: 1px solid black;" |
|-|Dream=
When you have compleated all the waves you will be teleported out of the arena and receive 40 Assault points.
{| class="wikitable" style="margin:auto" cellpadding="2" cellspacing="0" data-expandtext="show" data-collapsetext="hide"
[[File:Assault_Reward.png|thumb|400px]]
|-
|-
! colspan="8" style="min-width:300px" | Uniques
{| border="0" cellpadding="1" cellspacing="1" class="article-table" style="width: auto;"
|-
|-
|
! scope="col" style="background-color: navy;" style="background-color:navy;color:white;"|Gear Suggestion:
{| class="article-table" style="margin:auto" cellpadding="2" cellspacing="0" data-expandtext="show" data-collapsetext="hide"
!
!Name
!Drop Chance
|-
|-
|[[File:Backstab_Cape.png|center|thumb]]
| style="width: auto;border: 1px solid black;" |
|[[Backstab Cape]]
Range setup:
|1/4000
[[American Pernix Set]], [[Golden Minigun]] or [[Golden Ak-47]], best boots and gloves you have and best cape.
Mage setup:
Inga set, [[Soulflare]]/[[Soulflare (u)]], [[Aqua Spirit Shield]] [[Captain America Shield]] best boots and gloves and cape you have.
|-
|-
|[[File:Sack of Effigies.png|center|thumb]]
{| border="0" cellpadding="1" cellspacing="1" class="article-table" style="width: auto;"
|[[Sack of Effigies]]
|1/3000
|-
|-
|[[File:Explosive_Barrel.png|center|thumb]]
! scope="col" style="background-color: navy;" style="background-color:navy;color:white;"|Assault Shop:
|[[Explosive Barrel]]
|1/4000
|-
|-
|[[File:Orlando_Smith's_Hat.png|center|thumb]]
| style="width: auto;border: 1px solid black;" |
|[[Orlando Smith's Hat]]
Once you have enough points, you can go to the Assault Shop and get some exclusive items! The store can be found.
|1/3000
[[File:Assault_shop.png|thumb|350px|center]]
* Fighter Torso 75 Assault Points.
* Silver Space Sword 75 point.
* Fighter Hat 65 Assault Points.
* Ranger Hat 65 Assault Points.
* Runner Boots 75 Assault Points.
* Saradomin Sword 75 Assault Points.
* Ancient Ceremonial Hood 135 Assault Points.
* Ancient Ceremonial Top 200 Assault Points.
* Ancient Ceremonial Legs 150 Assault Points.
 
{| border="0" cellpadding="1" cellspacing="1" class="article-table" style="width: auto;"
|-
|-
|[[File:Briefcase.png|center|thumb]]
! scope="col" style="background-color: navy;" style="background-color:navy;color:white;"|How to get to Dominion minigame:
|[[Briefcase]]
|1/1500
|-
|-
|[[File:Offhand Briefcase.png|center|thumb]]
| style="width: auto;border: 1px solid black;" |You open the teleport book and use the minigame teleport and choose the option Assault & Dominion, when you get there you talk with the ghost, and start the minigame.
|[[Briefcase|Off-Hand Briefcase]]
[[File:Dominion_Ghost.png|thumb|center]]
|1/1500
|-
|-
|[[File:Pyjama_Top.png|center|thumb]]
{| border="0" cellpadding="1" cellspacing="1" class="article-table" style="width: auto;"
|[[Pyjama Top]]
|1/1500
|-
|-
|[[File:Pyjama_Bottoms.png|center|thumb]]
! scope="col" style="background-color: navy;" style="background-color:navy;color:white;"|How does Dominion minigame work:
|[[Pyjama Bottoms]]
|1/1500
|-
|-
|[[File:Pyjama_Slippers.png|center|thumb]]
| style="width: auto;border: 1px solid black;" |Is a minigame where you need to kill some Black Demon, Lesser Demon Champ, Nezikchened, Chronozon and last Jungle Demon.
|[[Pyjama Slippers]]
You have to complete 6 waves, and each wave got some monster you have to defeat to complete the wave.
|1/1500
* wave 1, - 3 Black Demon combat lvl 172
* wave 2, - 6 Black Demon combat lvl 172
* wave 3, - 1 Lesser Demon Champ combat lvl 162
* wave 4, - 1 Nezikchened combat lvl 187
* wave 5, - 1 Chronozon combat lvl 170
* wave 6, - 1 Jungle Demon combat lvl 195
Wave 6 is the last one and when you are done with that kill, the minigame is done.
|-
|-
|[[File:Elite Robin Hood Hat.png|center|thumb]]
{| border="0" cellpadding="1" cellspacing="1" class="article-table" style="width: auto;"
|[[Elite Robin Hood Set|Elite Robin Hood Hat]]
|1/5000
|-
|-
|[[File:Elite Robin Hood Tunic.png|center|thumb]]
! scope="col" style="background-color: navy;" style="background-color:navy;color:white;"|How to gain points:
|[[Elite Robin Hood Set|Elite Robin Hood Tunic]]
|1/5000
|-
|-
|[[File:Elite Robin Hood Tights.png|center|thumb]]
| style="width: auto;border: 1px solid black;" |
|[[Elite Robin Hood Set|Elite Robin Hood Tights]]
When you have completed all the waves you will be teleported out of the arena and receive 100 Dominion points.
|1/5000
 
|-
|-
|[[File:Bloodhound.png|center|thumb]]
{| border="0" cellpadding="1" cellspacing="1" class="article-table" style="width: auto;"
|[[Bloodhound]]
|1/5000
|-
|-
|[[File:Superior Death Lotus Hood.png|center|thumb]]
! scope="col" style="background-color: navy;" style="background-color:navy;color:white;"|Gear Suggestion:
|[[Superior Death Lotus Hood]]
|1/3750
|-
|-
|[[File:Superior Death Lotus Chestplate.png|center|thumb]]
| style="width: auto;border: 1px solid black;" |
|[[Superior Death Lotus Chestplate]]
Range setup:
|1/3750
[[American Pernix Set]], [[Golden Minigun]] or [[Golden Ak-47]], best boots and gloves you have and best cape.
Mage setup:
Inga set, [[Soulflare]]/[[Soulflare (u)]], [[Aqua Spirit Shield]] [[Captain America Shield]] best boots and gloves and cape you have.
|-
|-
|[[File:Superior Death Lotus Chaps.png|center|thumb]]
{| border="0" cellpadding="1" cellspacing="1" class="article-table" style="width: auto;"
|[[Superior Death Lotus Chaps]]
|1/3750
|-
|-
|[[File:Superior Death Lotus Tabi.png|center|thumb]]
! scope="col" style="background-color: navy;" style="background-color:navy;color:white;"|Dommion Shop:
|[[Superior Death Lotus Tabi]]
|1/3750
|-
|-
|[[File:Superior Death Lotus Tekoh.png|center|thumb]]
| style="width: auto;border: 1px solid black;" |
|[[Superior Death Lotus Tekoh]]
Once you have enough points, you can go to the Dominion Shop, talk with the ghost and get some exclusive items!.
|1/3750
[[File:Domin_shop.png|thumb|400px|center]]
 
|-|Duel Arena=
 
{| border="0" cellpadding="1" cellspacing="1" class="article-table" style="width: auto;"
|-
|-
|[[File:Globetrotter Backpack.png|center|thumb]]
! scope="col" style="background-color: navy;" style="background-color:navy;color:white;"|Short Intro:
|[[Globetrotter Set|Globetrotter Backpack]]
|1/3000
|-
|-
|[[File:Globetrotter Arm Guards.png|center|thumb]]
| style="width: auto;border: 1px solid black;" |Duel Arena is a place were you can duel other people, go there and use challange another person and you get this challange box.
|[[Globetrotter Set|Globetrotter Arm Guards]]
[[File:Duel.png|thumb|318px|center]]
|1/3000
|-
|-
|[[File:Globetrotter Boots.png|center|thumb]]
! scope="col" style="background-color:navy;color:white;"|How to play:
|[[Globetrotter Set|Globetrotter Boots]]
|1/3000
|-
|-
|[[File:Globetrotter Jacket.png|center|thumb]]
| style="width: auto;border: 1px solid black;" |When you challange another person you get the challange box, here you can choose some funktions what fight you want to make.
|[[Globetrotter Set|Globetrotter Jacket]]
If you want a range fight you simply click the other att style off, and if you want an no stats boots you switch that off
|1/3000
 
|-
</tabber></div>
|[[File:Globetrotter Shorts.png|center|thumb]]
</center>
|[[Globetrotter Set|Globetrotter Shorts]]
[[Category:Duel Arena]]
|1/3000
[[Category:Barrows]]
|-
[[Category:Castle Wars]]
|[[File:Bag of Clues.png|center|thumb]]
[[Category:Tzhaar]]
|[[Bag of Clues]]
[[Category:Warriors Guild]]
|1/1250
[[Category:Assault & Dominion]]
|-
[[Category:Nomad & Angry Goblin]]
|[[File:Gilded Cavalier.png|center|thumb]]
|[[Gilded Cavalier]]
|1/1500
|-
|[[File:Tuxedo Cravat.png|center|thumb]]
|[[Tuxedo Set|Tuxedo Cravat]]
|1/3500
|-
|[[File:Tuxedo Jacket.png|center|thumb]]
|[[Tuxedo Set|Tuxedo Jacket]]
|1/3500
|-
|[[File:Tuxedo Trousers.png|center|thumb]]
|[[Tuxedo Set|Tuxedo Trousers]]
|1/3500
|-
|[[File:Tuxedo Shoes.png|center|thumb]]
|[[Tuxedo Set|Tuxedo Shoes]]
|1/3500
|-
|}
</tabber>

Revision as of 13:51, 17 August 2021

Error creating thumbnail: Unable to save thumbnail to destination


Arcade Regular Mode.png


Arcade System

The Arcade System offers players a multifaceted gaming experience. It introduces a variety of gameplay modes, each tailored to challenge players at different skill levels and preferences, while rewarding their efforts with a range of items and prizes.

Arcade Modes Overview

Core Arcade Modes

These four modes form the backbone of the Arcade System and revolve around providing players with Cape Slot items as rewards, each mode increasing in difficulty:

Normal Mode: Offers a moderate level of challenge and rewards players with valuable Cape Slot items.

Extreme Mode: Elevates the difficulty level, providing players with prestigious Cape Slot items upon successful completion.

Hell Mode: Presents an even greater challenge, offering exclusive Cape Slot items as rewards.

Extreme Hell Mode: Reserved for the most skilled and daring players, rewarding access to unique and powerful rewards.

Themed Arcade Modes

In addition to the core modes, players can explore themed modes inspired by popular comic book series:

Avengers Arcade Based on the iconic Avengers comic book series, this mode offers a unique gaming experience, rewarding players with Arcade Tokens and other valuable prizes.

DC Arcade: Drawing inspiration from the DC Comics universe, DC Arcade provides another exciting gameplay option. Players can earn Arcade Tokens and even have a chance to obtain coveted DC Arcade boxes as rewards.

Endless Arcade: For those seeking an endless challenge, this mode exclusively rewards Arcade Tokens, which can be exchanged for various in-game items and bonuses. While it doesn't offer Cape Slot items, it provides a constant source of rewards for dedicated players.


Error creating thumbnail: Unable to save thumbnail to destination

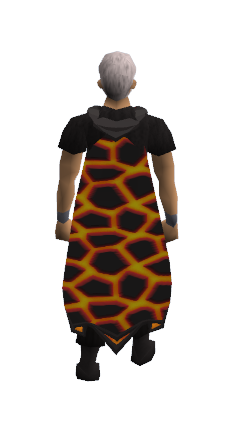
The Normal Mode within the Arcade System offers challenging gameplay accessible to players using starter-level gear. This mode is primarily sought after by those aiming to obtain the Infernal Cape upon successful completion.

The Infernal Cape is a hybrid cape. Players engaging in Normal Mode also earn Arcade Tokens during the arcade minigame.

In Normal Mode, players receive one Arcade Token per wave number they complete, accumulating tokens progressively as they advance through the waves.

To join, please read each interface. Do not select "Yes" from the first. This will place the player in Duo mode and they will be unable to proceeed.


For clarification, consider the following illustration:

  • Wave 1: Yields 1 token.
  • Wave 2: Results in the acquisition of 1 token plus 2 more, totaling 3 tokens.
  • Wave 3: Yields 1 token, in addition to the 3 previously earned tokens, resulting in a total of 6 tokens, and so forth.

The Arcade's wave system is categorized into several sections, each awarding bonus tokens upon successful completion:

  • Beginner Waves (Waves 1-20).
  • Experienced Waves (Waves 21-30).
  • Advanced Waves (Waves 31-40).
  • Dream Waves (Waves 41-50).

These distinct sections provide a structured progression path and bonus tokens, contributing to the comprehensive reward system of Normal Mode gameplay.

Gear

Players should equip Magic or Ranged gear from Early-Mid Game. It is recommended to use an Area of Effect (AoE) weapon to efficiently eliminate multiple monsters at once. Additionally, a pet that provides healing and prayer restoration, as detailed in the Pet section, should be utilized.

Poison Mechanic

A poison gas mechanic is in place that slowly drains the player's hitpoints if they remain stationary for too long. To prevent this, players must Normally move within the area. If affected by the gas, simply moving will halt its effects.

Clearing Waves

Wave section does not matter in how they are cleared. Waves do get more difficult as they progress, however the method of completion does not change unless the player is or is not using Area of Effect (AoE).

No AoE

When clearing waves without an AoE weapon, positioning in a corner of the room while ensuring Normal movement to avoid the poison gas is advisable. NPCs should be attacked as they approach. Without AoE, it may be necessary to carry some food items such as Rainbow Fish or Special Bandages from Dreamland. It is strongly recommended to have healing and prayer restoration gear equipped.

AoE

If the player possesses an AoE weapon, Normal Mode Arcade becomes much simpler. The option to stand in a corner or in the middle of the room is available. As waves of monsters approach, waiting for them to group up before attacking them collectively is advisable. Carrying Special Bandages from Dreamland in case hitpoints become low is recommended. Additionally, ensuring the presence of healing and prayer restoring gear is essential for added sustain.


Beginner: Waves 1-19
Wave Enemies
Wave 1 5x Luigi
Wave 2 5x Mario
Wave 3 5x luigi & 5x Mario
Wave 4 5x Pikachu
Wave 5 5x Charmander
Wave 6 5x Charmander & 5x Pikachu
Wave 7 2x Pacman Ghost
Wave 8 4x Pacman Ghost
Wave 9 1x Pacman
Wave 10 1x Pacman & 2x Pacman Ghost
Wave 11 1x Pacman & 4x Pacman Ghost
Wave 12 1x Tetris Piece
Wave 13 2x Tetris Piece
Wave 14 4x Tetris Piece
Wave 15 1x Space Invader
Wave 16 2x Space Invader
Wave 17 4x Space Invader
Wave 18 1x Pacman, 4x Pacman Ghost, & 4x Space Invader
Wave 19 4x Tetris Pieces & 4x Space Invader
Experienced: Waves 20-29
Wave Enemies
Wave 20 1x Pacman, 4x Pacman Ghost, 4x Space Invaders, & 4x Tetris Pieces
Wave 21 1x Sonic
Wave 22 1x Knuckles
Wave 23 1x Sonic and 1x Knuckles
Wave 24 4x Sonic & 4x Knuckles
Wave 25 1x Frogger
Wave 26 2x Frogger
Wave 27 4x Frogger
Wave 28 1x Crash Bandicoot
Wave 29 1x Crash Bandicoot & 1x Sonic & 1x Knuckles
Advanced: Waves 30-39
Wave Enemies
Wave 30 1x Crash Bandicoot, 1x Sonic, 1x Knuckles, & 4x Frogger
Wave 31 1x Police Car
Wave 32 2x Police Car
Wave 33 2x Police Car & 4x Frogger
Wave 34 4x Police Car
Wave 35 1x Helicopter
Wave 36 1x Helicopter & 2x Police Cars
Wave 37 1x Donkey Kong
Wave 38 1x Donkey Kong & 1x Helicopter
Wave 39 1x Donkey Kong & 1x Helicopter & 2x Police Car
Dream: Waves 40-50
Wave Enemies
Wave 40 1x Donkey Kong, 1x Helicopter, & 4x Police Car
Wave 41 1x Lava Croft
Wave 42 1x Diablo
Wave 43 1x Raiden
Wave 44 1x Dark Raiden
Wave 45 1x Raiden & 1x Dark Raiden
Wave 46 1x Raiden, 1x Dark Raiden, 1x Diablo, & 1x Lava Croft
Wave 47 1x Link
Wave 48 1x Link & 1x Lava Croft
Wave 49 1x Link, 1x Lava Croft, 1x Diablo
Wave 50 1x Link, 1x Lava Croft, 1x Diablo, 1x Dark Raiden, & 1x Raiden


Error creating thumbnail: Unable to save thumbnail to destination
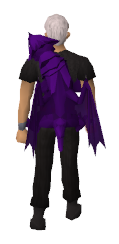
The infernal Cape is a tribrid cape. It is a reward for completing normal Arcade.

The player is required to sacrifice an Infernal Cape in order to attempt the Extreme Arcade.

Hover over image for type
Error creating thumbnail: Unable to save thumbnail to destination
 Attack bonus
Error creating thumbnail: Unable to save thumbnail to destination
+200 +200 +200 +200 +200
Error creating thumbnail: Unable to save thumbnail to destination
 Defence bonus
Error creating thumbnail: Unable to save thumbnail to destination
+500 +500 +500 +500 +500
Other bonuses Slot
Error creating thumbnail: Unable to save thumbnail to destination

Cape slot.png

+2,500 +2,500 +2,500 +0
Bonus Stats Item Class
Error creating thumbnail: Unable to save thumbnail to destination
N/A N/A 0% ?
Error creating thumbnail: Unable to save thumbnail to destination
5% 5% 5% N/A


Error creating thumbnail: Unable to save thumbnail to destination

To access the challenging Extreme Mode, players must sacrifice an Infernal Cape before commencing each run. The first 50 waves of the Extreme Arcade mirror those of the Regular Arcade, with the addition of five extra mobs or bosses at the end of this sequence.

Upon successful completion of the Extreme Arcade, players are rewarded with one of three capes: the Infernal Melee Cape, Infernal Range Cape, or Infernal Mage Cape. Importantly, the distribution of these capes is random, and player preference does not influence the outcome.

Players who collect all three cape styles have the opportunity to combine them, creating the Tribrid Infernal Cape.

In addition to capes, players receive tokens as a reward for conquering the Extreme Mode. The quantity of tokens granted depends on the player's donated rank, following this formula:

Regular-Extreme: 3,300 Tokens

Sponsor: 4,060 Tokens

Executive: 4,800 Tokens

Platinum: 6,275 Tokens

In the unfortunate event of a player's death before completing the Extreme Arcade, token rewards align with the same formula as those in the regular mode, ensuring fairness and consistency in the reward system.

Gear

Players should equip Magic or Ranged gear from Mid-Game Gear or better. It is recommended to use an Area of Effect (AoE) weapon to efficiently eliminate multiple monsters at once. Additionally, a pet that provides healing and prayer restoration, as detailed in the Pet section, should be utilized.

Poison Mechanic

A poison gas mechanic is in place that slowly drains the player's hitpoints if they remain stationary for too long. To prevent this, players must regularly move within the area. If affected by the gas, simply moving will halt its effects.

Clearing Waves

Wave section does not matter in how they are cleared. Waves do get more difficult as they progress, however the method of completion does not change unless the player is or is not using Area of Effect (AoE).

No AoE

When clearing waves without an AoE weapon, positioning in a corner of the room while ensuring regular movement to avoid the poison gas is advisable. NPCs should be attacked as they approach. Without AoE, it may be necessary to carry some food items such as Rainbow Fish or Special Bandages from Dreamland. It is strongly recommended to have healing and prayer restoration gear equipped.

AoE

If the player possesses an AoE weapon, Regular Mode Arcade becomes much simpler. The option to stand in a corner or in the middle of the room is available. As waves of monsters approach, waiting for them to group up before attacking them collectively is advisable. Carrying Special Bandages from Dreamland in case hitpoints become low is recommended. Additionally, ensuring the presence of healing and prayer restoring gear is essential for added sustain.

Beginner: Waves 1-19
Wave Enemies
Wave 1 5x Luigi
Wave 2 5x Mario
Wave 3 5x luigi & 5x Mario
Wave 4 5x Pikachu
Wave 5 5x Charmander
Wave 6 5x Charmander & 5x Pikachu
Wave 7 2x Pacman Ghost
Wave 8 4x Pacman Ghost
Wave 9 1x Pacman
Wave 10 1x Pacman & 2x Pacman Ghost
Wave 11 1x Pacman & 4x Pacman Ghost
Wave 12 1x Tetris Piece
Wave 13 2x Tetris Piece
Wave 14 4x Tetris Piece
Wave 15 1x Space Invader
Wave 16 2x Space Invader
Wave 17 4x Space Invader
Wave 18 1x Pacman, 4x Pacman Ghost, & 4x Space Invader
Wave 19 4x Tetris Pieces & 4x Space Invader
Experienced: Waves 20-29
Wave Enemies
Wave 20 1x Pacman, 4x Pacman Ghost, 4x Space Invaders, & 4x Tetris Pieces
Wave 21 1x Sonic
Wave 22 1x Knuckles
Wave 23 1x Sonic and 1x Knuckles
Wave 24 4x Sonic & 4x Knuckles
Wave 25 1x Frogger
Wave 26 2x Frogger
Wave 27 4x Frogger
Wave 28 1x Crash Bandicoot
Wave 29 1x Crash Bandicoot & 1x Sonic & 1x Knuckles
Advanced: Waves 30-39
Wave Enemies
Wave 30 1x Crash Bandicoot, 1x Sonic, 1x Knuckles, & 4x Frogger
Wave 31 1x Police Car
Wave 32 2x Police Car
Wave 33 2x Police Car & 4x Frogger
Wave 34 4x Police Car
Wave 35 1x Helicopter
Wave 36 1x Helicopter & 2x Police Cars
Wave 37 1x Donkey Kong
Wave 38 1x Donkey Kong & 1x Helicopter
Wave 39 1x Donkey Kong & 1x Helicopter & 2x Police Car
Dream: Waves 40-50
Wave Enemies
Wave 40 1x Donkey Kong, 1x Helicopter, & 4x Police Car
Wave 41 1x Lava Croft
Wave 42 1x Diablo
Wave 43 1x Raiden
Wave 44 1x Dark Raiden
Wave 45 1x Raiden & 1x Dark Raiden
Wave 46 1x Raiden, 1x Dark Raiden, 1x Diablo, & 1x Lava Croft
Wave 47 1x Link
Wave 48 1x Link & 1x Lava Croft
Wave 49 1x Link, 1x Lava Croft, 1x Diablo
Wave 50 1x Link, 1x Lava Croft, 1x Diablo, 1x Dark Raiden, & 1x Raiden
Extreme: Waves 51-55
Wave Enemies
Wave 51 2x Links

1x Lara Croft

Wave 52 2x Lara Croft

4x Diablo

Wave 53 2x Link

2x Lara Croft

Wave 54 3x Link
Wave 55 2x Link

2x Lara Croft

2x Diablo

2x Raiden

2x Dark Raiden


Error creating thumbnail: Unable to save thumbnail to destination

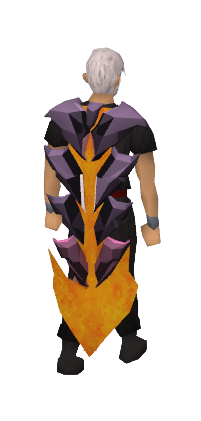
The Infernal Melee Cape is a reward from the Extreme Arcade.

The player will receive one of 3 capes from completing the Extreme Arcade. This is random. The other capes are the Infernal Range Cape and the Infernal Mage Cape.

To enter the Extreme Arcade, an Infernal Cape must be sacrificed.


Hover over image for type
Error creating thumbnail: Unable to save thumbnail to destination
 Attack bonus
Error creating thumbnail: Unable to save thumbnail to destination
+200 +200 +200 +200 +200
Error creating thumbnail: Unable to save thumbnail to destination
 Defence bonus
Error creating thumbnail: Unable to save thumbnail to destination
+500 +500 +500 +500 +500
Other bonuses Slot
Error creating thumbnail: Unable to save thumbnail to destination

Cape slot.png

+5,000 +0 +0 +0
Bonus Stats Item Class
Error creating thumbnail: Unable to save thumbnail to destination
N/A N/A 0% 0%
Error creating thumbnail: Unable to save thumbnail to destination
5% 0% 0% N/A


Item Upgrade

Upgrade Materials
Upgrade Location Chance
Inventory 100%
Item Quantity
Infernal Melee Cape.png
Infernal Melee Cape 1
Error creating thumbnail: Unable to save thumbnail to destination
Infernal Mage Cape 1
Error creating thumbnail: Unable to save thumbnail to destination
Infernal Range Cape 1
Results in
Tribrid Infernal Cape.png
Tribrid Infernal Cape


Error creating thumbnail: Unable to save thumbnail to destination

Hell Mode represents the third level within the Arcade System, offering a challenging gameplay experience. To access this mode, players must sacrifice a Tribrid Infernal Cape earned from the Extreme Arcade.

This mode consists of 55 waves that players must navigate.

As players progress through Hell Mode, they are rewarded with Arcade Tokens. The player will also receive a Tribrid Inferno Cape for completing the Hell Arcade. This is needed to complete the Extreme Hell Arcade.

Upon completing Hell Mode, the player will receive 1 of 3 Dragon Capes. All 3 of these capes can be combined at the Draconic Forge to create the Elite Dragon Cape This reward is random and the player can receive more than one of the same.

Error creating thumbnail: Unable to save thumbnail to destination
This Article Is Currently Under Construction.

The articles content is missing, incomplete or not fully accurate. Please refrain from editing it in order to avoid edit conflicts.


Gear

Players should equip Magic or Ranged gear from Late-Mid Game. It is recommended to use an Area of Effect (AoE) weapon to efficiently eliminate multiple monsters at once. Additionally, a pet that provides healing and prayer restoration, as detailed in the Pet section, should be utilized.

Poison Mechanic

A poison gas mechanic is in place that slowly drains the player's hitpoints if they remain stationary for too long. To prevent this, players must regularly move within the area. If affected by the gas, simply moving will halt its effects.

Clearing Waves

Wave section does not matter in how they are cleared. Waves do get more difficult as they progress, however the method of completion does not change unless the player is or is not using Area of Effect (AoE).

No AoE

When clearing waves without an AoE weapon, positioning in a corner of the room while ensuring regular movement to avoid the poison gas is advisable. NPCs should be attacked as they approach. Without AoE, it may be necessary to carry some food items such as Rainbow Fish or Special Bandages from Dreamland. It is strongly recommended to have healing and prayer restoration gear equipped.

AoE

If the player possesses an AoE weapon, Regular Mode Arcade becomes much simpler. The option to stand in a corner or in the middle of the room is available. As waves of monsters approach, waiting for them to group up before attacking them collectively is advisable. Carrying Special Bandages from Dreamland in case hitpoints become low is recommended. Additionally, ensuring the presence of healing and prayer restoring gear is essential for added sustain.


Error creating thumbnail: Unable to save thumbnail to destination
This Article Is Currently Under Construction.

The articles content is missing, incomplete or not fully accurate. Please refrain from editing it in order to avoid edit conflicts.


After successful completion of the Hell Arcade, the player will receive 1 of 3 Dragon Capes at random.

After recieving all 3, the player can craft the Elite Dragon Cape at the Draconic Forge.


Error creating thumbnail: Unable to save thumbnail to destination

The Dragon Cape (Magic) is a reward from the Hell Arcade. It can be upgraded in to an Elite Dragon Cape by combining it with the Dragon Cape (Melee), Dragon Cape (Ranged), and 250,000 Arcade Token at the Draconic Forge.

Hover over image for type
Error creating thumbnail: Unable to save thumbnail to destination
 Attack bonus
Error creating thumbnail: Unable to save thumbnail to destination
+0 +0 +0 +0 +0
Error creating thumbnail: Unable to save thumbnail to destination
 Defence bonus
Error creating thumbnail: Unable to save thumbnail to destination
+0 +0 +0 +0 +0
Other bonuses Slot
Error creating thumbnail: Unable to save thumbnail to destination

Cape slot.png

+0 +0 +10,000 +0
Bonus Stats Item Class
Error creating thumbnail: Unable to save thumbnail to destination
N/A N/A 0% 0%
Error creating thumbnail: Unable to save thumbnail to destination
0% 0% 15% N/A


Upgrading

Upgrade Materials
Upgrade Location Chance
Draconic Forge 31.5%
Item Quantity
Error creating thumbnail: Unable to save thumbnail to destination
Dragon Cape (Melee) 1
Error creating thumbnail: Unable to save thumbnail to destination
Dragon Cape (Magic) 1
Error creating thumbnail: Unable to save thumbnail to destination
Dragon Cape (Ranged) 1
Error creating thumbnail: Unable to save thumbnail to destination
Arcade Token 250,000
Results in
Error creating thumbnail: Unable to save thumbnail to destination
Elite Dragon Cape


Error creating thumbnail: Unable to save thumbnail to destination

The Extreme Hell Arcade represents the highest level of challenge within the Arcade System, targeting experienced players seeking an end-game test of their PvM skills.

To gain access to the Extreme Hell Arcade, players must sacrifice either: a Elite Dragon Cape and 100,000 Arcade Tokens or an Arcade Ticket.

The following section provides comprehensive information about the Extreme Hell Arcade, including insights into the mechanics of each monster and wave.

Notably, the first player to successfully complete the Extreme Hell Arcade was Sperm Dibber.

Street Fighter Set
Monster Mechanic Description
Ryu Hadouken Sends an Energy Ball in a straight line till the end of the map, If a player touches the energy ball, you will take 50 damage.
Ken Senpukyaku Ken will do a Spin kick animation in a straight line of 4 Tiles, 3 x 3 area. If a player is in the area of the spin, your are dealt 30 damage per tick.
Chun Li Lightning Kicks Chun Li will do a fury of kicks Infront of her. If a player is standing Infront of her, take 30 damage per tick.
Guile Knee Bazooka Guile will do a quick surge forward with his knee across 4 Tiles.

If you are standing in the area of the surge, you will receive 70 damage.

Cammy Delta Through Cammy will do a quick surge forward with a corkscrew kick, surging forward 6 Tiles. If the player is in range, they will be dealt 70 damage.
M. Bison Psycho Reflect M. Bison will reflect all damage done towards it.

Each HIT splat the NPC receives = 5 damage reflected towards the player. This will stack to do MASSIVE damage.

E. Honda Flying Sumo Press E. Honda will jump towards player dealing damage in a 3 x 3 area. If the player is in the 3 x 3 area, the player will receive 75 damage.
Super Smash Bros Set
Monster Mechanic Description
Meta Knight Mach Tornado Meta Knight will send 3 Tornados in a CONE shape toward the player. If player gets hit by the tornado, player will receive 10 to 40 damage.
King Dedede Super Dedede Jump King Dedede will jump upwards on the same tile damaging in a 4 x 4 area. Players in the area will be stunned for 3 seconds and Prayer overheads will be removed.
Samus Charged Shot Samus will charge up a projectile and fire a cannon shot towards the player, this projectile is not tracking and it will fire in a straight line and can be avoided. If player is hit, they will be hit for 80 damage.
Link Remote Bomb Link will randomly walk around the map and plant remote mines. The mines will remain on the ground for 15 seconds and will explode thereafter. Upon stepping on the mine, the player will take 65 damage.
Falco Fire Bird Falco will summon a phoenix and burn the ground in a 9 x 9 area. The Ground will burn for 15 seconds. If the player is standing in the fire, the player will receive 10 damage every tick.
Captain Falcon Falcon Punch Captain Falcon will channel a punch for 5 seconds, during this 5 seconds phase, the player may dodge it. If the player does not dodge the attack; they are dealt 99 damage.
Fox Fire Fox Fox will set himself ablaze and charge in a straight line for 8 tiles. If the player is hit or stands in the fire trail, they will be dealt 15 damage per tick.
Mewtwo 1. Teleportation Mewtwo will teleport the player Infront of Mewtwo. After 4 ticks, if the player does not move away from that specific tile, player will be dealt for 150 damage.
2. Psystrike Mewtwo will knock back the player 3 tiles and stun the player for 3 seconds. This move can be avoided by hiding behind the pillars if they are still up. On Channeling, the player will receive an alert "Pesky humans Die" and the player will be dealt 0 - 75 damage.
Mortal Kombat Set
Monster Mechanic Description
Scorpion Get Over Here Scorpion will pull the player towards them, stunning them for 1 second and dealing 25 damage.
Sub-Zero (Bender) Freeze Sub-Zero will freeze the player on the same tile and prevent you from healing for 5 seconds. Rainbow fish will only heal for 10 hp during the duration of the freeze.
Goro Ground Slam Goro will do a Ground slam of 3 x 3 Area dealing 0 - 30 damage and stunning the player for 2 ticks within the area.
Kung Lao Teleport Kung Lao will dive underground and pop out Infront of the player, dealing 10-50 damage with an uppercut.
Sonya Blade Flash Blind Sonya will flashbang the player, making the screen fade to black for 2 seconds.
Heartless Summon Bats Quan Chi will summon 1 bat toward the player's last location. Upon reaching the location the bat will explode in a 3 x 3 area dealing 20 - 55 damage.
Kabal Speed dash Kabal will dash around the map randomly, while dashing; he cannot be targetted for 5 seconds.
Shao Kahn 1. Soul Steal Shao Kahn will drain the players stats overtime for 5 seconds at a rate of 10 stats per second. This move cannot be avoided and the stats will be restored after 30 seconds.
2. Ground Smash Shao Khan will jump up and smash the ground giving a quake effect. If the player is not behind a Pillar, their weapon is unequipped and dealt 75 damage.
House of the Dead Set
Monster Mechanic Description
All Monsters in this set have the same Mechanics. They will infect the player when within a 3 x 3 area of themselves, draining your stats for 1 stat every 4 ticks. All damage done toward the Pillars are doubled. On Death, they will explode in a 9 x 9 area dealing 35 damage.
Sam Infect and Explode As mentioned above
Neil Infect and Explode As mentioned above
Cyril Infect and Explode As mentioned above
Kageo Infect and Explode As mentioned above
Bourbon Infect and Explode As mentioned above
Ebitan A Infect and Explode As mentioned above
Ebitan B Infect and Explode As mentioned above
Kage Infect and Explode As mentioned above
Metal Slug Set
Monster Mechanic Description
Marco Rossi Grenade Marco will throw a grenade at the player, on impact it will explode in a 9 x 9 area dealing 0 - 40 damage.
Allen O'Neil Fire fire fire Allen will chain fire his minigun dealing damage in a straight 5 tile line. If the player is in range, they are dealt 15 damage per tick.
Allen Jr Fire Fire fire away Allen Jr will chain fire his minigun dealing damage in a straight 3 tile line. If the player is in range, they are dealt 30 damage per tick.
RootMars Slice and Dice RootMars will claw in a cone dealing 0 - 65 damage.
Avatar of Evil Shadow Clones The Avatar of Evil will spawn between 2 - 5 monsters and teleport to another location. It will then drive into the ground and spawn another 2 - 5 clones with less HP. The Avatar is invulnerable until all monsters have been killed.
Invader King Savage Roar The Invader King will Roar, Fearing the player and causing them to run in Panic. The closer you are to the Invader King, the further you are locked in Fear. You are also dealt 0 - 25 damage.
Unknown Alien Creep Spawn The Alien will spawn a pool of Creep, which can be destroyed. The pool will spawn Lesser Aliens that will attack the player until killed.
Ptolemaios 1. Laser Fireworks Ptolemaios will spawn random lasers will be beamed across the map dealing 0 - 30 damage to the player.
2. Ball of Energy Ptolemaios will be surrounded by rotating Energy balls that will damage the player for 10 damage. This balls will last for 15 seconds, and will then be launched at the player. If the player does not move away, the player will be instantly killed.
TzKal Zuk (Final Wave)
Monster Mechanic Description
Tzkal Zuk
1. The Floor is LAVA The floor will be randomly filled with Lava, with only a few spaces left to stand. If the player is standing on lava, they will receive 5 damage every 2 ticks.
2. Slash Zuk will swing his blade in an 180 angle. If the player is within range, they will receive 0 - 70 damage.
3. Summon Healers At 50% HP, Zuk will summon Rangers to heal him for 250k hp per hitsplat received. The player must draw the aggro to stop healing. The healers will hit between 0 - 25 damage on the player. This is a one time Mechanic.
4. Quake Slam Zuk will slam the ground dealing 10 - 60 damage. The screen will shake for 5 seconds if the player is hit. This attack can be avoided by hiding behind the Pillars.
5. Fire Rain Zuk will Rain down fire across a random portion of the map dealing 15 - 35 damage.
NOTE: Zuk's Regular attacks will heal him for 2500 HP x damage dealt.

Street Fighter Set
Wave Monsters
Wave 1 2x Ryu
Wave 2 2x Ryu, 1x Chun Li
Wave 3 2x Chun Li, 1x Ken
Wave 4 2x Ken, 1x M. Bison
Wave 5 1x Cammy, 1x Guile
Wave 6 2x Ryu, 2x Chun Li, 2x Ken, 2x M. Bison
Wave 7 2x E. Honda, 2x Cammy, 2x Guile
Wave 8 4x Ryu, 4x Chun Li, 4x Ken
Wave 9 4x Cammy, 4x Guile
Wave 10 1x Akuma
Super Smash Bros Set
Wave Monsters
Wave 11 2x Meta Knight
Wave 12 2x King Dedede
Wave 13 3x Meta Knight, 3x King Dedede
Wave 14 4x Samus, 2x Link
Wave 15 2x Falco, 2x Fox
Wave 16 1x Captain Falcon, 2x Falco, 2x Fox
Wave 17 4x Meta Knight, 4x King Dedede, 4x Link
Wave 18 4x Captain Falcon, 4x Falco, 4x Fox
Wave 19 6x Samus, 6x Meta Knight
Wave 20 1x Mewtwo
Mortal Kombat Set
Wave Monsters
Wave 21 2x Scorpion
Wave 22 2x Sub-Zero, 2x Scorpion
Wave 23 4x Goro
Wave 24 3x Kung Lao, 1x Kabal
Wave 25 3x Sonya Blade, 3x Johnny Cage
Wave 26 6x Scorpion
Wave 27 6x Goro
Wave 28 3x Sonya Blade, 3x Johnny Cage, 3x Sub-Zero
Wave 29 4x Kabal, 2x Sub-Zero
Wave 30 1x Shao Kahn
House of the Dead Set
Wave Monsters
Wave 31 2x Sam
Wave 32 2x Sam, 2x Neil
Wave 33 4x Cyril
Wave 34 3x Kageo, 1x Bourbon
Wave 35 3x Ebitan A, 3x Ebitan B
Wave 36 6x Sam
Wave 37 6x Bourbon
Wave 38 3x Kageo, 3x Cyril, 3x Neil
Wave 39 4x Bourbon, 2x Kageo
Wave 40 1x Kage
Metal Slug Set
Wave Monsters
Wave 41 2x Marco Rossi
Wave 42 2x Allen O'Neil, 2x Allen Jr
Wave 43 4x Marco Rossi
Wave 44 3x Allen Jr, 1x Allen O'Neil
Wave 45 3x RootMars, 3x Avatar of Evil
Wave 46 6x Invader King
Wave 47 6x Unknown Alien
Wave 48 3x RootMars, 3x Invader King, 3x Unknown Alien
Wave 49 4x Marco Rossi, 2x Invader King
Wave 50 1x Ptolemaios
Tzkal Zuk
Wave Monsters
Wave 51 1x Tzkal Zuk

Item Rewards
1x Arcade Champion Coin The Arcade Champion Coin can be used on the Extreme Hell Gachapon Machine. This machine will reward the player with various loot.
1x Arcade Ticket The Arcade Ticket will give you a Free Entry to the Extreme Hell Arcade Mode.
500,000x Arcade Token The Arcade Token is an untradeable form of Currency used in the Arcade Reward Shop.
Arcade Champion Coin Loot Table
Error creating thumbnail: Unable to save thumbnail to destination
Platinum Coin 1−5 1/5
Error creating thumbnail: Unable to save thumbnail to destination
Little Zuk Pet 1 1/5
Error creating thumbnail: Unable to save thumbnail to destination
Tribrid Inferno Cape 1 1/5
Error creating thumbnail: Unable to save thumbnail to destination
Obsidian Blade 1 1/30
Error creating thumbnail: Unable to save thumbnail to destination
Magma Core 1 1/30
Error creating thumbnail: Unable to save thumbnail to destination
Ancient Hilt 1 1/30
Error creating thumbnail: Unable to save thumbnail to destination
Zekkil Gauntlet 1 1/35
Error creating thumbnail: Unable to save thumbnail to destination
Zodiac Coin (Scorpio) 1 1/20

Error creating thumbnail: Unable to save thumbnail to destination

The Avengers Mode

The Avengers Mode is one of the newest and most popular arcade modes. In this raid, the player will face characters from the Avengers Universe. They each have unique abilities, making this a true challenge.


Total Tokens After Each Wave
Note: Tokens are affected by Donator Rank and Wednesday's Arcade Event. The following values in the drop don below are the total token rewards, they do not add up cumulatively.
Waves
Wave 1: Black Panther Use soulsplit for this wave or if you have Sponsor+ prayer it's better to use Fury or Cyclone for more damage.
Wave 2: Drax the Destroyer Same strategy as Black Panther, but when Drax the Destroyer says "argggghhhh" your prayer will be drained to 0 so it's recommended to bring a super restore potion, Captain America Shield, or a pet that restores prayer such as the Helicopter Pet.
Wave 3: Vision Same strategy as Black Panther.
Wave 4: Dr Strange Same stategy as Black Panther but sometimes he will teleport under you.
Wave 5: Ant Man When Ant Man says "Haha" he will turn small and any damage that you deal to him will heal him. He also will say "Haha" again when he returns to normal size and then you can deal damage.
Wave 6: Captain America


Same strategy as Black Panther, but he does have soulsplit so watch your prayer points and bring super restore potions,Captain America Shield, or a pet that restores prayer such as the Helicopter Pet or Diablo Jr incase.
Wave 7: Iron Man


Note: Iron Man is immune to Range and Melee

If you are using range or melee, then bring a switch to mage and continue killing, swap back to range or melee after. If you are only using Mage then you are fine.

Wave 8: Spiderman


Same strategy as Black Panther, but can freeze you for 3 seconds, and can do a lot of damage with his combos so be aware of your HP.
Wave 9: Hulk


Do not stand right next to his spawn because when he says "SMASH" he will deal 75 damage so be aware of your HP. Using Soulsplit, or another form of healing will make this boss much easier.
Wave 10: Thanos and Ultron


For this wave, start next to Thanos and attack him. Be aware that he switches his protection prayer randomly, so be ready to switch styles. Ultron will walk over and, if you have an AOE weapon, then you will be able to heal from the hits on Ultron. Watch your HP because Thanos can create combos with his hits and poison.
Token Reward by Wave
Wave Reward
Wave 1 20 tokens
Wave 2 40 tokens
Wave 3 60 tokens
Wave 4 80 tokens
Wave 5 100 tokens
Wave 6 125 tokens
Wave 7 150 tokens
Wave 8 250 tokens
Wave 9 350 tokens
Wave 10 500 tokens


Error creating thumbnail: Unable to save thumbnail to destination

The DC Raid can be found in the Game's Room (::arcade) along with all of the other arcade modes.
The raid consists of 5 waves in which you fight Batman, The Joker, Wonder Woman, Superman, and Flash.

Wave Breakdown
Wave 1: Batman HP: 1,500,000 , Attack Style: Range, Ability: A very rare chance Batman will stun you with his batterang for 3 seconds
Wave 2: The Joker HP: 1,600,000, Attack Style: Range, Ability: Laughing Gas : Joker will poison the area around your player
Wave 3: Wonder Woman HP: 1,700,000, Attack Style: Melee ,Ability: Taunt, Wonder Woman will pull you towards her and stun you for a few seconds.
Wave 4: Superman HP: 1,800,000, Attack Style: Melee,Ability:Super Strength, just hits..really really...hard. Superman has a cyanide punch that does 15 damage per tick
Wave 5: Flash HP: 3,000,000, Attack Style: Melee, Ability: Super Speed: Randomly runs around the room dodging your attacks

Suggested Gear

Recommended Mage Gear
Equipment

Gear

Mid-Gear End-Game Gear
Aura Auras.png Mystic Lvl 3-4 Kaiser Aura.png Kaiser Aura
Pocket Stone of Power.png Stone of Power Book of Heaven.png Book of Heaven Book of Hell.png Book of Hell
Necklace
Error creating thumbnail: Unable to save thumbnail to destination
Trix Amulet (i)
Kaiser Necklace.png Kaiser Necklace
Helmet
Error creating thumbnail: Unable to save thumbnail to destination
Space Virtus Helm
Artic Guardian Hat.png Artic Guardian Hat
Body Space Virtus Body.png Space Virtus Body Artic Guardian Robe Top.png Artic Guardian Robe Top
Legs Space Virtus Legs.png Space Virtus Legs Artic Guardian Robe Bottoms.png Artic Guardian Robe Bottoms
Belt Sigil of Power.png Sigil of Power
Mainhand Sanguinesti Staff (i).png Sanguinesti Staff (i) Staff of Awakening.png Staff of Awakening
Offhand Ancient Wyvern Shield.png Ancient Wyvern Shield SharkFist Mage Offhand.png SharkFist Mage Offhand
Cape Tribrid Infernal Cape.png Tribrid Infernal Cape Demon Cape.png Demon Cape
Arrow Thepowerstone.png The Power Stone Elemental Ward Fury.png Elemental Ward Fury
Boots
Error creating thumbnail: Unable to save thumbnail to destination
Ultimate Mage Boots
Draconic Magic Boots.png Draconic Mage Boots
Gloves Ultimate Mage Gloves.png Ultimate Mage Gloves Ultimate Cerberus Gloves.png Ultimate Cerberus Gloves
Ring Brimstone Ring Equipped.png Brimstone Ring Kaiser Ring.png Kaiser Ring
Pet(s) File:Thanos Pet Icon.png Thanos Pet Shadow Drake.png Shadow Drake
Recommended Melee Gear
Equipment Mid-Gear End-Game Gear
Aura Auras.png Berserker Lvl 3-4 Kaiser Aura.png Kaiser Aura
Pocket Stone of Power.png Stone of Power
Book of Heaven.png Book of Heaven Book of Hell.png Book of Hell
Necklace
Error creating thumbnail: Unable to save thumbnail to destination
Trix Amulet (i)
Kaiser Necklace.png Kaiser Necklace
Helmet
Error creating thumbnail: Unable to save thumbnail to destination
Justiciar faceguard
Silent Death Helm
Body Justiciar chestguard.png Justiciar chestguard Silent Death Body
Legs
Error creating thumbnail: Unable to save thumbnail to destination
Justiciar legguards
Silent Death Legs
Belt Sigil of Power.png Sigil of Power
Mainhand Arrav Sword.png Arrav Sword Slayer Master Hammer (i).png Slayer Master Hammer (i)
Offhand Arrav Shield.png Arrav Shield SharkFist Melee Offhand.png SharkFist Melee Offhand
Cape Tribrid Infernal Cape.png Tribrid Infernal Cape Demon Cape.png Demon Cape
Arrow The Power Fist.png The Power Fist Elemental Ward Fury.png Elemental Ward Fury
Boots Ultimate Melee Boots.png Ultimate Melee Boots Draconic Melee Boots.png Draconic Melee Boots
Gloves Ultimate Brawler Gloves.png Ultimate Brawler Gloves Ultimate Cerberus Gloves.png Ultimate Cerberus Gloves
Ring Brimstone Ring Equipped.png Brimstone Ring Kaiser Ring.png Kaiser Ring
Pet(s) File:Thanos Pet Icon.png Thanos Pet Shadow Drake.png Shadow Drake
Recommended Range Gear
Equipment Mid-Gear End-Game Gear
Aura Auras.png Augury Lvl 3-4 Kaiser Aura.png Kaiser Aura
Pocket Stone of Power.png Stone of Power
Book of Heaven.png Book of Heaven Book of Hell.png Book of Hell
Necklace
Error creating thumbnail: Unable to save thumbnail to destination
Trix Amulet (i)
Kaiser Necklace.png Kaiser Necklace
Helmet Space Pernix Mask.png Space Pernix Hat
Error creating thumbnail: Unable to save thumbnail to destination
Doomblade Cowl
Belt Sigil of Power.png Sigil of Power
Body Space Pernix Body.png Space Pernix Body Doomblade Spaulders.png Doomblade Spaulders
Legs Space Pernix Legs.png Space Pernix Legs
Error creating thumbnail: Unable to save thumbnail to destination
Doomblade Pants
Mainhand Poison Lotus Crossbow.png Poison Lotus Crossbow Ultimate Raksha Crossbow.png Ultimate Raksha Crossbow
Offhand Poison Lotus Crossbow Offhand.png Poison Lotus Offhand Crossbow SharkFist Range Offhand.png SharkFist Range Offhand
Cape Tribrid Infernal Cape.png Tribrid Infernal Cape Demon Cape.png Demon Cape
Arrow The Power Arrow.png The Power Arrow Elemental Ward Fury.png Elemental Ward Fury
Boots
Error creating thumbnail: Unable to save thumbnail to destination
Ultimate Range Boots
Draconic Range Boots.png Draconic Range Boots
Gloves Ultimate Ranger Gloves.png Ultimate Ranger Gloves Ultimate Cerberus Gloves.png Ultimate Cerberus Gloves
Ring Brimstone Ring Equipped.png Brimstone Ring Kaiser Ring.png Kaiser Ring
Pet(s) File:Thanos Pet Icon.png Thanos Pet Shadow Drake.png Shadow Drake

Poison Mechanic

The poison mechanic is active for all waves. If the player stands still for too long, they will be hit with rapid poison damage, dealing 5 damage each hit until the player moves at least 1 tile.

Wave 1

Upon entering the raid, it will take a few seconds for Batman to spawn in. It is best to place yourself in the center of the arena to allow you enough room to move around to dodge incoming attacks.

Once Batman has spawned, begin attacking him while being mindful of his stun ability. If you are stunned, keep an eye on your health and rapidly click Batman to begin attacking again as soon as possible. After killing Batman, Wave 2 will begin.

Wave 2

This Wave brings the Joker. He has a chance to spawn a poison cloud on you at the very start of the wave. This cloud hits rapid poison 10s. To avoid this, simply step outside of the cloud and heal. This can happen multiple times during the fight.
Joker Cloud.png
It can be beneficial to use Range/Mage and stay on the move. This is a very effective strategy for the final waves, as they all use melee.

Wave 3

Moving into wave 3, this mode is going to start to get harder.
Wonder Woman can be easily fought using a similar method to the Joker by staying on the move while using Range/Mage gear.

Wonder Woman's ability allows her to pull you in and stun you for several seconds, even if you are moving. Once you are pulled in and stunned, click away from Wonder Woman until you are able to move again. You aren't able to use any consumables while stunned, so as soon as you can move, eat if necessary and continue damaging Wonder Woman.

Wave 4

For the second-to-last wave, you will be fighting Superman. Once again, moving around the arena is the best method for avoiding damage. While you may be able to tank hits from the others, avoiding being hit by Superman is extremely important. Aside from his ability, he deals very high melee damage, and is capable of ending a run without needing his ability.

The only mechanic to take note of aside from the high melee damage is the random poison hit. Superman can hit a 15 damage poison hit that temporarily poisons you. This effect can be instantly removed through the use of Anti-poison potions made with the Herblore skill.

Wave 5

Now, the final wave against The Flash. Similar to Superman, he is capable of dealing very high melee damage, so keeping your distance is highly recommended.

Flash's ability allows him to quickly dash around the arena, avoiding any damage dealt to him while also dealing rapid, high damage hits. To combat this, spam eat while Flash is dashing around. As soon as he stops dashing, you are able to damage him.

After defeating The Flash, you will be moved outside of the Arcade and be given your rewards.

Error creating thumbnail: Unable to save thumbnail to destination

Rewards

Collection Log Rewards
Image Item Quantity
Error creating thumbnail: Unable to save thumbnail to destination
Platinum Coin 15
Error creating thumbnail: Unable to save thumbnail to destination
Minesweeper Box 15
Error creating thumbnail: Unable to save thumbnail to destination
Antique Lamp 250


Image Item Quantity
Error creating thumbnail: Unable to save thumbnail to destination
Platinum Coin 20
Error creating thumbnail: Unable to save thumbnail to destination
Elite Membership Scroll 1


Image Item Quantity
Error creating thumbnail: Unable to save thumbnail to destination
Platinum Coin 30
Error creating thumbnail: Unable to save thumbnail to destination
Treasure Hunter Chest Key 5


Image Item Quantity
Error creating thumbnail: Unable to save thumbnail to destination
Platinum Coin 30
Error creating thumbnail: Unable to save thumbnail to destination
Treasure Hunter Chest Key 10


Image Item Quantity
Error creating thumbnail: Unable to save thumbnail to destination
Platinum Coin 30
Error creating thumbnail: Unable to save thumbnail to destination
Treasure Hunter Chest Key 15


Image Item Quantity
Error creating thumbnail: Unable to save thumbnail to destination
Platinum Coin 30
Error creating thumbnail: Unable to save thumbnail to destination
Treasure Hunter Chest Key 20


Possible Loot
Error creating thumbnail: Unable to save thumbnail to destination
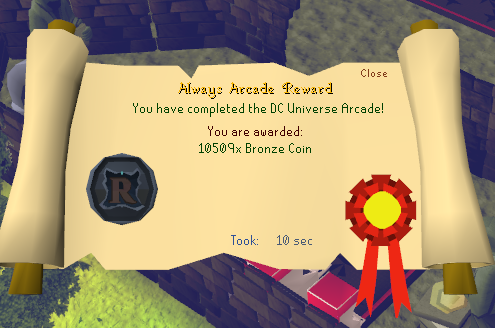
Bronze Coin 10K−15K Always
Error creating thumbnail: Unable to save thumbnail to destination
DC Universe Box 1 1 in 35
Error creating thumbnail: Unable to save thumbnail to destination
DC Universe Box 2 1 in 65
Error creating thumbnail: Unable to save thumbnail to destination
Bronze Coin 20K−30K 1 in 100
Error creating thumbnail: Unable to save thumbnail to destination
Arcade Token 1 1 in 100
Error creating thumbnail: Unable to save thumbnail to destination
Rainbow Fish 10 1 in 100
Error creating thumbnail: Unable to save thumbnail to destination
DC Universe Box 3 1 in 125
Error creating thumbnail: Unable to save thumbnail to destination
DC Universe Box 4 1 in 200
Error creating thumbnail: Unable to save thumbnail to destination
Bronze Coin 35K−50K 1 in 300
Error creating thumbnail: Unable to save thumbnail to destination
Arcade Token 2 1 in 300
Error creating thumbnail: Unable to save thumbnail to destination
DC Universe Box 5 1 in 300
Error creating thumbnail: Unable to save thumbnail to destination
Batman Mask 1 1 in 750
Error creating thumbnail: Unable to save thumbnail to destination
Batman Body 1 1 in 750
Error creating thumbnail: Unable to save thumbnail to destination
Batman Legs 1 1 in 750
Error creating thumbnail: Unable to save thumbnail to destination
Superman Helmet 1 1 in 750
Error creating thumbnail: Unable to save thumbnail to destination
Superman Body 1 1 in 750
Error creating thumbnail: Unable to save thumbnail to destination
Superman Legs 1 1 in 750
Error creating thumbnail: Unable to save thumbnail to destination
Flash Helmet 1 1 in 750
Error creating thumbnail: Unable to save thumbnail to destination
Flash Body 1 1 in 750
Error creating thumbnail: Unable to save thumbnail to destination
Flash Legs 1 1 in 750
Error creating thumbnail: Unable to save thumbnail to destination
Arcade Token 1 1 in 750
Error creating thumbnail: Unable to save thumbnail to destination
DC Universe Box 10 1 in 750
Error creating thumbnail: Unable to save thumbnail to destination
Donator Tabs 3 1 in 750


Error creating thumbnail: Unable to save thumbnail to destination

The arcade's Endless Mode is one of, most challenging arcade mode's.


With new debuffs and rewards, this new mode is endlessly rewarding. The endless arcade mode contains enemies from both the regular/extreme modes as well as from the avengers arcade mode.


The first 55 waves of the endless mode are the same as the normal and extreme arcade modes.

New waves, effects, and rewards
Wave Reward
Wave 56 3x Links

3x Lara Croft

Wave 57

4x Diablo

Wave 58 3x Dark Raiden
Wave 59 3x Raiden
Wave 60 4x Lara Croft
Wave 61 4x Links
Wave 62

3 x Link 3 x Lara Croft 3 x Diablo 3 x Dark Raiden 3 x Raiden

Wave 63 4x Dark Raiden

4x Raiden

Wave 64 5x diablo

5x lara croft

Wave 65 6x Lara Croft

After this wave, healing items and soulsplit will only work every other hit, making them 50% as effective.

Wave 66 5x link
Wave 67 5x Dark Raiden

5x Raiden

Wave 68 5x Link

5x Lara Croft 5x Diablo 5x Dark Raiden 5x Raiden

Wave 69 7x lara croft
Wave 70

7x link

After this wave, rocks will begin to fall from the ceiling, dealing 20 damage if they land on you.

Wave 71 6x Raiden
Wave 72 8x link
Wave 73 5x Link

5x Lara Croft 5x Diablo

Wave 74 8x Lara Croft
Wave 75 1x Antman

1x Ironman 1x Black Panther

Reward: if wave 75 is passed, the player receives a Tribrid Infernal Cape and gains the ability to start endless mode at wave 50!

Wave 76 1x Ultron

1x Thanos

Wave 77 1x Ultron

1x Thanos 1x Raiden

Wave 78 9x Link
Wave 79 2x Antman

2x Ironman 2x Black Panther

Wave 80 2x Ultron

2x Thanos

After this wave, healing items and soulsplit will only work every fourth hit, making them 25% as effective.

Wave 81 10x Raiden
Wave 82 10x Link
Wave 83 6x Link

6x Lara Croft 6x Diablo

Wave 84 10x Lara Croft
Wave 85 2x Antman

2x Ironman 2x Black Panther

Wave 86 3x Ultron

3x Thanos

Wave 87 3x Ultron

3x Thanos 3x Raiden

Wave 88 10x Link
Wave 89 3x Antman

3x Ironman 3x Black Panther

Wave 90 4x Ultron

4x Thanos

After this wave, a poison effect takes hold dealing more damage with each wave.

Wave 91 10x Raiden
Wave 92 12x Link
Wave 93 7x Link

7x Lara Croft 7x Diablo

Wave 94 15x Lara Croft
Wave 95 5x Antman

5x Ironman 5x Black Panther

After this wave, explosions start to take place which can 1-hit the player.

Wave 96 5x Ultron

5x Thanos

Wave 97 6x Ultron

6x Thanos 6x Raiden

Wave 98 20x Link
Wave 99 10x Antman

10x Ironman 10x Black Panther

Wave 100 10x Ultron

10x Thanos

The first player to complete wave 100 received a mystery prize!

808Raptor was the first to finish wave 100 and claimed the prize of $1k store credit!


The Big 6!!

Mh kit barrows sets by atellum.gifCrypt
Tips
Each brother has his own burial mound and possesses a combat level of 115, except Ahrim the Blighted and Karil the Tainted, who both have a combat level of 98. To enter a mound, the player must stand on top of it and dig using a spade. Inside the tomb the Tomb's of the brother appear, simply clicking the tomb will wake them up to begin fighting them.

BarrowsBrother.png

Information
The Barrows brothers are very strong, each with high Defence levels and strong armour. Each brother has a set effect, which is the same as the corresponding armour set. Because of this, consideration should be given to the methods with and order in which the brothers are killed.
Error creating thumbnail: Unable to save thumbnail to destination


What you need
Range setup: Minigun / Golden Minigun with American pernix set, Blue Deathcape and Ring of Wealth (i).

Magic setup: Soulflare u with aqua spirit shield with inga armor set or Infernal Set a Spade (They only have 5000 health, any form of damage you can do, can be well affected but its noted that they pierce through armor and will hit you hard)

Getting there
To get to barrows use the Minigames Teleport and selecting "Barrows"
Error creating thumbnail: Unable to save thumbnail to destination
Inside The Crypt
Inside the barrows crypt there are NO Monsters inside just some puzzle you must answer before entering the door as shown
Error creating thumbnail: Unable to save thumbnail to destination
Entering the chest room
Error creating thumbnail: Unable to save thumbnail to destination
It's Barrows from the Crypt!

Once the player locates the operational door that leads to the Barrows Chest, he or she will have to solve a simple puzzle in order to open the door. Due to not having any monsters in the room it's a fast and easy process once you've gon the hand of it

Error creating thumbnail: Unable to save thumbnail to destination
This Article Is Currently Under Construction.

The articles content is missing, incomplete or not fully accurate. Please refrain from editing it in order to avoid edit conflicts.


View Table of Barrows pet rewards
A list of Barrows pets
Name
About
Image Missing Ahrim jr Has a 1 in 10 chance of hitting twice when using mage.
Image Missing Dharok jr Causes the players average damage dealt to be increased as they lose life points.
Image Missing Guthan jr Has the chance to heal the player.
Image Missing Karil jr Your hits reduce the bosses magic level.
Image Missing Torag jr 3x the special attack recovery time.
Image missing Verac jr Allows the player to have a chance to ignore the bosses armour.


Castle Wars:
Castle wars is an minigame released on 26th of May 2015.
How does Castle Wars work:
In the minigame there are two teams who have to battle against each other. You need at least four (4) players on each team to play the mini game.

The two teams are.

  • Saradomin Team (Blue Flag)
  • Zamorak Team (Red Flag)

In the minigame, there are three portals

  • Blue Portal = Saradomin team.
  • Red Portal = Zamorak team.
  • Green Portal = Guthix team | Team with fewer players.

In each castle, there are four (4) floors.

  • On the 1st floor of the castle are some tables. Each table contains items such as; Rocks, Pickaxe, Rope, Toolkit, Barricade, Poison of explosion and a bucket of water. These items can be used in the minigame through-out your game.
  • On the 2nd floor, the players will spawn when the minigame starts, and you spawn there when you die in the game.
  • On the 3rd floor there is a ladder to get into the opponents 2nd floor.
  • On the 4th floor is where the flag is located.
Playground Castle wars
How to gain points:
Example how to gain points:

If one of the players from team Saradomin gets the Zamorak flag and return the flag to the Saradomin castle, team Saradomin gets one point. Also of course if the team Zamorak takes the Saradomin flag and returns it to Zamorak castle, then team Zamorak gets one point. In castle wars minigame can you also choose to kill the other team and force them back so they don't get your team flag

Rules:
There is some rules cause it have to be a fair minigame.
  • You cant wear overpowered items (such as Glock, Assault Rifle and Ice Katana).
  • You cant wear a helmet or a hat, because you already get a castle-wars team hood.
  • You cant wear a cape, because you already get a castle-wars team cape.
  • You must wear gear while in the game. If you do not, you will be punished.
Castle Wars Shop:
Castle Wars.PNG

Once you have enough points, you can go to the Castle Wars Shop and get some exclusive items! The store can be found just next to the portals.

Castle Wars2.PNG


Jad (firecape):
To get an firecape you need to kill Jad.
Jad.png

TzTok-Jad is combat lvl 702.

How to get there.
You use the teleport book and choose minigames and then use Tzhaar cave, when you get there just go north and enter,
Error creating thumbnail: Unable to save thumbnail to destination

when you click enter you get to choose 1 normal fightcaves (Firecape)

TookHar Kal Cape.
You use the teleport book and choose minigames and then use Tzhaar cave, when you get there just go north and enter.
Error creating thumbnail: Unable to save thumbnail to destination

when you click enter you get to choose 2 Tookhar kal caves (New cape)

TookHar Kal Cape.
This minigame you need to complete 5 waves.
  • Wave 1 Nomad
  • Wave 2 Angry Goblin
  • Wave 3 General Graador
  • Wave 4 Chaos Elemental
  • Wave 5 Corporeal Beast
Warriors Guild:
Warriors Guild is a minigame where you can get different defenders from iron to flameburst.
How does Warriors Guild work:
You start buying an armour set (helm, plate, legs) from Shanomi then you use it on the magical animator.
Error creating thumbnail: Unable to save thumbnail to destination
Shop.png

And an animated warrior spawn and you kill him, he drops Warrior Guild Token.

Error creating thumbnail: Unable to save thumbnail to destination
Drops:
When you get the tokens you go to the south-west corner and climb up the staircase, and enter the room inside the room you need to kill the cyclops lvl 56.
Cyclops.png

keep killing those and they drop the defenders, first they will drop the iron defender, pick it up and kill more, the order they drop the defender is.

  • Iron
  • Steel
  • Black
  • Mithril
  • Adamant
  • Rune
  • Dragon
  • Flameburst

Keep repeat this until you have the defender you want.

Error creating thumbnail: Unable to save thumbnail to destination
How to get to assault minigame:
You open the teleport book and use the minigame teleport and choose the option Assault & Dominion, when you get there you enter the trapdoor and the fight begins, make sure to bring the best gear and weapon you have.
Assault Start.png
How does Assault minigame work:
Is a minigame where you need to kill some Penance fighter, penance ranger, beserk barbarian spirit and corporeal beast.

You have to complete 26 waves, and each wave got some monster you have to defeat to complete the wave.

  • wave 1, - 2 penance fighter 2 penance ranger
  • wave 2, - 4 penance fighter 4 penance ranger
  • wave 3, - 4 penance fighter 4 penance ranger
  • wave 4, - 4 penance fighter 4 penance ranger
  • wave 5, - 4 penance fighter 4 penance ranger
  • wave 6, - 4 penance fighter 4 penance ranger
  • wave 7, - 4 penance fighter 4 penance ranger
  • wave 8, - 4 penance fighter 4 penance ranger
  • wave 9, - 4 penance fighter 4 penance ranger
  • wave 10 - 4 penance fighter 4 penance ranger
  • wave 11 - 4 penance fighter 4 penance ranger
  • wave 12 - 4 penance fighter 4 penance ranger
  • wave 13 - 4 penance fighter 4 penance ranger
  • wave 14 - 4 penance fighter 4 penance ranger
  • wave 15 - 4 penance fighter 4 penance ranger
  • wave 16 - 4 penance fighter 4 penance ranger
  • wave 17 - 6 penance fighter 6 penance ranger
  • wave 18 - 6 penance fighter 6 penance ranger
  • wave 22 - 6 penance fighter 6 penance ranger
  • Wave 23 - 6 penance fighter 6 penance ranger
  • wave 24 - 6 penance fighter 6 penance ranger
  • wave 25 - 6 penance fighter 6 penance ranger
  • wave 26 - 12 beserk barbarian spirit 1 corporeal beast

Wave 26 is the last one and when you get to that one kill corporeal beast and the minigame is done.

Assault Arena.png
How to gain points:

When you have compleated all the waves you will be teleported out of the arena and receive 40 Assault points.

Assault Reward.png
Gear Suggestion:

Range setup: American Pernix Set, Golden Minigun or Golden Ak-47, best boots and gloves you have and best cape. Mage setup: Inga set, Soulflare/Soulflare (u), Aqua Spirit Shield Captain America Shield best boots and gloves and cape you have.

Assault Shop:

Once you have enough points, you can go to the Assault Shop and get some exclusive items! The store can be found.

Assault shop.png
  • Fighter Torso 75 Assault Points.
  • Silver Space Sword 75 point.
  • Fighter Hat 65 Assault Points.
  • Ranger Hat 65 Assault Points.
  • Runner Boots 75 Assault Points.
  • Saradomin Sword 75 Assault Points.
  • Ancient Ceremonial Hood 135 Assault Points.
  • Ancient Ceremonial Top 200 Assault Points.
  • Ancient Ceremonial Legs 150 Assault Points.
How to get to Dominion minigame:
You open the teleport book and use the minigame teleport and choose the option Assault & Dominion, when you get there you talk with the ghost, and start the minigame.
Error creating thumbnail: Unable to save thumbnail to destination
How does Dominion minigame work:
Is a minigame where you need to kill some Black Demon, Lesser Demon Champ, Nezikchened, Chronozon and last Jungle Demon.

You have to complete 6 waves, and each wave got some monster you have to defeat to complete the wave.

  • wave 1, - 3 Black Demon combat lvl 172
  • wave 2, - 6 Black Demon combat lvl 172
  • wave 3, - 1 Lesser Demon Champ combat lvl 162
  • wave 4, - 1 Nezikchened combat lvl 187
  • wave 5, - 1 Chronozon combat lvl 170
  • wave 6, - 1 Jungle Demon combat lvl 195

Wave 6 is the last one and when you are done with that kill, the minigame is done.

How to gain points:

When you have completed all the waves you will be teleported out of the arena and receive 100 Dominion points.

Gear Suggestion:

Range setup: American Pernix Set, Golden Minigun or Golden Ak-47, best boots and gloves you have and best cape. Mage setup: Inga set, Soulflare/Soulflare (u), Aqua Spirit Shield Captain America Shield best boots and gloves and cape you have.

Dommion Shop:

Once you have enough points, you can go to the Dominion Shop, talk with the ghost and get some exclusive items!.

Domin shop.png


Short Intro:
Duel Arena is a place were you can duel other people, go there and use challange another person and you get this challange box.
Duel.png
How to play:
When you challange another person you get the challange box, here you can choose some funktions what fight you want to make.

If you want a range fight you simply click the other att style off, and if you want an no stats boots you switch that off