Nightmare Guide
- For more information, go to the main article.
- The main article contains drops, information, and more.
This is an informative guide on the mechanics of Nightmare, and how to fight it effectively.
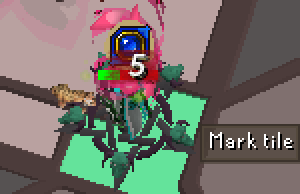
For starters, in order to kill Nightmare you will need to have a high damage output, and an AOE of at least 12x12 is recommended for Nightmare as you can damage all 4 totems at once.
If they want to attempt the Challenge Mode Nightmare, the player must first kill 250 Normal Mode Nightmare. Players will also need P3 slayer or an active membership.
Recommended Gear:[edit | edit source]
It is ideal to at the very least have a Late Game setup from the Gear Progression page or better if you wanted to solo Nightmare normal mode.
If you wanted to solo the challenge mode version of Nightmare, you should be equipped with an End Game setup from the Gear Progression.
Starting the fight:[edit | edit source]
When you are ready to try out Nightmare, teleport to the arena using the teleport interface or simply do ::nm.
Once you do this, you should be met with an area that looks like this:
To begin the fight, you need to click on the sleeping Nightmare to 'disturb' it.
You will then be met with an interface of open parties which you could join, or you could create your own party!
Also in this interface, you can choose whether to start in normal mode or challenge mode.
In order to fight challenge mode Nightmare, the player must have killed Normal mode Nightmare 250 times. In addition to this, they must have Prestige 3 Slayer OR an active membership.
Phases:[edit | edit source]
Normal Mode:
Phase 1 = 100% health - 66% health
Phase 2 = Charging 4 totems in each corner of fight arena (5,000,000 health each).
Phase 3 = 66% health - 33% health
Phase 4 = Charging 4 totems in each corner of fight arena (5,000,000 health each).
Phase 5 = 33% heatlh - 0% heatlh
Challenge Mode:
Phase 1 = 100% health - 50% health
Phase 2 = Charging 4 totems in each corner of fight arena (5,000,000 health each).
Phase 3 = 50% health - 33% health
Phase 4 = Charging 4 totems in each corner of fight arena (5,000,000 health each).
Phase 5 = 33% health - 16% health
Phase 6 = Charging 4 totems in each corner of fight arena (5,000,000 health each).
Phase 7 = 16% health - 0% health
General Mechanics[edit | edit source]
Mechanic #1:
The Nightmare can flood the arena with black holes that can cause some serious damage if you don't move from them.
To avoid this mechanic you need to move on an area with no black hole beneath you.
Mechanic #2:
Nightmare will charge a 'devastating attack' which will consist of a swirl of energy falling down on your character.
This mechanic does not need to be avoided.
Mechanic #3:
The Nightmare will 'split the arena into segments' which means the arena gets split into 4 segments.
If you are standing on the segment lines you will take small ticks of damage.
Be careful, if you are not getting enough damage to heal, this damage can add up quick!
Mechanic #4
The Nightmare will 'put you in a strange trance, preventing you from moving'.
This mechanic will spawn 2 husks which you must kill in order to move again.


