OpenGL: Difference between revisions
Jump to navigation
Jump to search

>Peripheral Vision No edit summary |
>Peripheral Vision No edit summary |
||
| Line 33: | Line 33: | ||
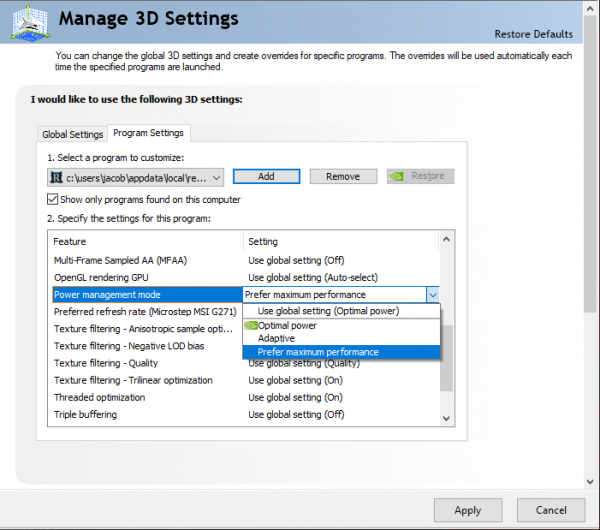
* Step 5: Scroll down and click on the settings for Power Management Mode and click Prefer Maximum Performance (only use this for desktops or laptops when plugged in) | * Step 5: Scroll down and click on the settings for Power Management Mode and click Prefer Maximum Performance (only use this for desktops or laptops when plugged in) | ||
[[File:Power Performance Mode.png|center]] | [[File:Power Performance Mode.png|center|600px]] | ||
* Step 6: Click Apply at the bottom right | * Step 6: Click Apply at the bottom right | ||
Latest revision as of 19:56, 23 June 2022
This page contains a short guide to enable OpenGL rendering system via the NVIDIA control panel for those experiencing issues.
OpenGL Rendering Guide[edit]
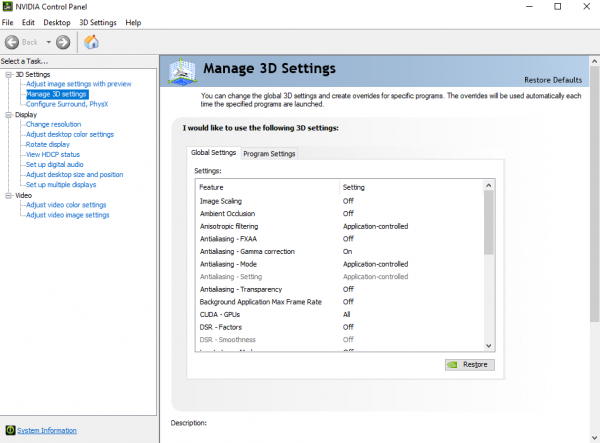
- Step 1: Open NVIDIA Control Panel
- Step 2: Click on Manage 3D Settings

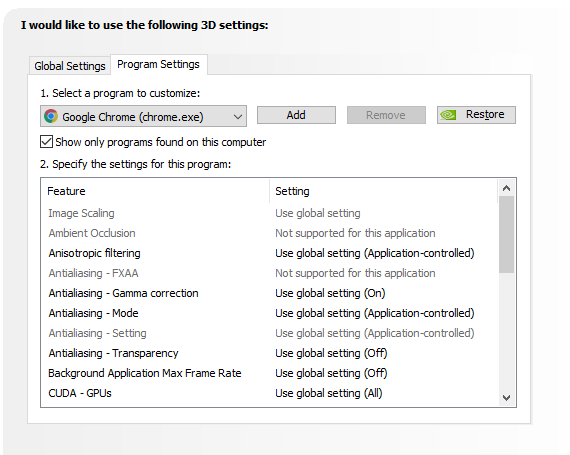
- Step 3: Click on Program Settings

- Step 4: Click on Add and add Redemption
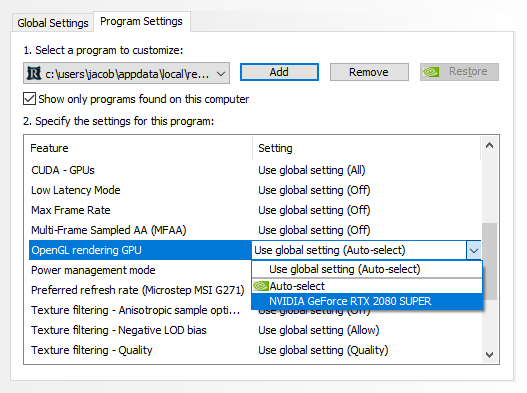
- Step 5: Scroll down and click on the settings for OpenGL Rendering GPU and click on your GPU

- Step 6: Click Apply at the bottom right
Power/Performance Guide[edit]
- Step 1: Open NVIDIA Control Panel
- Step 2: Click on Manage 3D Settings
- Step 3: Click on Program Settings
- Step 4: Click on Add and add Redemption
- Step 5: Scroll down and click on the settings for Power Management Mode and click Prefer Maximum Performance (only use this for desktops or laptops when plugged in)

- Step 6: Click Apply at the bottom right