OpenGL: Difference between revisions
Jump to navigation
Jump to search

>Jladams No edit summary |
>Jladams No edit summary |
||
| Line 5: | Line 5: | ||
==Guide== | ==Guide== | ||
* Step 1: Open NVIDIA Control Panel | * Step 1: Open NVIDIA Control Panel | ||
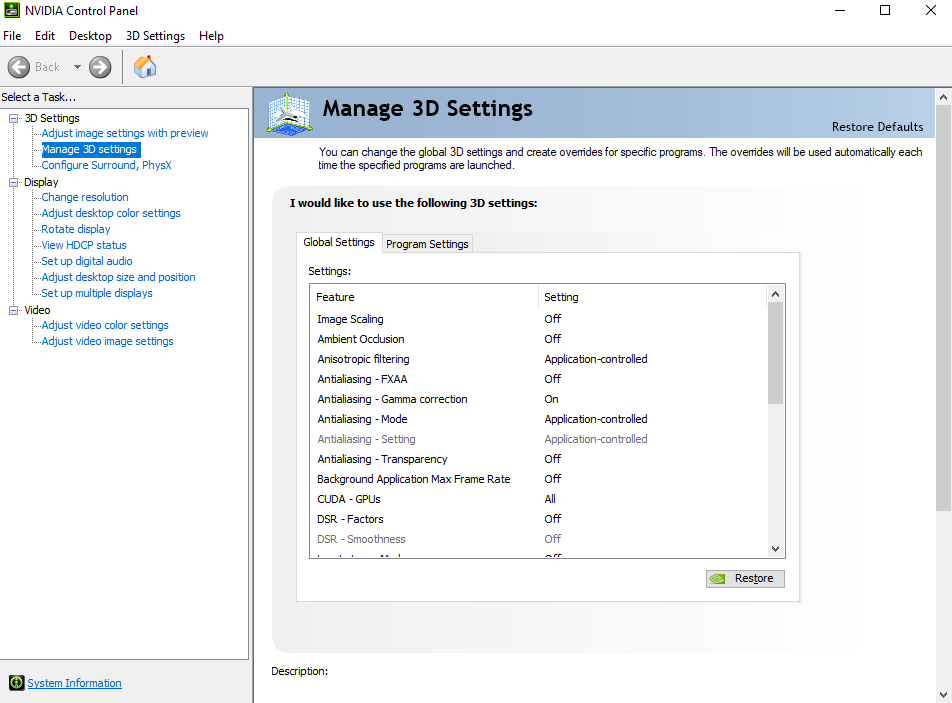
* Step 2: Click on Manage 3D Settings | |||
[[File:NVIDIA Control Panel.png|center]] | [[File:NVIDIA Control Panel.png|center]] | ||
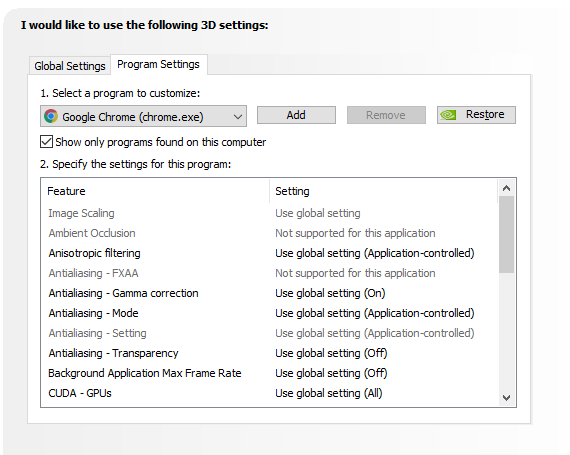
* Step 3: Click on Program Settings | * Step 3: Click on Program Settings | ||
[[File:Program Settings.png|center]] | [[File:Program Settings.png|center]] | ||
* Step 4: Click on Add and add Redemption | * Step 4: Click on Add and add Redemption | ||
[[File:Add Redemption program NVIDIA.mp4|center]] | [[File:Add Redemption program NVIDIA.mp4|center]] | ||
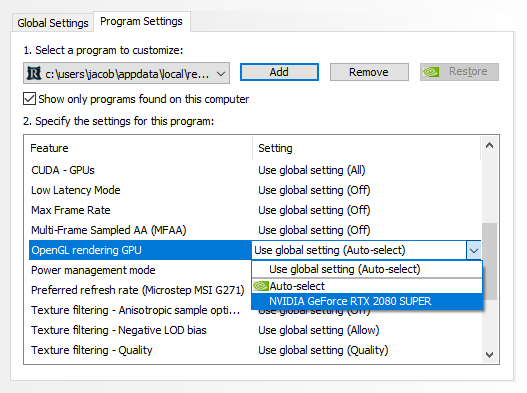
* Step 5: Scroll down and click on the settings for OpenGL Rendering GPU and click on your GPU | * Step 5: Scroll down and click on the settings for OpenGL Rendering GPU and click on your GPU | ||
[[File:Set GPU for OpenGL.png|center]] | [[File:Set GPU for OpenGL.png|center]] | ||
Revision as of 19:14, 23 June 2022
This page contains a short guide to enable OpenGL rendering system via the NVIDIA control panel for those experiencing issues.
Guide
- Step 1: Open NVIDIA Control Panel
- Step 2: Click on Manage 3D Settings

- Step 3: Click on Program Settings

- Step 4: Click on Add and add Redemption
- Step 5: Scroll down and click on the settings for OpenGL Rendering GPU and click on your GPU
