User:Iron Heph/Sandbox: Difference between revisions
>Iron Heph No edit summary |
>Iron Heph No edit summary |
||
| Line 58: | Line 58: | ||
== Gear Guide == | == Gear Guide == | ||
<center> | |||
{| class="wikitable dropstable mw-collapsible mw-collapsed rdtable" style="text-align:center" cellpadding="2" cellspacing="0" data-expandtext="show" data-collapsetext="hide" | {| class="wikitable dropstable mw-collapsible mw-collapsed rdtable" style="text-align:center" cellpadding="2" cellspacing="0" data-expandtext="show" data-collapsetext="hide" | ||
|- | |- | ||
| Line 68: | Line 68: | ||
|- | |- | ||
|style="text-align:center;" |Rune Full set (Chain & Platebody) | |style="text-align:center;" |Rune Full set (Chain & Platebody) | ||
|style="text-align:center;" | | |style="text-align:center;" |Mystic Set | ||
|style="text-align:center;" | | |style="text-align:center;" |Spined Set | ||
|- | |- | ||
|style="text-align:center;" |Granite Set | |style="text-align:center;" |Granite Set | ||
|style="text-align:center;" | | |style="text-align:center;" |Enchanted Set | ||
|style="text-align:center;" | | |style="text-align:center;" |Black Dragonhide Set | ||
|- | |- | ||
|style="text-align:center;" |Dragon Full Set (Chain & Platebody) | |style="text-align:center;" |Dragon Full Set (Chain & Platebody) | ||
|style="text-align:center;" | | |style="text-align:center;" |Skeletal Set | ||
|style="text-align:center;" | | |style="text-align:center;" |Karil's Set | ||
|- | |- | ||
|style="text-align:center;" |Verac Set | |style="text-align:center;" |Verac Set | ||
|style="text-align:center;" | | |style="text-align:center;" |Infinity Set | ||
|style="text-align:center;" | | |style="text-align:center;" |Armadyl Set | ||
|- | |- | ||
|style="text-align:center;" |Guthans Set | |style="text-align:center;" |Guthans Set | ||
|style="text-align:center;" | | |style="text-align:center;" |Lunar Set | ||
|style="text-align:center;" | | |style="text-align:center;" |Morrigan's Set | ||
|- | |- | ||
|style="text-align:center;" |Dharok Set | |style="text-align:center;" |Dharok Set | ||
|style="text-align:center;" | | |style="text-align:center;" |Ahrim's Set | ||
|style="text-align:center;" | | |style="text-align:center;" |Pernix Set | ||
|- | |- | ||
|style="text-align:center;" |Torag's Set | |style="text-align:center;" |Torag's Set | ||
|style="text-align:center;" | | |style="text-align:center;" |Zurial's Set | ||
|style="text-align:center;" |/ | |style="text-align:center;" |/ | ||
|- | |- | ||
|style="text-align:center;" |Bandos Set | |style="text-align:center;" |Bandos Set | ||
|style="text-align:center;" | | |style="text-align:center;" |Virtus Set | ||
|style="text-align:center;" |/ | |style="text-align:center;" |/ | ||
|- | |- | ||
| Line 106: | Line 106: | ||
|style="text-align:center;" |/ | |style="text-align:center;" |/ | ||
|style="text-align:center;" |/ | |style="text-align:center;" |/ | ||
|} | |||
{| class="wikitable dropstable mw-collapsible mw-collapsed rdtable" style="text-align:center" cellpadding="2" cellspacing="0" data-expandtext="show" data-collapsetext="hide" | |||
|- | |- | ||
! colspan="10" style="min-width:250px" |Melee Gear detailed | |||
|- | |- | ||
! | ! scope="col" style="text-align:center;"|Helm | ||
! | ! scope="col" style="text-align:center;"|Body | ||
! | ! scope="col" style="text-align:center;"|Legs | ||
|- | |- | ||
|style="text-align:center;" |Rune Full Helm | |style="text-align:center;" |Rune Full Helm | ||
|style="text-align:center;" |Rune Platebody | |style="text-align:center;" |Rune Chainbody - Platebody | ||
|style="text-align:center;" |Rune Platelegs | |style="text-align:center;" |Rune Platelegs | ||
|- | |- | ||
|style="text-align:center;" |Dragon Full Helm | |style="text-align:center;" |Dragon Full Helm | ||
|style="text-align:center;" | | |style="text-align:center;" |Granite Platebody | ||
|style="text-align:center;" | | |style="text-align:center;" |Granite Platelegs | ||
|- | |- | ||
|style="text-align:center;" | | |style="text-align:center;" | | ||
|style="text-align:center;" |Fighter Platebody | |||
|style="text-align:center;" |/ | |||
|- | |||
|style="text-align:center;" | | |style="text-align:center;" | | ||
|style="text-align:center;" | | |style="text-align:center;" |Dragon Chainbody - Platebody | ||
|style="text-align:center;" |Dragon Platelegs | |||
|- | |||
|style="text-align:center;" |Verac's Helm | |||
|style="text-align:center;" |Verac's Platebody | |||
|style="text-align:center;" |Verac's skirt | |||
|- | |||
|style="text-align:center;" |Guthan's Helm | |||
|style="text-align:center;" |Guthan's Platebody | |||
|style="text-align:center;" |Guthan's Platelegs | |||
|- | |||
|style="text-align:center;" |Dharok's Helm | |||
|style="text-align:center;" |Dharok's Platebody | |||
|style="text-align:center;" |Dharok's Platelegs | |||
|- | |||
|style="text-align:center;" |Torag's Helm | |||
|style="text-align:center;" |Torag's Platebody | |||
|style="text-align:center;" |Torag's Platelegs | |||
|- | |||
|style="text-align:center;" |/ | |||
|style="text-align:center;" |Bandos Chestplate | |||
|style="text-align:center;" |Bandos Tassets | |||
|- | |||
|style="text-align:center;" |Statius Full Helm (Damage) | |||
|style="text-align:center;" |Statius Platebody (Damage) | |||
|style="text-align:center;" |Statius Plateskirt (Damage) | |||
|- | |- | ||
|style="text-align:center;" | | |style="text-align:center;" |Vesta's Full Helm (Defence) | ||
|style="text-align:center;" | | |style="text-align:center;" |Vesta's Platebody (Defence) | ||
|style="text-align:center;" | | |style="text-align:center;" |Vesta's Plateskirt (Defence) | ||
|- | |- | ||
|style="text-align:center;" | | |style="text-align:center;" | | ||
|style="text-align:center;" | | |style="text-align:center;" |Torva Platebody | ||
|style="text-align:center;" | | |style="text-align:center;" |Torva Platelegs | ||
|- | |- | ||
|} | |} | ||
</center> | |||
== The Finale == | == The Finale == | ||
[[File:Battlegrounds Finale.png|400x400px]] <br> | [[File:Battlegrounds Finale.png|400x400px]] <br> | ||
Revision as of 16:58, 8 January 2021
What is Battlegrounds?
Battlegrounds is a last man standing minigame, fully customized by Dreamscape.
How do I get to Battlegrounds?
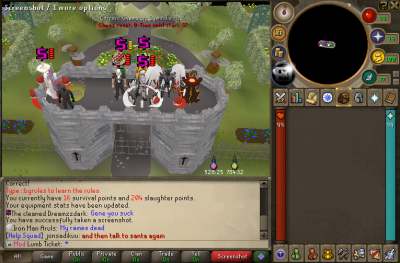
You need to type in the command ;;bg or ;;arcade. Both will get you towards the room where the BattleGrounds portal stands.
In order for you to be able to enter, you will need to have removed all of your equipment, emptied your inventory into your bank and als have to type ;;callpet. (to make sure you don't have a pet out)
It has begun
You have entered the Battlegrounds ! What to do now ! First of all, you will notice you have received a gear setup ! Equip it all.
Staying Alive
The next section is based on what you need to do to stay alive !
Grimy Keys
Grimy keys are used to open up the Battleground chests which are scattered all over the map. These chests can give any kind of armour, weapons, potions, food and even runes.
Getting Keys
How Could one obtain Keys though?
- At the start of the game. You start with 2 keys no matter which gear set-up you receive.
- Killing other Players (Any player = 1 / Target player = 2)
- Killing the poisonous spiders - They drop the keys at a rate of 40% (unless you get a
Refreshments
Refreshments can make the difference of life and death. They are the things that replenish your Hitpoints or Prayer or...
Fountain
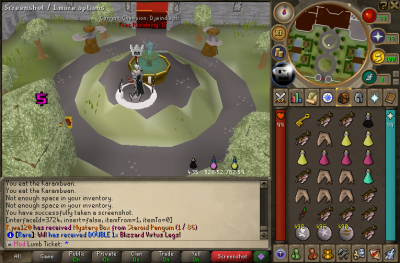
In front of the main entrance, there's a fountain, this fountain can be used every 5 minutes to restore everything;
- Prayer
- Hitpoints
- Stats
- Special attack.
Altar

Inside the house, up in the North, there's an altar where you can restore your prayer points for free.
This is very convenient as you would no longer need Prayer potions.
Also useful for when you're in need of a quick prayer restore when fighting.
Damage
What are the ways to get damage? Let's get into this deeper shall we.
- Other Players: Well, this doesn't need further explaining I believe...
- Poisonous Spiders: The Spiders can hit back when you're trying to steal a Grimy Key ! So be aware and keep an Antipoison to be sure.
- Rotating Scissors: In the middle of the garden and at the entrance of the house, there are scissors which can hit 15 damage each time !
- Fireballs: Random Fireballs will come from the skies ! Which can hit up to 50 DAMAGE ! So make sure you keep your health Above that at any cost when outside.
- Standing Still: When standing still, you'd get hit 1's by the server, so keep running.
- Game takes too long: Everybody gets hit 1's consistently.
Tips and Tricks
- Once the Battlegrounds starts, Nobody can attack each other for a decent amount of time. Be smart and use both of your keys to get the best gear possible !
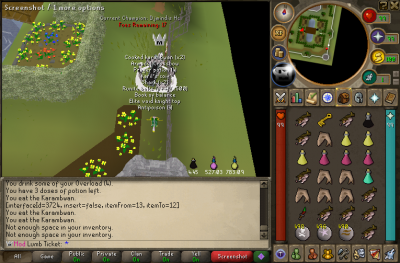
- When opening the 2nd chest make sure to use your overload and get your hp up by eating karambwans first, as they can't be used to combo-heal you.
- When you have drunk an Overload potion, you can drink saradomin brews without decreasing your stats, and they wont stall you account so you can keep fighting, unlike with sharks
- If you have your spellbook on lunars, you have a chance to get vengeance runes (death, earth, astral) from chest, although the Vengeance isn't as powerful as in OSRS. Keep this in mind.
Gear Guide
| Battlegrounds Gear | |||||||||
|---|---|---|---|---|---|---|---|---|---|
| Melee | Mage | Range | |||||||
| Rune Full set (Chain & Platebody) | Mystic Set | Spined Set | |||||||
| Granite Set | Enchanted Set | Black Dragonhide Set | |||||||
| Dragon Full Set (Chain & Platebody) | Skeletal Set | Karil's Set | |||||||
| Verac Set | Infinity Set | Armadyl Set | |||||||
| Guthans Set | Lunar Set | Morrigan's Set | |||||||
| Dharok Set | Ahrim's Set | Pernix Set | |||||||
| Torag's Set | Zurial's Set | / | |||||||
| Bandos Set | Virtus Set | / | |||||||
| Statius's Set (For Damage) Vesta's Set (For Defence) |
/ | / | |||||||
| Torva Set | / | / | |||||||
| Melee Gear detailed | |||||||||
|---|---|---|---|---|---|---|---|---|---|
| Helm | Body | Legs | |||||||
| Rune Full Helm | Rune Chainbody - Platebody | Rune Platelegs | |||||||
| Dragon Full Helm | Granite Platebody | Granite Platelegs | |||||||
| Fighter Platebody | / | ||||||||
| Dragon Chainbody - Platebody | Dragon Platelegs | ||||||||
| Verac's Helm | Verac's Platebody | Verac's skirt | |||||||
| Guthan's Helm | Guthan's Platebody | Guthan's Platelegs | |||||||
| Dharok's Helm | Dharok's Platebody | Dharok's Platelegs | |||||||
| Torag's Helm | Torag's Platebody | Torag's Platelegs | |||||||
| / | Bandos Chestplate | Bandos Tassets | |||||||
| Statius Full Helm (Damage) | Statius Platebody (Damage) | Statius Plateskirt (Damage) | |||||||
| Vesta's Full Helm (Defence) | Vesta's Platebody (Defence) | Vesta's Plateskirt (Defence) | |||||||
| Torva Platebody | Torva Platelegs | ||||||||
The Finale
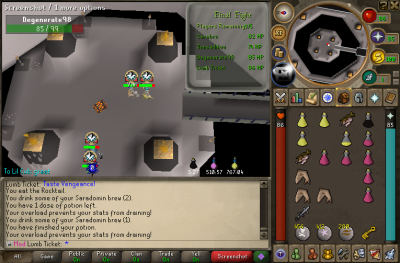
When there are only 4 players left, everybody will have 15 seconds before they will be teleported for the finals.
When teleported to the final (if you have room in inventory) you get a key for free.
At the finals you can only use 1 key, so there's no reason to hold on to multiple keys
- Use this key wisely, if you're full on food wait till you have enough room to loot the food from the chest.
Rewards
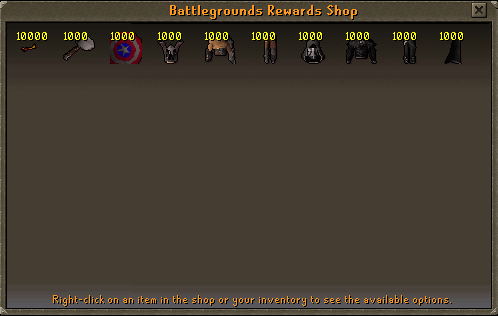
| Rewards | |||||||||||||||||||||||||||||||||||||||||||
|---|---|---|---|---|---|---|---|---|---|---|---|---|---|---|---|---|---|---|---|---|---|---|---|---|---|---|---|---|---|---|---|---|---|---|---|---|---|---|---|---|---|---|---|
|
--Special thanks to Reckful7, Jonsadikuu for helping me make this guide-
