>Vladox |
|
| (29 intermediate revisions by 2 users not shown) |
| Line 1: |
Line 1: |
| Co-op Slayer can be unlocked for 150 Slayer points, it allows you to start a slayer task with another player.
| | <p style="text-align:center;"> |
| | </p> |
|
| |
|
| it can be started by clicking on an enchanted gem and clicking on Co-op Slayer, from there you can type in the players name who you wish to Co-op slayer with. this will send them a request.
| | <center> |
| | <div> |
|
| |
|
| Please note.
| | [[File:Page-title-bestiary.jpg|600px|center|link=]] |
| *with Co-op Slayer you can receive longer tasks (100+ kills)
| | <tabber> |
| *if you logout or disconnect your Co-op will be terminated however will leave you with the slayer task (their kills will no longer count towards it) | | |
| *Both parties cannot have a current Slayer task to be able to do Co-op Slayer
| | |-|Training= |
| | [[File:RuneScape_Player.png|thumb|left|38px]]The [http://Redemptionrsps.wikia.com/wiki/Train_Teleport training] area has various monsters recommended for players who are new to Redemption. You can get there by typing [http://Redemptionrsps.wikia.com/wiki/Train_Teleport ::train] Crystal keys tend to be common drops in the training locations. |
| | <hr /> |
| | Another common area for beginners to train at is the [http://Redemptionrsps.wikia.com/wiki/Mystery_box_Teleport Mystery Box Teleport] which if you can guess, Mystery Box's are a common drop, you can get there by typing [https://Redemptionrsps.wikia.com/wiki/Mystery_box_Teleport ::mbox] |
| | <hr /> |
| | You can also explore our [[Monster Teleports]] which also includes other areas for beginners such as [[Taverly Dungeon]], [[Rock Crabs]], [[Pointzone]] and more. |
| | |
| | <tabber> |
| | |-|Monsters= |
| | [[File:Magic_short.png|thumb|left|44px]]The Monsters found in this category are located in the safe areas of Redemption. Any player that heads onwards from the ditch or a wild teleport into the Wilderness isn't safe. In this category you can find all the Bosses, Monsters, Locations, Drops, and more! |
| | Use CTRL + F to find what you're looking for. |
| | |
| | |
| | ==A== |
| | * [[Abyssal demon]] |
| | * [[Abyssal Sire]] |
| | * [[Avatar of Creation]] |
| | * [[Ahrim the blighted]] |
| | * [[Agrith na na]] |
| | ==B== |
| | * [[Baby Blue Dragon]] |
| | * [[Banshee]] |
| | * [[Barrelchest]] |
| | * [[Berserk barbarian spirit]] |
| | * [[Black Knight]] |
| | * [[Black demon]] |
| | * [[Bloodveld]] |
| | * [[Blue Dragon]] |
| | * [[Bork Boss]] |
| | * [[Black Dragon]] |
| | ==C== |
| | * [[Callisto]] |
| | * [[Cerberus]] |
| | * [[Chaos Elemental]] |
| | * [[Chaos Druid]] |
| | * [[Chaos Dwarf]] |
| | * [[Charmander]] |
| | * [[Culinaromancer]] |
| | * [[Chickens]] |
| | * [[Corporal Beast]] |
| | * [[Crawling hands]] |
| | ==D== |
| | * [[Dagannoth Kings]] |
| | * [[Dark Beast]] |
| | * [[Diglet]] |
| | * [[Dust devil]] |
| | * [[Desert Strykewyrm]] |
| | * [[Dharok the wretched]] |
| | * [[Diablo]] |
| | * [[Dragonbone Protector]] |
| | ==E== |
| | ==F== |
| | * [[Fire Giant]] |
| | * [[Flame Pernix]] |
| | * [[Flame King|Flame Torva]] |
| | * [[Flambeed]] |
| | * [[Forgotten Warrior]] |
| | * [[Frost Dragon]] |
| | * [[Flame Pingu]] |
| | ==G== |
| | * [[Gargoyle]] |
| | * [[Guardian of armadyl]] |
| | * [[Guardian of Am'orth]] |
| | * [[General Graador]] |
| | * [[Guthan the infested]] |
| | * [[Giant Bat]] |
| | * [[Greater Demon]] |
| | * [[Groudon]] |
| | ==H== |
| | * [[Hellhound]] |
| | * [[Hill Giant]] |
| | ==I== |
| | * [[Ice Strykewyrm]] |
| | * [[Ice gaint]] |
| | * [[Icy Skeleton]] |
| | * [[Invictus Warriors|Invictus Warriors]] |
| | * [[Infernal mage]] |
| | ==J== |
| | *[[Jungle Strykewrm]] |
| | ==K== |
| | * [[Karil the tainted]] |
| | * [[King Black Dragon]] |
| | * [[King Dreamer]] |
| | ==L== |
| | * [[Lesser Demon]] |
| | * [[Luigi]] |
| | ==M== |
| | * [[Magic axe]] |
| | * [[Mini Bosses]] |
| | * [[Moss Giant]] |
| | * [[c |
| | ==N== |
| | * [[Nex]] |
| | * [[Nechryael]] |
| | ==O== |
| | * [[Oblivion Dragon]] |
| | * [[O.G. Dragon]] |
| | * [[Olaf]] |
| | ==P== |
| | * [[Party pete boss]] |
| | * [[Penguins]] |
| | * [[Penance fighter]] |
| | * [[Penance ranger]] |
| | * [[Pikachu]] |
| | * [[Phoenix]] |
| | ==Q== |
| | ==R== |
| | * [[Raiden]] |
| | * [[Raksha]] |
| | * [[Rock Crabs]] |
| | ==S== |
| | * [[Scorpia]] |
| | * [[Solus dellager]] |
| | * [[Sea Troll Queen]] |
| | * [[Shadow King]] |
| | * [[Skeleton]] |
| | * [[Steroid penguin tank]] |
| | ==T== |
| | * [[Tank Boss]] |
| | * [[Telos, The Warden]] |
| | * [[Thugbob]] |
| | * [[Tormented Demon]] |
| | * [[Tzhaar xil]] |
| | * [[Torag the corrupted]] |
| | * [[Torquat]] |
| | ==U== |
| | ==V== |
| | * [[Venenatis]] |
| | * [[Verac the defiled]] |
| | * [[Vendura]] |
| | * [[Vet'ion]] |
| | * [[Voldemort]] |
| | * [[Vorago]] |
| | ==W== |
| | * [[White Knight]] |
| | * [[Wizard Grayzag]] |
| | ==X== |
| | * [[Xebos Boss]] |
| | ==Y== |
| | ==Z== |
| | * [[Zulrah]] |
| | |
| | <tabber> |
| | |-|Bosses= |
| | When it comes to bossing, Redemption has the best-bossing experience! Redemption has 30 Bosses, and 15 of those are custom. Each with their own unique rewards. |
| | |
| | If you'd like to understand how drop rates work on Redemption view this [http://Redemptionrsps.net/forum/index.php?/topic/18103-drop-rates-full-proper-explaination-on-how-they-work/ guide]. |
| | |
| | {| width="auto" |
| | |[[File:Abyssal_sire_Tile.png|link=https://Redemptionrsps.fandom.com/wiki/Abyssal_Sire|right]] |
| | |[[File:Alchemical_Hydra_Tile.png|link=http://Redemptionrsps.wikia.com/wiki/Alchemical_Hydra|right]] |
| | |[[File:Arraxor_Tile.png|link=http://Redemptionrsps.wikia.com/wiki/Arraxor|right]] |
| | |- |
| | |[[File:Cerberus_Tile.png|link=https://Redemptionrsps.fandom.com/wiki/Cerberus|right]] |
| | |[[File:Crimson_Chin_Tile.png|link=http://Redemptionrsps.wikia.com/wiki/Crimson_Chin|right]] |
| | |[[File:Grinder_Boss_Tile.png|link=http://Redemptionrsps.wikia.com/wiki/Grinder_Boss|right]] |
| | |- |
| | |[[File:Grotesque_Guardians_Tile.png|link=http://Redemptionrsps.wikia.com/wiki/Grotesque_Guardian|right]] |
| | |[[File:Hespori_Tile.png|link=http://Redemptionrsps.wikia.com/wiki/Hespori|right]] |
| | |[[File:Lachrym_Tile.png|link=http://Redemptionrsps.wikia.com/wiki/Lachrym|right]] |
| | |- |
| | |[[File:Lodsmok_Tile.png|link=http://Redemptionrsps.wikia.com/wiki/Lodsmok|right]] |
| | |[[File:Mr_X_Tile.png|link=http://Redemptionrsps.wikia.com/wiki/Mr_X|right]] |
| | |[[File:Nex_Tile.png|link=http://Redemptionrsps.wikia.com/wiki/Nex|right]] |
| | |- |
| | |[[File:Queen_Black_Dragon_Tile.png|link=http://Redemptionrsps.wikia.com/wiki/Queen_Black_Dragon|right]] |
| | |[[File:Raksha_Tile.png|link=http://Redemptionrsps.wikia.com/wiki/Raksha|right]] |
| | |[[File:Scrooge_McDuck_Tile.png|link=http://Redemptionrsps.wikia.com/wiki/Scrooge_McDuck|right]] |
| | |- |
| | |[[File:Skotizo_Tile.png|link=http://Redemptionrsps.wikia.com/wiki/Skotizo|right]] |
| | |[[File:Telos_Tile.png|link=http://Redemptionrsps.wikia.com/wiki/Telos|right]] |
| | |[[File:The_Nightmare_Tile.png|link=http://Redemptionrsps.wikia.com/wiki/Nightmare|right]] |
| | |- |
| | |[[File:Uncle_Penny_Bags_Tile.png|link=http://Redemptionrsps.wikia.com/wiki/Uncle_Penny_Bags|right]] |
| | |[[File:Viscidus_Globule_Tile.png|link=http://Redemptionrsps.wikia.com/wiki/Viscidus_Globule|right]] |
| | |[[File:Vorkath_Tile.png|link=http://Redemptionrsps.wikia.com/wiki/Vorkath|right]] |
| | |- |
| | |[[File:Zalcano_Tile.png|link=http://Redemptionrsps.wikia.com/wiki/Zalcano|right]] |
| | |[[File:Zulrah_Tile.png|link=https://Redemptionrsps.fandom.com/wiki/Zulrah|right]] |
| | |
| | |-|Slayer= |
| | [[File:Enchanted_gem_detail.png|thumb|left|38px]]Want a challenge fighting a certain monster or boss? The [[Slayer]] skill rewards players for their determination! You can also check the [[Slayer prestige]] shop for rewards to keep an eye on. |
| | |
| | |
| | |-|Raids= |
| | [[File:07_Skull1.png|thumb|left|48px]]Raids allow boss battles to deliver a truly amazing experience. Be prepared to step into warfare with your friends against unique and AI bosses. |
| | |
| | |
| | {| width="auto" |
| | |[[File:Diablo_Tile.png|link=http://Redemptionrsps.wikia.com/wiki/Diablo|right]] |
| | |[[File:Raiden_Tile.png|link=http://Redemptionrsps.wikia.com/wiki/Raiden|right]] |
| | |[[File:Shredder_Tile.png|link=http://Redemptionrsps.wikia.com/wiki/Shredder|right]] |
| | |- |
| | |[[File:Voldemort_Tile.png|link=http://Redemptionrsps.wikia.com/wiki/Voldemort|right]] |
| | |[[File:O.G Dragon_Tile.png|link=http://Redemptionrsps.wikia.com/wiki/O.G_Dragon|right]] |
| | |[[File:Ventura_Tile.png|link=http://Redemptionrsps.wikia.com/wiki/Ventura|right]] |
| | |- |
| | |[[File:Enraged_Arrav_Tile.png|link=http://Redemptionrsps.wikia.com/wiki/Enragged_Arrav|right]] |
| | |[[File:Enraged_Hades_Tile.png|link=http://Redemptionrsps.wikia.com/wiki/Enragged_Hades|right]] |
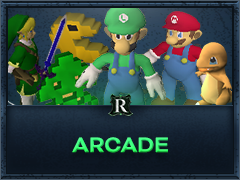
| | |[[File:Arcade_Tile.png|link=http://Redemptionrsps.wikia.com/wiki/Arcade|right]] |
| | |- |
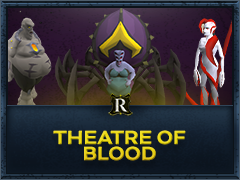
| | |[[File:Theatre_of_Blood_Tile.png|link=http://Redemptionrsps.wikia.com/wiki/Theatre_of_Blood|right]] |
| | |[[File:Chambers_of_Xerics_Tile.png|link=http://Redemptionrsps.wikia.com/wiki/Chambers_of_Xerics|right]] |
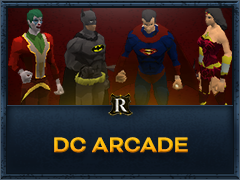
| | |[[File:DC_Universe_Tile.png|link=http://Redemptionrsps.wikia.com/wiki/DC_Universe|right]] |
| | |- |
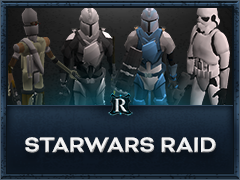
| | |[[File:Starwars_Raid_Tile.png|link=http://Redemptionrsps.wikia.com/wiki/Starwars_Raid|right]] |
| | |[[File:Yu-Gi-Oh_Raid_Tile.png|link=http://Redemptionrsps.wikia.com/wiki/Yu-Gi-Oh_Raid|right]] |
| | |[[File:_Tile.png|link=http://Redemptionrsps.wikia.com/wiki/|right]] |
| | <!--- |
| | {| class="wikitable sortable jquery-tablesorter" style="border-color:red;font-size:13px;line-height:21px;width:347px;style=" cellpadding="2" cellspacing="0" text-align:center; " |
| | |- |
| | ! colspan="2" style="text-align:center;" |Raid Bosses & Difficulty |
| | |- |
| | |style="text-align:center;" |[[File:Charizard_-_image.png|center|75px]][[Charizard Raid]] |
| | |style="text-align:center;" |Easy |
| | |- |
| | |style="text-align:center;" |[[File:Voldemort.png|center|75px]][[Voldemort]] |
| | |style="text-align:center;" |Medium |
| | |- |
| | |style="text-align:center;" |[[File:Vendura.png|center|75px]][[Vendura]] |
| | |style="text-align:center;" |Medium |
| | |- |
| | |style="text-align:center;" |[[File:Og_dragon1.png|center|75px]][[O.G. Dragon]] |
| | |style="text-align:center;" |Hard |
| | |- |
| | |style="text-align:center;" |[[File:Arcade_Dark_Raiden_outlined.png|center|75px]][[Raiden]] |
| | |style="text-align:center;" |Hard |
| | |- |
| | |style="text-align:center;" |[[File:Theatre_of_blood.png|center|75px]][[Theatre of Blood]] |
| | |style="text-align:center;" |Extreme |
| | |- |
| | |style="text-align:center;" |[[File:Arcade_Diablo_outlined.png|center|75px]][[Diablo]] |
| | |style="text-align:center;" |Hard |
| | |- |
| | |style="text-align:center;" |[[File:Arcade Header.png|center|75px]] [[Arcade]] |
| | |style="text-align:center;" |Extreme |
| | |- |
| | |style="text-align:center;" |[[File:Trinity_bosses.png|center|75px]][[Trinity]] |
| | |style="text-align:center;" |Hard |
| | |- |
| | |style="text-align:center;" |[[File:King_kong.png|center|75px]][[King Kong Vs Godzilla]] |
| | |style="text-align:center;" |Medium |
| | |- |
| | |style="text-align:center;" |[[File:Faladormassacre.png|center|200px]] [[Falador Massacre]] |
| | |style="text-align:center;" |Hard |
| | |- |
| | |style="text-align:center;" |[[File:Ninja_Turtle.png|center|75px]][[Ninja Turtles]] |
| | |style="text-align:center;" |Extreme |
| | |- |
| | |style="text-align:center;" |[[File:Hades_Pet.png|center|75px]][[Enraged Hades]] |
| | |style="text-align:center;" |Hard |
| | |- |
| | |style="text-align:center;" |[[File:Arrav.png|center|75px]][[Arrav]] |
| | |style="text-align:center;" |Medium |
| | |} |
| | ---> |
| | </tabber> |
| | |
| | |
| | [[Category:Train Teleport]] |
| | [[Category:Monsters]] |
| | [[Category:Bosses]] |
| | [[Category:Slayer]] |
| | [[Category:Raids]] |
| | [[Category:Wilderness Bosses]] |


