|
|
| (3 intermediate revisions by 3 users not shown) |
| Line 2: |
Line 2: |
|
| |
|
| <center> | | <center> |
| '''Dc Universe Raid''' <br>
| | <tabber> |
| | |-|Dc Universe Raid = |
|
| |
|
| The DC Raid can be found in the Game's Room (::arcade) along with all of the other arcade modes. <br> | | The DC Raid can be found in the Game's Room (::arcade) along with all of the other arcade modes. <br> |
| Line 21: |
Line 22: |
| |- | | |- |
| ! scope="col" style="text-align:center;" |'''Wave 4: Superman''' | | ! scope="col" style="text-align:center;" |'''Wave 4: Superman''' |
| ! scope="col" style="text-align:center;" | HP: 1,800,000, Attack Style: Melee,''Ability:Super Strength, just hits..really really...hard.'' | | ! scope="col" style="text-align:center;" | HP: 1,800,000, Attack Style: Melee,''Ability:Super Strength, just hits..really really...hard. Superman has a cyanide punch that does 15 damage per tick'' |
| |- | | |- |
| ! scope="col" style="text-align:center;" |'''Wave 5: Flash''' | | ! scope="col" style="text-align:center;" |'''Wave 5: Flash''' |
| Line 238: |
Line 239: |
| |style="text-align:center;" | [[File:Shadow Drake.png|30px]] [[Shadow Drake]] | | |style="text-align:center;" | [[File:Shadow Drake.png|30px]] [[Shadow Drake]] |
| |- | | |- |
| | |-|Strategy Guide = |
| | ===Poison Mechanic=== |
|
| |
|
| | The poison mechanic is active for all waves. If the player stands still for too long, they will be hit with rapid poison damage, dealing 5 damage each hit until the player moves at least 1 tile. |
| | |
| | ===Wave 1=== |
| | Upon entering the raid, it will take a few seconds for Batman to spawn in. It is best to place yourself in the center of the arena to allow you enough room to move around to dodge incoming attacks. |
| | <br> |
| | <br> |
| | Once Batman has spawned, begin attacking him while being mindful of his stun ability. If you are stunned, keep an eye on your health and rapidly click Batman to begin attacking again as soon as possible. After killing Batman, Wave 2 will begin. |
| | |
| | ===Wave 2=== |
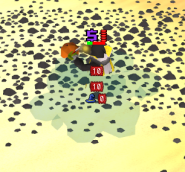
| | This Wave brings the Joker. He has a chance to spawn a poison cloud on you at the very start of the wave. This cloud hits rapid poison 10s. To avoid this, simply step outside of the cloud and heal. This can happen multiple times during the fight.<br> |
| | [[File:Joker Cloud.png|185px]]<br> |
| | It can be beneficial to use Range/Mage and stay on the move. This is a very effective strategy for the final waves, as they all use melee. |
| | |
| | ===Wave 3=== |
| | Moving into wave 3, this mode is going to start to get harder.<br> |
| | Wonder Woman can be easily fought using a similar method to the Joker by staying on the move while using Range/Mage gear. |
| | <br> |
| | <br> |
| | Wonder Woman's ability allows her to pull you in and stun you for several seconds, even if you are moving. Once you are pulled in and stunned, click away from Wonder Woman until you are able to move again. You aren't able to use any consumables while stunned, so as soon as you can move, eat if necessary and continue damaging Wonder Woman. |
| | |
| | ===Wave 4=== |
| | For the second-to-last wave, you will be fighting Superman. Once again, moving around the arena is the best method for avoiding damage. While you may be able to tank hits from the others, avoiding being hit by Superman is extremely important. Aside from his ability, he deals very high melee damage, and is capable of ending a run without needing his ability. |
| | <br> |
| | <br> |
| | The only mechanic to take note of aside from the high melee damage is the random poison hit. Superman can hit a 15 damage poison hit that temporarily poisons you. This effect can be instantly removed through the use of Anti-poison potions made with the [[Herblore]] skill. |
| | |
| | ===Wave 5=== |
| | Now, the final wave against The Flash. Similar to Superman, he is capable of dealing very high melee damage, so keeping your distance is highly recommended. |
| | <br> |
| | <br> |
| | Flash's ability allows him to quickly dash around the arena, avoiding any damage dealt to him while also dealing rapid, high damage hits. To combat this, spam eat while Flash is dashing around. As soon as he stops dashing, you are able to damage him. |
| | <br> |
| | <br> |
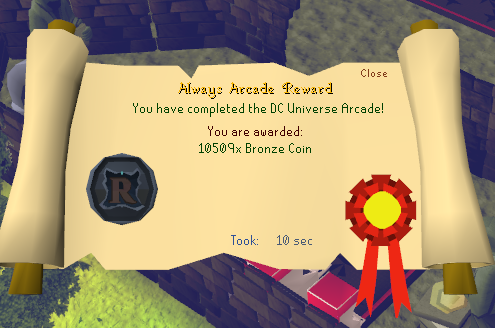
| | After defeating The Flash, you will be moved outside of the Arcade and be given your rewards.<br> |
| | [[File:DC Raid Rewards.png]] |
| | </tabber> |
| | |
| | ==Rewards== |
| | |
| | {| class="fandomtable dropstable mw-collapsible mw-collapsed rdtable" style="text-align:center; max-width:65%" cellpadding="2" cellspacing="0" data-expandtext="show" data-collapsetext="hide" |
| | |- |
| | ! colspan="10" style="min-width:250px" | Collection Log Rewards |
| | |- |
| | |style="text-align:center;" | |
| | <tabber> |
| | |
| | |-|Base Log Rewards= |
| | |
| | {| class="sortable article-table" style="margin:auto" cellpadding="2" cellspacing="0" data-expandtext="show" data-collapsetext="hide" |
| | ! scope="col" style="text-align:center;" |''Image'' |
| | ! scope="col" style="text-align:center;" |''Item'' |
| | ! scope="col" style="text-align:center;" |''Quantity'' |
| | |- |
| | | style="text-align:center;" |[[File:Platinum Coin.png]] |
| | | style="text-align:center;" |[[Platinum Coin]] |
| | | style="text-align:center;" |15 |
| | |- |
| | | style="text-align:center;" |[[File:Minesweeper Box.png]] |
| | | style="text-align:center;" |[[Minesweeper Box]] |
| | | style="text-align:center;" |15 |
| | |- |
| | | style="text-align:center;" |[[File:Antique Lamp.png]] |
| | | style="text-align:center;" |[[Antique Lamp]] |
| | | style="text-align:center;" |250 |
| | |} |
| | |
| | |
| | |-|Prestige 1 Rewards= |
| | |
| | {| class="sortable article-table" style="margin:auto" cellpadding="2" cellspacing="0" data-expandtext="show" data-collapsetext="hide" |
| | ! scope="col" style="text-align:center;" |''Image'' |
| | ! scope="col" style="text-align:center;" |''Item'' |
| | ! scope="col" style="text-align:center;" |''Quantity'' |
| | |- |
| | | style="text-align:center;" |[[File:Platinum Coin.png]] |
| | | style="text-align:center;" |[[Platinum Coin]] |
| | | style="text-align:center;" |20 |
| | |- |
| | | style="text-align:center;" |[[File:Elite Membership Scroll.png]] |
| | | style="text-align:center;" |[[Elite Membership Scroll]] |
| | | style="text-align:center;" |1 |
| | |} |
| | |
| | |
| | |-|Prestige 2 Rewards= |
| | |
| | {| class="sortable article-table" style="margin:auto" cellpadding="2" cellspacing="0" data-expandtext="show" data-collapsetext="hide" |
| | ! scope="col" style="text-align:center;" |''Image'' |
| | ! scope="col" style="text-align:center;" |''Item'' |
| | ! scope="col" style="text-align:center;" |''Quantity'' |
| | |- |
| | | style="text-align:center;" |[[File:Platinum Coin.png]] |
| | | style="text-align:center;" |[[Platinum Coin]] |
| | | style="text-align:center;" |30 |
| | |- |
| | | style="text-align:center;" |[[File:Treasure Hunter Chest Key.png]] |
| | | style="text-align:center;" |[[Treasure Hunter |Treasure Hunter Chest Key]] |
| | | style="text-align:center;" |5 |
| | |} |
| | |
| | |
| | |-|Prestige 3 Rewards= |
| | |
| | {| class="sortable article-table" style="margin:auto" cellpadding="2" cellspacing="0" data-expandtext="show" data-collapsetext="hide" |
| | ! scope="col" style="text-align:center;" |''Image'' |
| | ! scope="col" style="text-align:center;" |''Item'' |
| | ! scope="col" style="text-align:center;" |''Quantity'' |
| | |- |
| | | style="text-align:center;" |[[File:Platinum Coin.png]] |
| | | style="text-align:center;" |[[Platinum Coin]] |
| | | style="text-align:center;" |30 |
| | |- |
| | | style="text-align:center;" |[[File:Treasure Hunter Chest Key.png]] |
| | | style="text-align:center;" |[[Treasure Hunter |Treasure Hunter Chest Key]] |
| | | style="text-align:center;" |10 |
| | |} |
| | |
| | |
| | |-|Prestige 4 Rewards= |
| | |
| | {| class="sortable article-table" style="margin:auto" cellpadding="2" cellspacing="0" data-expandtext="show" data-collapsetext="hide" |
| | ! scope="col" style="text-align:center;" |''Image'' |
| | ! scope="col" style="text-align:center;" |''Item'' |
| | ! scope="col" style="text-align:center;" |''Quantity'' |
| | |- |
| | | style="text-align:center;" |[[File:Platinum Coin.png]] |
| | | style="text-align:center;" |[[Platinum Coin]] |
| | | style="text-align:center;" |30 |
| | |- |
| | | style="text-align:center;" |[[File:Treasure Hunter Chest Key.png]] |
| | | style="text-align:center;" |[[Treasure Hunter |Treasure Hunter Chest Key]] |
| | | style="text-align:center;" |15 |
| | |} |
| | |
| | |
| | |-|Prestige 5 Rewards= |
| | |
| | {| class="sortable article-table" style="margin:auto" cellpadding="2" cellspacing="0" data-expandtext="show" data-collapsetext="hide" |
| | ! scope="col" style="text-align:center;" |''Image'' |
| | ! scope="col" style="text-align:center;" |''Item'' |
| | ! scope="col" style="text-align:center;" |''Quantity'' |
| | |- |
| | | style="text-align:center;" |[[File:Platinum Coin.png]] |
| | | style="text-align:center;" |[[Platinum Coin]] |
| | | style="text-align:center;" |30 |
| | |- |
| | | style="text-align:center;" |[[File:Treasure Hunter Chest Key.png]] |
| | | style="text-align:center;" |[[Treasure Hunter |Treasure Hunter Chest Key]] |
| | | style="text-align:center;" |20 |
| | |} |
| | |
| | |
| | </tabber> |
| |} | | |} |
|
| |
|
| ==Rewards==
| |
| {| class="wikitable dropstable mw-collapsible mw-collapsed rdtable" style="text-align:center" cellpadding="1" cellspacing="0" data-expandtext="show" data-collapsetext="hide" | | {| class="wikitable dropstable mw-collapsible mw-collapsed rdtable" style="text-align:center" cellpadding="1" cellspacing="0" data-expandtext="show" data-collapsetext="hide" |
| |- | | |- |


